


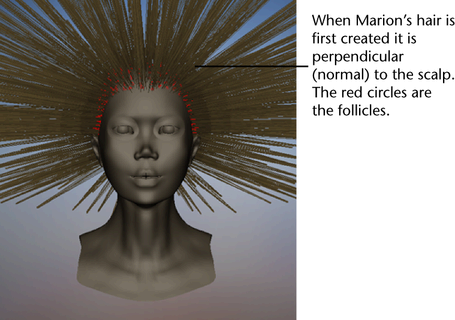
When you first create hair it appears sticking out normal to the surface. For a more natural look, play the hair simulation to see the hair react to gravity and then you can set a more realistic Start position for the hair. In these steps you create hair on a NURBS model and set a Start position after playing the simulation. You use Interactive Playback to play the simulation while adjusting dynamic hair system attributes and see how your changes affect the simulation.

 and in the Create Hair Options window, specify the following:
 The hair is attached to the scalp and sticks out perpendicular to the surface. You are looking at the Current Position of the hair, which is also referred to as the “dynamic” position. Do not edit the hair curves in this view; edit only in Start Position or RestPosition.
 button to play the simulation.
The hair falls due to default dynamic forces, such as gravity, which are found in the hair system attributes. However the hair takes a while to fall, which is as a result of a high Display Quality setting.
 button to stop the simulation when the hair is relaxed as it is in the following image.
Notice the hairs are quite stiff and stick out from the scalp instead of naturally falling closer to the scalp. To make the hair appear less stiff you can either increase the number of Points Per Hair (segments), which increases the simulation and render time, or you can reduce the Stiffness value in the hair system’s Dynamic attributes.
In the next part of the lesson you adjust dynamic settings of the hair system, including Stiffness and Gravity, to achieve more naturally behaving hair.
To improve playback performance and modify dynamic settings
 + a) select the hairSystemShape1 tab and change Display Quality to 2. This affects how many hairs display in the scene view, but has no effect on how much hair appears in the software render.
By reducing the Display Quality, this speeds up the playback of the hair simulation.
button when the hair has relaxed as in the following image.
+ a) select the hairSystemShape1 tab and change Display Quality to 2. This affects how many hairs display in the scene view, but has no effect on how much hair appears in the software render.
By reducing the Display Quality, this speeds up the playback of the hair simulation.
button when the hair has relaxed as in the following image. 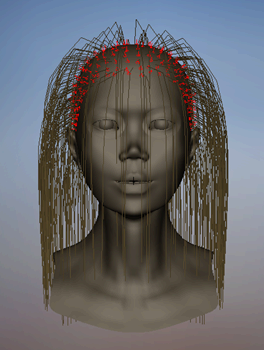
To set the position of the hair for the start frame
 button to rewind to the start frame.