You can render a composition at any time, to save the final output of a composition. When you render a composition, you choose the output(s) you wish to render, and the way in which they will be rendered, which is called the render action, as either the foreground or one of the many background actions. A progress bar displays the rendering of frames for all outputs. The outputs are rendered in parallel, one frame index after another alternating between each output. This can speed up the rendering process because some intermediate results are reused.
This section shows different rendering methods:


Foreground will perform the render while blocking further interaction with the Composite UI. It will only use the local machine, but is the fastest single-machine rendering option. Its disadvantage is that you cannot use Composite while rendering proceeds.
Background will also perform the render on the local machine, but allows you to continue using Composite during rendering. It is slower than Foreground rendering.
Backburner dispatches rendering to Autodesk Backburner(TM), Autodesk's distributed network rendering solution. As for Background rendering, you can use Composite while rendering proceeds. When you choose Background or Backburner rendering, the render is done on a copy of the composition: modifying the composition while it renders will not affect the result of the rendering.
To display the list of background tasks:

(a) Number of ongoing render tasks
The Render Actions tab in the Project Preferences dialog allows you to edit existing render actions, and define new ones. To define a new render action, right-click in the render actions browser at left, and select "New". Select an existing render action to edit it. Render actions use variables, or tokens, that are replaced with actual values when the action is run.
| Variable | Description |
|---|---|
| <InstallDir> | Composite root installation folder. |
| <BgTaskDir> | Points to the \resources\bgTasks folder of the Composite installation. |
| <PythonExec> | Points to the Python executable used by Composite. |
| <SharedDataDir> | Folder on the network where shared data files are stored. |
| <DestinationPath> | The destination folder specified in the current project's Rendered settings. |
| <CurrentUser> | The current user. |
| <CurrentProject> | The current project. |
| <CompositionPath> | The path to the current composition. |
| <ProjectFolder> | The path of the current project. |
| <Name> | The current composition name. |
| <Date> | The current date. |
| <Time> | The current time. |
| <FilenamePattern> | The file name pattern specified in the current project's Rendered settings. |
| <Custom> | The custom string associated with the current composition. |
| <FrameNo> | The current frame number (only available in the file name Rendered setting). |
| <NbFrames> | The number of frames in the current composition. |
| <StartFrame> | The start frame index for the current composition. |
| <EndFrame> | The end frame index for the current composition. |
| <RenderedResult> | The current rendered result name. |
The Wiretap protocol allows some degree of data exchange between Autodesk Composite and Autodesk editing and effects products, such as Autodesk Smoke ®, and Autodesk Flame®. In a facility where Composite is used with one of these Wiretap-compatible products, rendering to Wiretap is an easy way for you to quickly make available the rendered result of a composition to the Flame or Smoke user.
To set the Wiretap mode for new compositions:
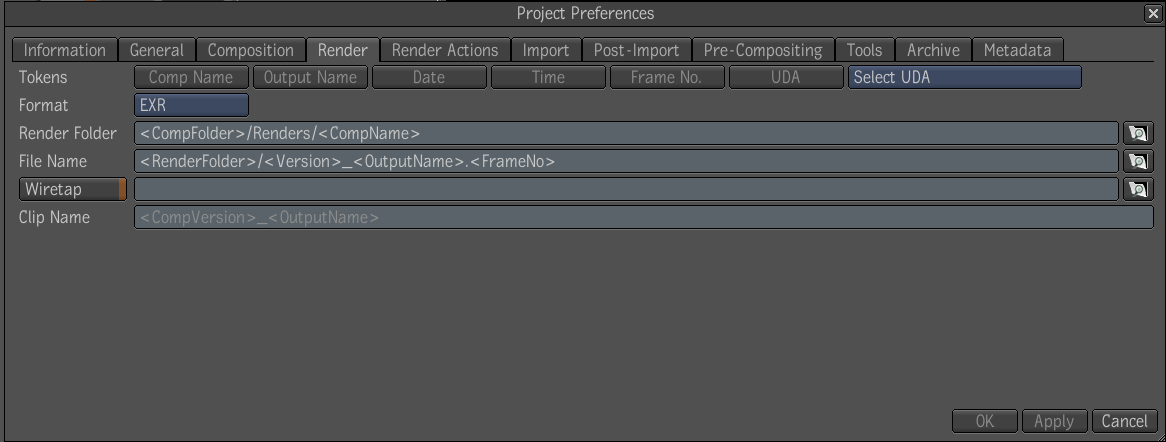
The server specified corresponds generally to an IFFFS server. In the text field, the prefix “Wiretap:” is stripped off if present, because it is implicit. For IFFFS, the path must specify a writable folder, which is either a library or a reel. For example: Wiretap:/belgium/stonefs/myProject/myLibrary/myReel/. The trailing slash is optional.
You can also set Wiretap rendering on existing compositions, for each output. Select an output node in the composition, and click on the Render tab in the UI. The same Wiretap controls as described above are available for the output.
 Except where otherwise noted, this work is licensed under a Creative Commons Attribution-NonCommercial-ShareAlike 3.0 Unported License


