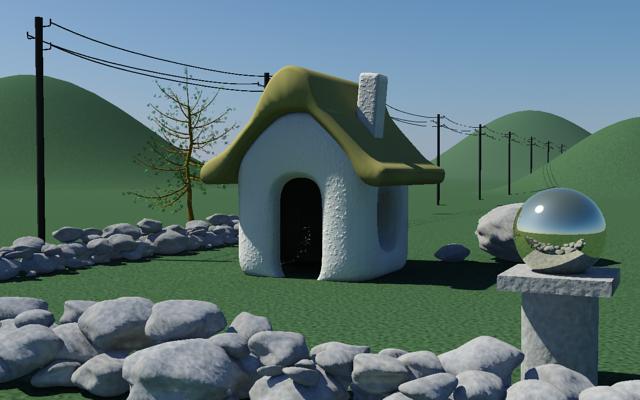
Haze=0
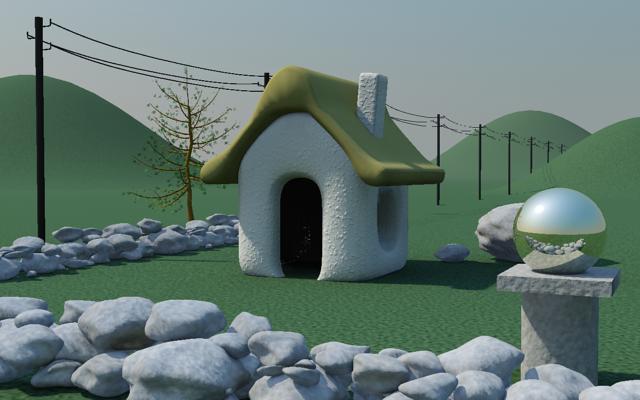
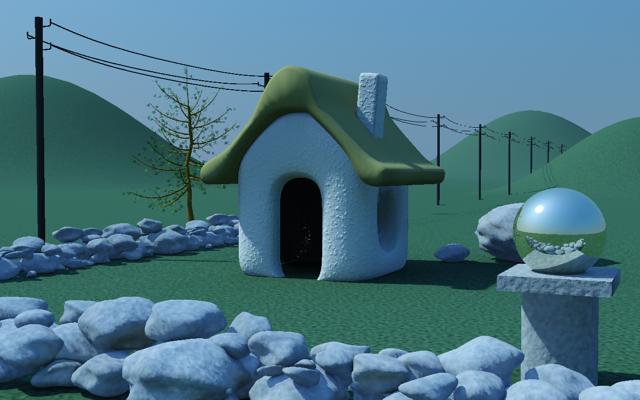
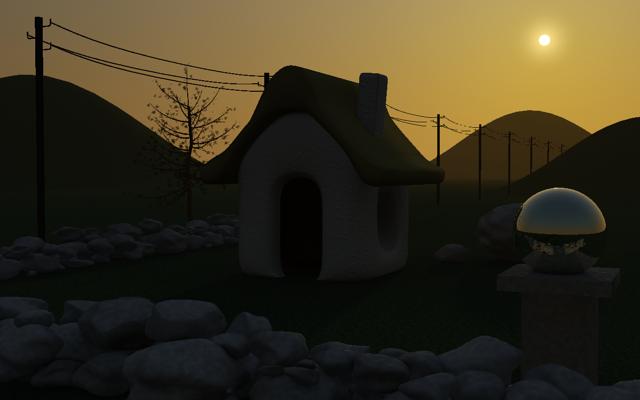
Haze=3
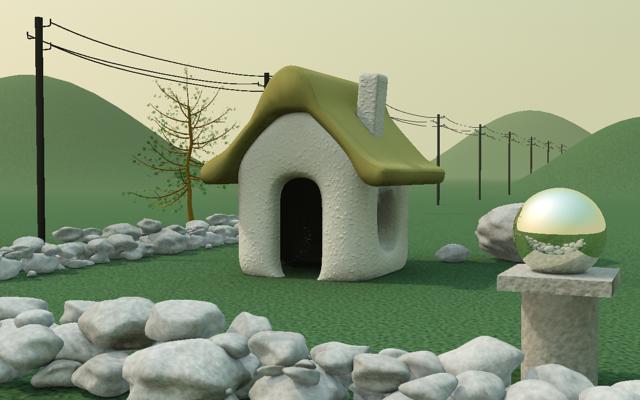
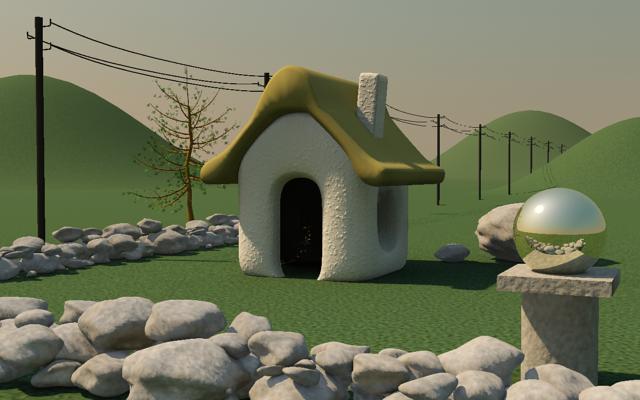
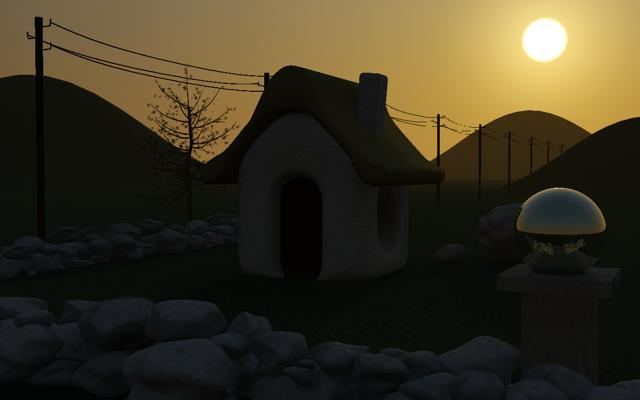
Haze=8
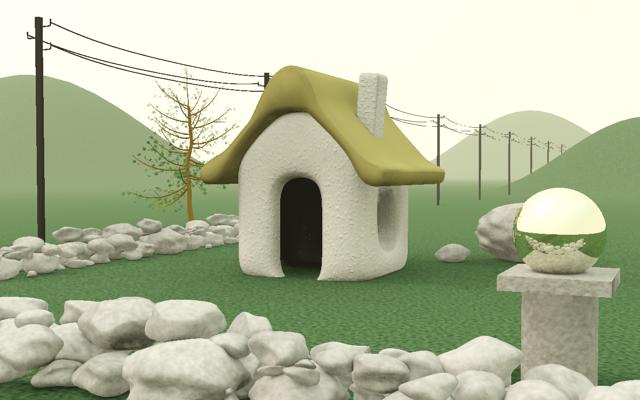
Haze=15
Redness=-0.3
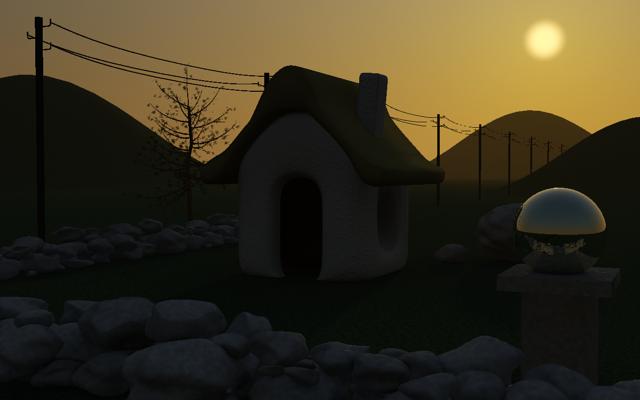
Redness=+0.3
The mental ray physical sun sky shaders are designed to enable physically plausible daylight simulations and very accurate renderings of daylight scenarios.
The shader library provides tools for lighting analysis. A shader for the standard CIE sky model (both clear and overcast) is available. This shader is grayscale (no color) and intended for analysis purposes rather than generating visually pleasing images. See page ciesky for details. The mia_physicalsky shader supports analysis related parameters from the Perez sky model, as well as explicit illuminance parameter for the mia_physicalsun.
The mia_physicalsun and mia_physicalsky are intended to be used together, with the mia_physicalsun shader applied to a directional light that represents the sun light, and the mia_physicalsky shader used as the scenes camera environment shader. The environment shader should be used to illuminate the scene with the help of Final Gathering (which must be enabled) and bounced light from the sun can be handled either by final gather diffuse bounces, or via GI (photons).
For improving quality in indoor shots, the sky can be combined with the mia_portal_light shader described on page Sky Portals.
The sun and sky work in true photometric units, but the output can be converted to something else with the rgb_unit_conversion parameter.
If it is set to 1 1 1, both the values returned by the mental ray shader API functions mi_sample_light (for the sunlight) and mi_compute_avg_radiance (for the skylight), when sent through the mi_luminance function, can be considered as photometric illuminance values in lux.
Since the intensity of the sun outside the atmosphere is calibrated as a 5900 degrees Kelvin blackbody radiator providing an illuminance of 127500 lux, this is very bright when seen compared to a more "classical" rendering where light intensities generally range from 0 to 1.
The rgb_unit_conversion parameter is applied as a multiplier and could be set to a value below 1.0 (e.g. 0.001 0.001 0.001) to convert the raw lux value to something more "manageable".
For convenience, the special rgb_unit_conversion value of 0 0 0 is internally set so that 80000 lux (approximately the amount of light on a sunny day) equals the classical light level of 1.0.
An interesting alternative is to set rgb_unit_conversion to 0.318 0.318 0.318. Then the final rendered pixels in the image (when rendered with mia_material or shaders following that shading convention and when sent through the mi_luminance function) are true photometric luminance values in candela per square meter 1.
These true luminance values then fit perfectly as input to the photographic tone mapper described on page Tone Mapper, with its cm2_factor set at 1.0.
To use the mental ray fast SSS shaders together with the high dynamic range indirect sun and skylight, it is very important to turn on the Indirect parameter so the SSS shader can scatter the skylight (which is considered indirect).
It is equally important to turn off the Screen composit parameter (otherwise the output of the SSS shaders are clamped to a low dynamic range and will appear to render black).
Some parameters exist both in the mia_physicalsun and mia_physicalsky and all do the same thing. For physical correctness, it is necessary to keep these parameter in sync with each other in both the sun and sky. For example, a sun with a different haze value than the sky cannot be guaranteed to be physically plausible.
The most important common parameters are those that drive the
entire shading- and colorization model:
The mia_physicalsun is responsible for the color and intensity of the sunlight, as well as emitting photons from the sun. The shader should be applied as light shader and photon emission shader on a directional light source (it does not work on any other light type).
declare shader "mia_physicalsun" (
        boolean "on"                   default on,
        scalar  "multiplier"           default 1.0,
        color   "rgb_unit_conversion"  default 0.0001 0.0001 0.0001,
        scalar  "haze"                 default 0.0,
        scalar  "redblueshift"         default 0.0,
        scalar  "saturation"           default 1.0,
        scalar  "horizon_height"       default 0.0,
        scalar  "shadow_softness"      default 1.0,
        integer "samples"              default 8,
        vector  "photon_bbox_min",
        vector  "photon_bbox_max",
        boolean "automatic_photon_energy",
        boolean "y_is_up",
        integer "illuminance_mode"           default 0,
        scalar  "direct_normal_illuminance"  default 0.0
    )
    version 6
    apply light
end declare
As mentioned above, the mia_physicalsun contains several
of the common parameters that are exposed in the
mia_physicalsky as well (haze, redblueshift
etc.). The value of these parameters for the mia_physicalsun
should match those in the mia_physicalsky. The parameters
specific to the mia_physicalsun are as follows:
The mia_physicalsky shader is responsible for creating the color gradient that represent the atmospheric skydome, which is then used to light the scene with the help of Final Gathering and/or sky portals (page Sky Portals). The mia_physicalsky, when used as an environment shader, also show the sky to the camera and in reflections.
mia_physicalsky also creates a virtual ground plane that exists "below" the model. This makes it unnecessary to actually model geometry all the way to the horizon line - the virtual ground plane provides both the visuals and the bounce-light from such ground.
declare shader "mia_physicalsky" (
        boolean "on"                  default on,
        scalar  "multiplier"          default 1.0,
        color   "rgb_unit_conversion" default 0.0001 0.0001 0.0001,
        scalar  "haze"                default 0.0,
        scalar  "redblueshift"        default 0.0,
        scalar  "saturation"          default 1.0,
        scalar  "horizon_height"      default 0.0,
        scalar  "horizon_blur"        default 0.1,
        color   "ground_color"        default 0.2 0.2 0.2,
        color   "night_color"         default 0 0 0,
        vector  "sun_direction",
        light   "sun",
        # The following parameters are only useful
        # when the shader is used as environment
        scalar  "sun_disk_intensity"  default 1.0,
        scalar  "sun_disk_scale"      default 4.0,
        scalar  "sun_glow_intensity"  default 1.0,
        boolean "use_background",
        shader  "background",
        # For the lens/volume shader mode
        scalar  "visibility_distance",
        boolean "y_is_up",
        integer "flags",
        integer "sky_luminance_mode" default 0,
        scalar  "zenith_luminance"               default 0.0,
        scalar  "diffuse_horizontal_illuminance" default 0.0,
        # Perez model luminance distribution parameters
        scalar  "a",
        scalar  "b",
        scalar  "c",
        scalar  "d",
        scalar  "e"
    )
    version 5
    apply environment, texture, lens, volume
end declare


It is important to note that the mia_physicalsky shader treats rays differently. Direct rays from the camera, as well as reflection and refraction rays see the "entire" effect, including the "sun disk" described below. But since the lighting already has a direct light that represents the sun (using the mia_physicalsun shader) the sun disk is not visible to the finalgather rays 3.
These parameters do not affect the Final Gathering result, only
the "visible" result, i.e. what the camera sees and what is seen in
reflection and refraction:

The CIE sky model is a standard model utilized in lighting analysis. It is a colorless (grayscale) model, and is hence not suitable for making "nice images", but it has the advantage of following a standardized (known) luminance distribution.
declare shader "mia_ciesky" (
        boolean "on"                  default on,
        color   "rgb_unit_conversion" default 0.0001 0.0001 0.0001,
        # Luminance parameters
        boolean "auto_luminance"                 default on,
        scalar  "zenith_luminance"               default 0.0,
        scalar  "diffuse_horizontal_illuminance" default 0.0,
        # CIE specific parameters. 0 = clear sky, 1 = overcast
        scalar  "overcast"            default 0.0,
        # Sun direction
        vector  "sun_direction",
        light   "sun",
        # Y vector
        boolean "y_is_up",
    )
    version 1
    apply environment, texture
end declare
The shader shares many parameters with the mia_physicalsky and they work the same, this includes parameters on, rgb_unit_conversion, sun_direction and y_is_up. See page mi_shader__mia_physicalsky for details.
The following parameters are unique to the mia_ciesky
shader:
A classic problem in computer graphics is lighting a scene solely through indirect light, like from a sky, or other "environment" light from an acquired HDRI or similar.
This is accomplished in mental ray using Final Gathering (henceforth abbreviated as FG), and is done by tracing a large number of "FG rays" to see which hit the environment (or other lit surfaces). Since this is a large number of rays, the results are cached (for performance) at FG points and the result is interpolated, "smoothing" the result.
This all works very well when there is a lot of fairly uniform light that is "seen" by the FG rays. In general, FG gives the best result when the light levels in a scene is fairly uniform; it works well to illuminate an outdoors scene by the sky (most FG rays "see" the sky), and it works well to bounce secondary light in a room in which most surfaces are lit by direct lights (most FG rays "see" some already-lit surface).
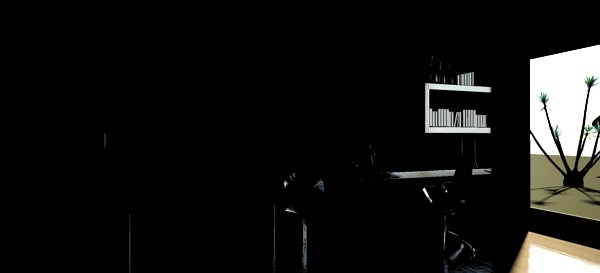
However, a scene of a dark room with no lights, and a single window only exposed to the sky is more problematic:
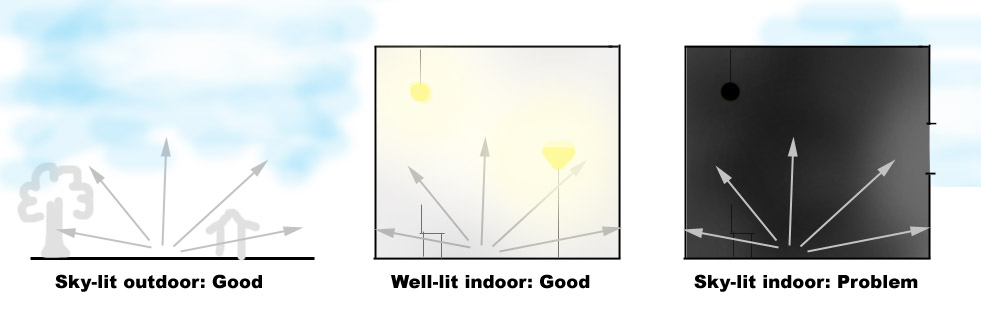
In the image on the right, almost all FG rays will "see" blackness and only a select few will be able to "escape" through the narrow window to hit the sky. To resolve this accurately one need to shoot very many FG rays, which has a negative impact on performance.
A further difference is that in the first two scenes (the outdoor scene and the well-lit interior) there are already direct lights which cause high-quality direct shadows, which resolves the details in the scene; FG is only used for additional bounce- or sky-lighting, and doesn't provide the bulk of the lighting. Therefore, any "over-smoothing" caused by the interpolation of FG points is drowned out by other lights (or can be resolved with AO in mia_material).
But the rightmost scene does not have that luxury, all light is indirect skylight. Any over-smoothing due to interpolation will be clearly visible, which means that one needs both a high FG ray count and a high FG point density to create a pleasing render, which gives longer render times.
A common technique used by many people doing interior renderings is to put an area light in the window, to provide the sky-lighting rather than rely on FG to "find" the sky. But this gives rise to the question "how bright and what color should this light be?".
To solve all these issues the concept of a portal light is introduced. The portal light is a (rectangular) area light which is placed in the window, which obtains it's proper intensity and color from the sky outside the window (i.e. an environment shader, like mia_physicalsky or similar) and how much of that sky that is "seen" 4.
Practically, this makes the portal light behave as a "FG concentrator" so instead of having to send thousands of FG rays around the scene to "find" the window, the portal light actually blocks FG rays, and instead converts light from beyond the window to direct light, with high-quality area shadows with no interpolation related issues possible.
FG will now see a well lit room rather than a black room, and can be performed at much lower FG ray counts. Furthermore, since the light from the window is now direct, we gain one extra light bounce "for free".
The mia_portal_light shader should be applied both as light- and photon emitter shader on a rectangular area light. The mental ray light instance must be set to be visible (this is a technical requirement for the portal light to be able to "block" final gather rays. If the light actually is visible or not in the rendering is instead handled by the shader).
Furthermore, the mental ray light instance must be set up such that the rectangular area light is extended in the X/Y plane of the lights own coordinate space, and any transformation of the light must be handled with the light instance's transform 5.
The following parameters exist:
declare shader "mia_portal_light" (
        boolean "on"                     default on,
        scalar  "multiplier"             default 1.0,
        color   "tint_color"             default 1 1 1,
        boolean "reverse"                default off,
        scalar  "cutoff_threshold"       default 0.005,
        boolean "shadows"                default true,
        boolean "use_custom_environment" default off,
        shader  "custom_environment",
        boolean "visible"                default off,
        boolean "lookup_using_fg_rays"   default on,
        scalar  "shadow_ray_extension"   default 0.0,
        boolean "emit_direct_photons"    default off,
        color   "transparency"           default 1 1 1
    )
    version 9
    apply light, emitter
end declare
on enables or disables the light.
multiplier sets the intensity and tint_color modifies the light color. When it is white, and the multiplier is 1.0, the light emitted is equal in intensity (and color) to the environment light that FG would have seen if allowed to send many thousands of FG rays6.
The light normally shines in the positive Z direction of the light instance's coordinate space. If reverse is on, it shines in the negative Z direction.
cutoff_threshold is a performance optimization option. Any light below this level is ignored, and no shadow rays are traced (which is what consumes the bulk of the render time of an area light). Of course, this makes the scene slightly darker since light is ignored, but can save a lot of excess render time.
shadows can turn shadows on and off.
If use_custom_environment is off, the shader looks in the global camera environment for the color of the light. If it is on, it calls the shader passed as custom_environment to find the color.
Tip: While the shader is intended to be a portal to an environment, one can also treat it as a "light card" shader by putting a shader returning a solid color as the custom_environment, for example using mib_blackbody creates a light card with a given color temperature.
If use_custom_environment is on but no custom_environment is actually passed, the shader behaves as a white light card.
visible defines if the light emitting surface is visible or not. When off, eye rays, reflection rays etc. go straight through so the portal light itself remains unseen (and we still "see" out the window). When on, the actual light emitting surface becomes visible to eye rays, reflection rays etc (and one do not "see" out the window any more, although one still "see" the environment shaders result). The on mode is useful when using mia_portal_light as a light card shader.
When lookup_using_fg_rays is off, the environment shader is looked up with a normal call to mi_trace_environment(). However, some shaders behave differently if they are called by an FG ray or by another ray (the mia_physicalsky shader, for example, does not show the "image" of the visible sun to FG rays). Since the idea of mia_portal_light is to act as an "FG concentrator" it should therefore follow that behavior. So when lookup_using_fg_rays is on, it calls the environment with the ray type set to miRAY_FINALGATHER, so that shaders that switch behavior based on this can return the color appropriate for a FG ray.
If shadow_ray_extension is zero, the shader begins tracing shadow rays "at" the light. When positive, the shadow rays actually start that distance "outdoors". So if there is a large object just outside the window, it's shadow will be taken into account. Conversely, a negative value allows the shadow rays to begin that distance inside the window, which can allow them to "skip" over troublesome geometry near the window (flowers, curtains) that would otherwise just introduce noise into the shadows.
If emit_direct_photons is on, the light only shoots direct photons, and does not actually emit any direct light at all.
The transparency parameters has two functions.
In this section we will examine the benefits of using the portal lights compared to what has been possible in previous versions of mental ray.
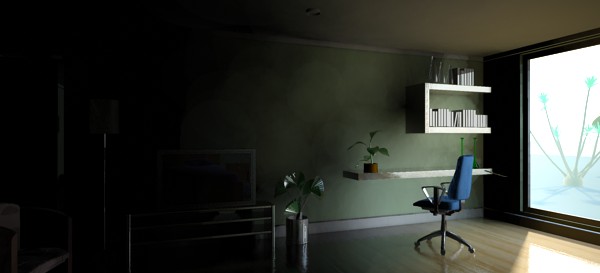
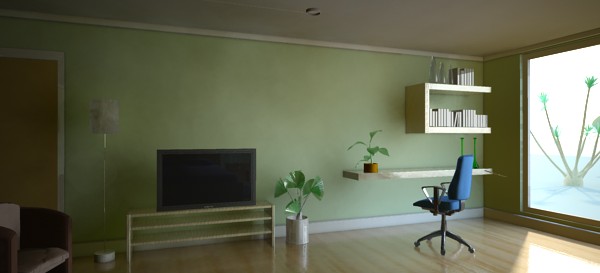
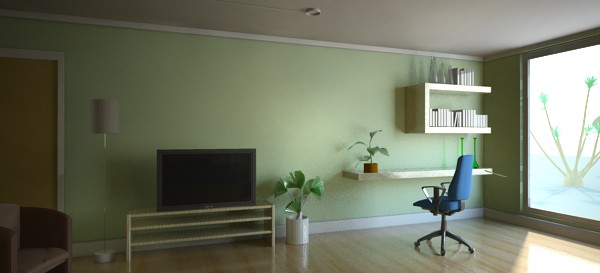
We are using the following scene 7:

The scene is only lit by the sun and sky, there are no light sources inside the room of any kind.
To clearly demonstrate what is direct and indirect light in the scene, we here show the scene with portals, GI and FG turned off:
The above image shows the isolated direct light. This means that this result is what FG will "see" - an extremely high-contrast scene consisting of complete blackness, the hotspot of the direct sunlight on the floor, and the very bright sky, and sun-lit ground outside - a sub-optimal input to the FG algorithm.
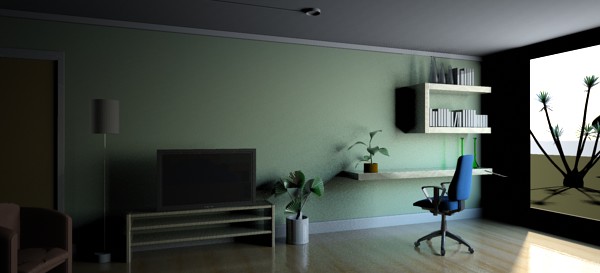
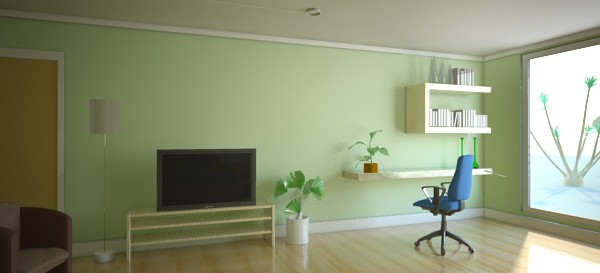
If we turn on FG on relatively low settings we get:
This image wins no beauty awards. It is splotchy, the shelves seem to "float" away from the wall, but most surprisingly, it's very dark. Why is that?
The reason is the high contrast input. FG contains a filter that is intended to avoid a speckled result if some stray FG rays hit a single extremely bright object, so the filter removes the brightest rays. But our scene really is high contrast, and we actually expect some rays to be much brighter than others.
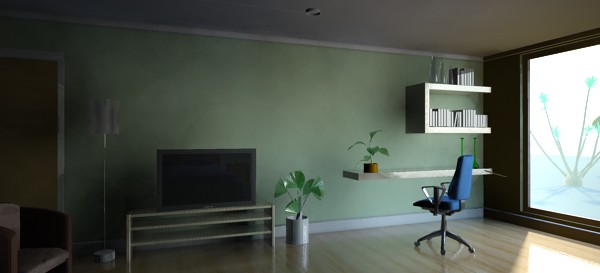
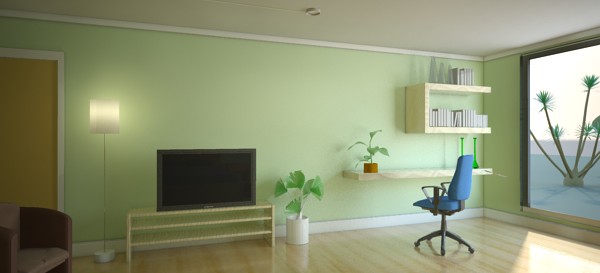
In our case the filter actually is fighting what we are trying to do. We can turn off the filter, as in the image above, which helps our light distribution some, but not the splotches, nor the "disconnect" of the shelves to the wall.
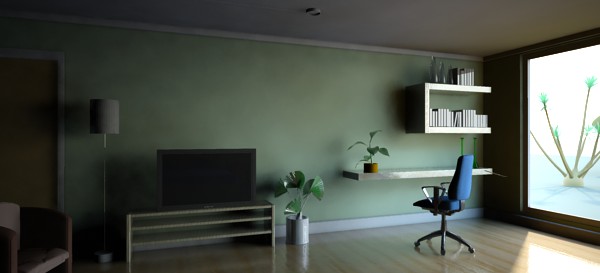
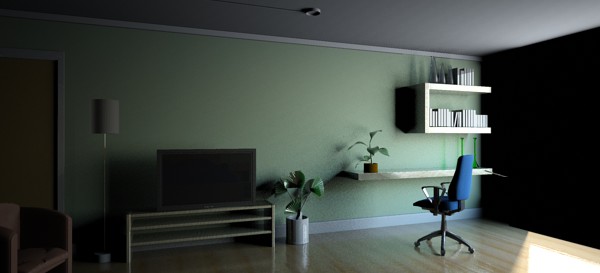
Since we are using mia_material, we have a built in ambient occlusion to help in exactly these situations. However, turning that up only helps partially:

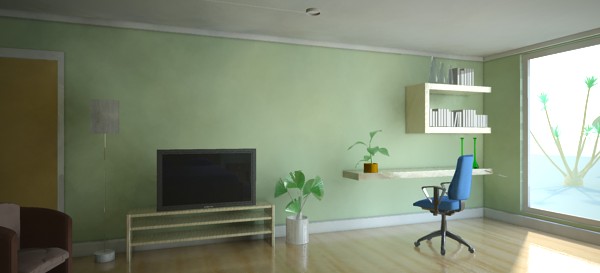
The lone solution available in the past was to simply increase the quality of the FG settings. And naturally, we are using very low settings, so the bad quality is not surprising at this stage. Lets turn up the knobs:

Yes, increasing the number of rays and the density helps but it hurts our render time a lot. Even at the high setting we are still not near the optimal result. We would have to go even higher to resolve all the detail!
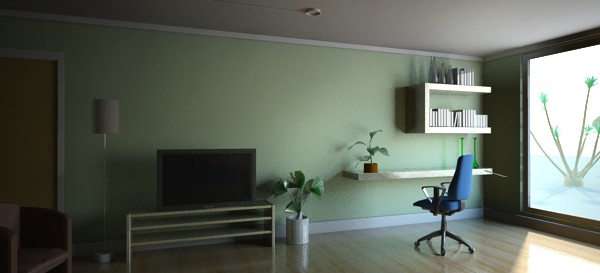
Lets back down from the high FG settings for a moment and concentrate on light transport. The scene is still very dark, because we are only getting a single FG bounce, and since the lighting from the sky is indirect we get no bounce of that light! Meaning: In this scene, the sunlight is bouncing once, but the skylight is not bouncing at all!
Lets turn up the number of bounces to 3:
This gave us more light. Due to the fact we stepped back from our "high" FG settings, the lighting isn't smooth and lacks any detail.
Using FG multi-bounce is just one of the ways mental ray can transport light in a scene. The alternative is to use Photons (GI). But keep in mind that when Photons are enabled, FG goes back to a single bounce, letting photons handle all the remaining bounces:
Now something odd happened; the color shifted towards yellow. Why is that? This is because the sky does not generate any photons. So we now have multiple good-quality bounces of the sun, but we are back to zero bounces of the sky!
Now lets turn to the portal lights. First lets turn all FG and GI off, and simply add a portal light to the window with it's default settings. The resulting image is this:
Color wise this looks very similar to our early FG results above, but the level of detail is much higher. Since no interpolation is going on, the shelves sit securely on the walls. All shadows contain the subtlest of details.
Since this is now direct light it will be picked up by FG when that is turned on. Let us compare what FG would "see" with, and without the portal lights:
The left is the super-high contrast result FG would "see" without portals, but the right is a fairly well balanced scene. And not only is it already filled with subtle direct light - the sky itself is actually invisible to FG, so it never has to carry the burden of hitting a high contrast area 8 and the problem with the final gather filter pretty much disappears.
The second feature of the portal lights being direct is that if we turn FG back on, we now get once bounce of light "for free":
Notice how the wall inside the window now has some bounce light on it from the sky light, even though we are using FG with a single bounce!
Turning on multiple diffuse bounces (on the left) makes the image come alive. Turning on GI (Photons) now yields a much more balanced image because the portal lights actually shoot photons! No longer is there the big skewing in favor of bounced sun light, the sky light will bounce equally well in the form of photons.
Finally, turning on one of the indoor lights, and utilizing the portal lights transparency parameter to combat the overexposure of the outdoor view, we get a final image:
In conclusion: The portal lights help...
One difficulty in using base mental ray shaders to render a physically correct scenes with GI (using photons), is in balancing the photon energy and the direct light correctly. The reason for this is that the intensity is generally specified as an intensity for some given direction (for example the peak intensity on a spotlight), but the energy is the sum of (or technically, the integral) of all such intensities in all directions.
So for example for a spotlight, for the same peak intensity, you would need different photon energies depending on the width of the spotlight cone, and depending on the shape of the intensity distribution within that cone. And while this can be calculated for a mathematically defined intensity distribution (such as a spotlight cone) what about an arbitrary distribution as defined by a light profile?
Furthermore, to ensure optimal convergence of the photon solution for a light which varies its intensity based on the direction of light (e.g. a spotlight or a light using a light profile), instead of emitting photons of different energy in different directions, one should emit photons of similar energy in different densities. So the amount of energy-per-area (the density of photon energy) at a given point must match the direct light arriving at that point.
To solve all these issues, we introduce the mia_photometric_light. It takes all the guesswork out of balancing the photon energy with the light intensity by peforming a numerical integration of the chosen intensity distribution to calculate the proper photon energy automatically, as well as takes care of adapting the photon density to the distribution, all automatically.
To use it, simply use the same instance of the shader as both light and photon shader on a light source. The light must have an origin (i.e. the shader does not work on an infinite light source). The light must be set to emit photons, and must be given a nonzero energy value (although the actual value will be overriden by the shader, a nonzero energy value is required, or mental ray will not emit any photons at all for the light). The exponent should always be 2. If the light is a spotlight, a spread value should be used. See the mental ray manual about lights.
shader "myLight" "mia_photometric_light" (
    "on" true,
    "color" 1 1 1,
    ...
)
light "theLight" = "myLight"
        emitter = "myLight"
        origin 0 0 0
        energy 1 1 1
        exponent 2
        caustic photons 20000
        globillum photons 20000
end light
The shader is declared as follows:
declare shader "mia_photometric_light" (
       boolean "on"           default on,
       scalar  "multiplier"   default 1.0,
       color   "color"        default 1.0 1.0 1.0,
       # How to define the light intensity
       #   0 = using a manual peak intensity in cd
       #   1 = using a total amount of lumen
       #   2 = using the information stored in the IES file
       integer      "intensity_mode",
       scalar       "manual_peak_intensity_cd",
       scalar       "manual_flux_lm",
       # How to define the light distribution
       #   0 = Isotropic spherical distribution
       #   1 = Spotlight distribution
       #   2 = using the information stored in the IES file
       integer      "distribution_mode"   default 0,
       scalar       "spotlight_cosine_bias",
       lightprofile "profile",
       # Scene and lighting unit management
       scalar      "units_to_meter_scale" default 1.0,
       scalar      "cm2_factor"           default 1.0
    )
    version 2
    apply   light, emitter
end declare
on turns the light on or off.
multiplier allows tweaking the intensity like a dimmer. Only when this is 1.0 will the intensity settings mentioned below be accurate.
color is the color of the light. Only if this is a normalized color (i.e. that the mi_luminance() of the color is 1.0) will the intensity settings mentioned below be accurate. Fortunately, functions such as mib_cie_d and mib_blackbody do return normalized colors.
intensity_mode guides what parameter and in what unit the light intensity is defined:
distribution_mode defines how the light is distributed in
different directions:
Since physical lighting in real world units is highly scale dependent, the units_to_meter_scale defines how many scene units goes into one meter. E.g. if one scene unit is one millimeter, this would be 1000.
Finally, the cm2_factor is the conversion factor between pixel values and candela per square meter luminance values. In short, this should match the cm2_factor of the mia_exposure_photographic shader to yield a photographically correct render, intensity wise. See also page Units.