Learning Resources > Tutorials > Getting Started with Maya > File Referencing > Lesson 1: Using file references >
Using the Reference Editor
You can duplicate your referenced zombie repeatedly to dress the scene. To do this, you use the Duplicate Reference option in the Reference Editor.
To duplicate the referenced zombie
The Reference Editor displays all your referenced files in a list. From this editor you can create and remove references, load and unload references, create proxies, and control all other aspects of the referenced files in the scene.
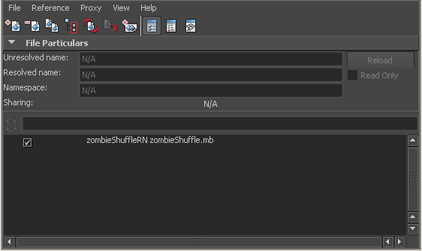
A second entry called zombieShuffleRN1 zombieShuffle.mb appears in the Reference Editor.
Although another entry appeared in the Reference Editor, there still appears to be one zombie in the scene. This is because the duplicated zombie is overlapping the original.
To reposition the duplicated zombie
The last entry in the Outliner is zombieShuffle1:zombie_AST. Notice that there is a small icon in the top-left corner of the asset icon, indicating that this is a referenced object. Also note that the prefix zombieShuffle1: denotes the namespace for that zombie.
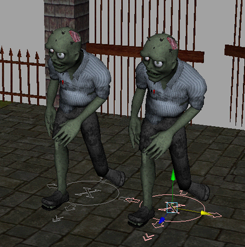
If you play the animation, both zombies perform identical shuffles in different parts of the scene.
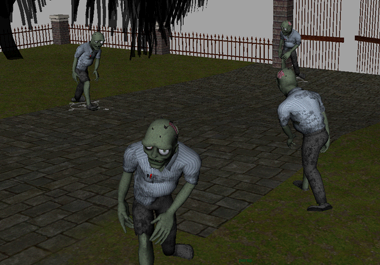
Now repeat the above steps 3 or 4 more times to fill the graveyard with a horde of zombies. Leave the original zombie reference in its default place.