Lesson 4: Simulating the
low resolution shirt
In this lesson, you simulate the character’s shirt using the workflow described in Lesson 3. Although there are some variations in attributes and values, the principles are the same.
To ensure the lesson works as described, do these steps before beginning:
For this lesson, you need to access Maya geometry cache files in addition to the lesson scene file.
This file can be found in the nClothAdvancedTutorials directory that you set as your Maya project.
To create a new nCache, in the Outliner select nCloth_Pants, and select nCache > Create New Cache.
To use the nCloth pants nCache from the previous lesson, you may need to reconnect the cache to the nCloth object. See Reconnecting objects to existing caches.
If you use a Maya scene file from a previous lesson, ensure that you:
Converting the shirt to nCloth
To convert the shirt to nCloth
 .
.
The low resolution shirt is converted to an nCloth object, and is added to the existing Maya Nucleus solver.
 .
.
Applying an nCloth preset to the shirt
When you play back the simulation, you notice the following:
A useful way to solve a number of these simulation problems simultaneously is to apply an nCloth attribute preset to the nCloth shirt object.
To apply an nCloth preset to the shirt
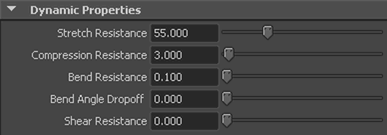
Some important attribute adjustments made by the t-shirt preset are the following:
Bend Angle Dropoff adds resistance to bending forces by responding to the angle and strength of the force applied to the nCloth. For example, a high Bend Angle Dropoff causes an nCloth to resist bending at higher angles more than at lower angles. When you simulate the shirt, you will see Bend Angle Dropoff reducing the nCloth's tendency to bend when the it is beginning to bundle up at frame 1032.
The reduction in Mass reflects the light-to medium-weight material of a cotton t-shirt.
Cache the simulation by selecting the nCloth shirt and selecting nCach > Replace Cache and then play it back to observe the results.
Wrapping the high resolution mesh
In this section of the lesson, you use a wrap deformer to create an influence object for the high resolution shirt.
To wrap the high resolution mesh
 -select
the nCloth shirt object.
.
-select
the nCloth shirt object.
.
A wrap node appears in the Attribute Editor, and a Shirt_LowResBase object appears in the Outliner.
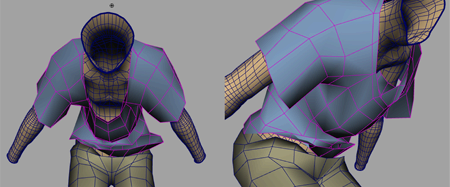
Identifying problem areas in the simulated nCloth
When you play back the simulation, you notice the following:
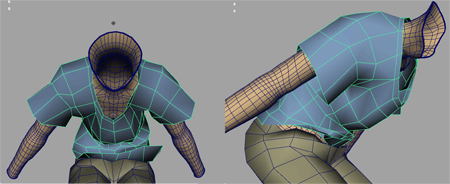
The nCloth t-shirt preset has improved many of the simulation issues, however some Dynamic Properties attributes need further adjustment.
When editing the Dynamic Properties attributes, cache your simulation and then play it back between attribute adjustments to see how your new settings affect the nCloth shirt's behavior. For comparison purposes, you can also display the reference character in the scene. To do this, in the Display Layer Editor, turn on Visible.
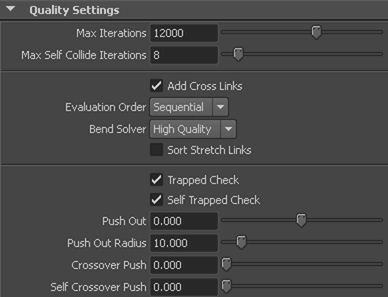
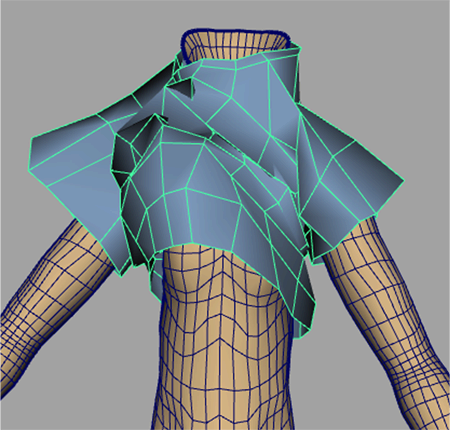
Editing the Quality Settings and resolving interpenetrations
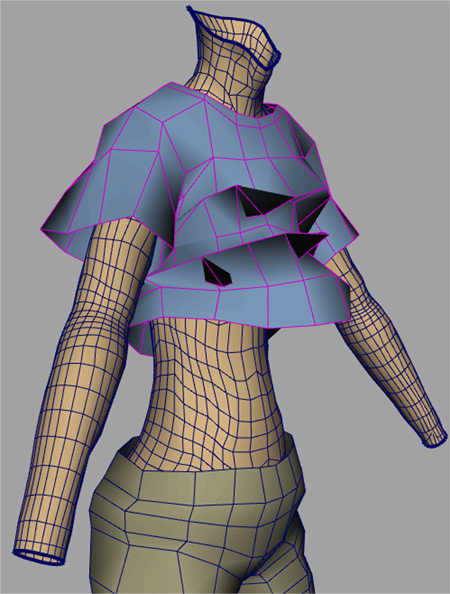
When you play back the simulation, you notice the following:
The offset between the nCloth object occurs because the collision Thickness is currently set to accommodate the high resolution wrap deformer. Reducing Thickness may solve this issue, but be aware that interpenetrations can result from such an adjustment. For the purposes of this tutorial, Thickness is left at its present value.
To smooth the mesh and reduce instances of interpenetrations, edit the Quality Settings.
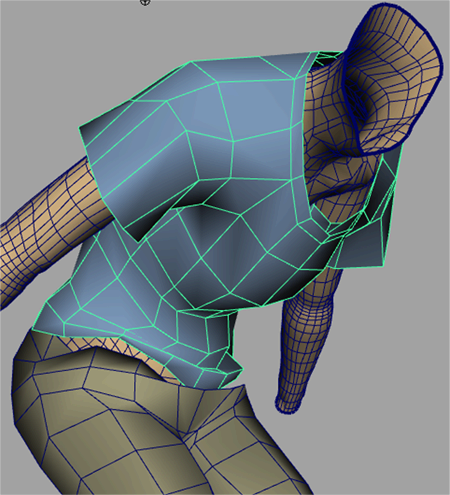
To further improve the quality of the simulation and reduce the instances of interpenetration in problem areas, such as the bunching of the shirt in the chest area (see frame 1040) you can set Push Out and Push Out Radius. Try setting the attributes values between the following ranges:
Experiment with your settings by creating duplicates of the meshes at specific frames of the simulation. For example, create mesh duplicates at frames 1040 and 1043. Cache the simulation, and then scrub through the Time Slider and compare your simulation with your duplicate mesh to see the results of your attribute edits.
Comparing the final low resolution simulation with the simulated reference character mesh
In this lesson, you compare the final simulation result of the nCloth shirt and nCloth pants objects with the simulated reference character object (the original simulated high resolution mesh).
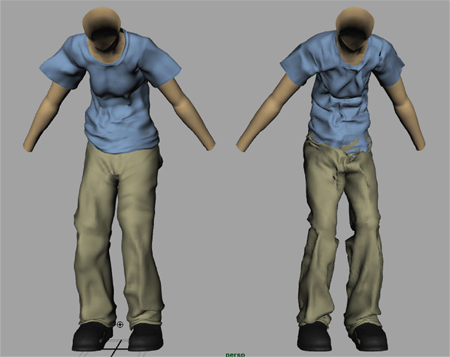
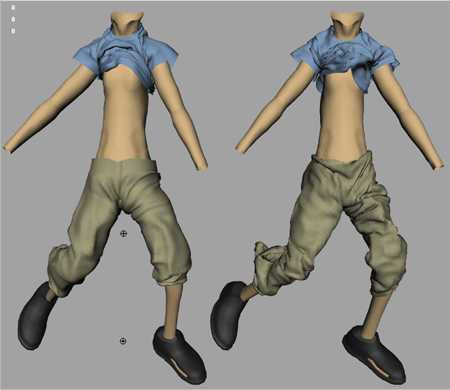
There are subtle differences in the way the high resolution and reference character objects simulate, but overall the nCloth behaves in similar ways. Considering the amount of time saved by repeatedly working through the simulation workflow of caching the simulation and adjusting attributes on the low resolution mesh, this workflow provides good results. Although the reference character object can be improved by optimizing the simulation, the higher resolution mesh slows down caching and simulation time and might require more attribute adjustments.