


Lesson 1: Setting up basic
skin deformation
This lesson shows you how to set up an object to be deformed by the Muscle deformer with bones and joints. You will prepare a rig for basic skin deformation and set initial weighting on your mesh.
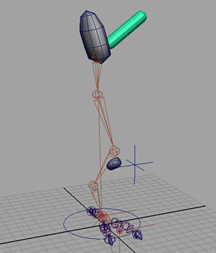
This scene contains a basic polygon mesh of a leg, some joints with a simple, animated IK rig, and some background lights.
You can see the basic IK rig setup as the leg moves back and forth over time. In addition to the basic Maya joints, there are two polygon bone objects for the hip blade and kneecap.
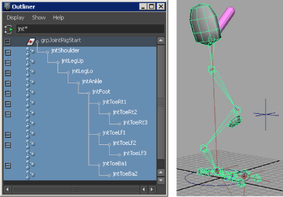
Currently, there is no stable root joint for this rig. Rather than creating a Maya joint as the root, and since you will be using the Muscle deformer for skinning, you can create a capsule object to use as the root.
Capsules are like joints, except that they have a true size and thickness and can be used by the Muscle skin deformer as both joints for Sticky weighting and actual sliding effects. They effectively work as bones, and are faster than polygon mesh bones.
To create and set up a capsule object
A capsule object appears at the origin. In the Outliner, you can see a group called grpMUSCLES is added. This group holds all capsules and muscles and is designed to keep your rig hierarchy clean.
The top of the Muscle Parameters tab lets you edit basic attributes for capsules, bones, and muscles.
Since only objects that have a cMuscleObject shape node can be connected to the Muscle skin deformer for skinning, you need to convert all of the joints and polygon bones to have this node.
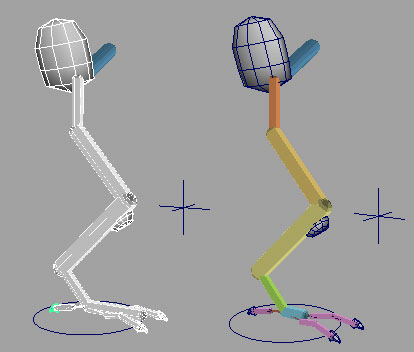
Rather than manually creating a capsule by hand for each joint, Maya Muscle provides an automatic way to convert joints to capsules so that they can be directly connected to the Muscle deformer. Converted joints function as both a regular Maya joint and a Muscle capsule object.
Since you are converting joints and not a surface, the Joint to Capsule Conversion window appears. You need to know which axis is running down the length of the joints in your rig. The default for Maya is X. However, on this rig a custom Joint Orient tool was used to get a cleaner joint rotation axis. It is highly recommended you use this sort of tool to set up your joints before rigging.
Each joint is converted to be a capsule object and have the shape node. You can adjust the color and length of capsules in the Muscle Parameters.
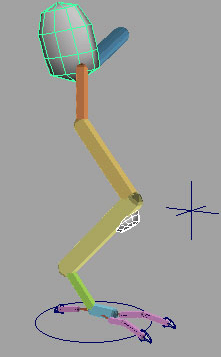
Since you did not originally select the polygon bone objects when you converted, you must also convert these mesh objects so they can be connected into the Muscle deformer for skinning.
The polygon mesh objects are converted and connected to a new cMuscleObject shape node.
While there is no visible change, the new shape node can be seen in the Channel Box. You can also use the Muscle Builder window to turn on display of the shape and adjust colors or other features as well. Make sure you leave the Strength setting at 1.0.
Now that you have a series of joints and polygon mesh objects that have been converted to work with the Muscle skin deformer, you can apply the skin deformer and connect the muscle objects.
Apply the Muscle skin deformer
In these steps, you select only the mesh you are applying the deformer to. You connect the bones and muscles afterwards.
To apply the Muscle skin deformer
As the deformer is applied, a window appears to pre-calculate required information for the Relax deformer in case you use it later.
When the process is complete, the dragon leg mesh looks the same, but it now has the Muscle skin deformer applied. You can view the cMuscleSystem1 node attributes in the Channel Box or Attribute Editor.
At this point, animating the mesh will have no deformation effect, because you have not yet connected or weighted any bones or muscles to the skin mesh. In the next steps, you will connect all the capsules and bones.
All the bones are connected into the Muscle deformer. At this point, scrubbing the timeline still does not produce any motion on the skin mesh because you have not yet applied the default skin weights.
Applying default weights to bones and polygon mesh objects is similar to weighting with the Maya skinCluster. The points on the skin will move when the capsule/bone moves.
The Default Weights window appears. There are several options available, depending on the selected Weight type. See Default Weights window for a detailed description.
Now that you have applied default Sticky weights, scrubbing the timeline shows the effect. The skin mesh moves when the capsules/bones move.
This concludes the first lesson. You can find the completed file for this lesson, DragonLeg_Basic_End.mb, in the Maya Muscle Advanced Techniques folder.
In this lesson you learned how to:
Now you are ready to refine the default weighting on your dragon leg mesh by painting weights with the Muscle Paint window.