Adding mental ray shadow maps to lights


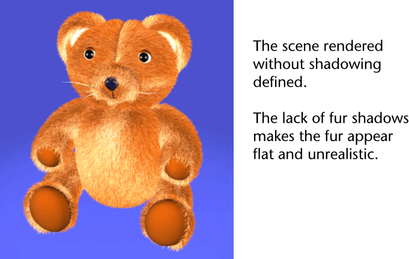
If the scene were rendered at this point, the fur would not appear realistic because it would not contain shadows. To correct this you must add shadowing for the spotlights.

In this tutorial, you will add shadows to your scene by generating shadow maps and rendering using the mental ray for Maya renderer. For more information about shadow maps, see mental ray shadow maps.

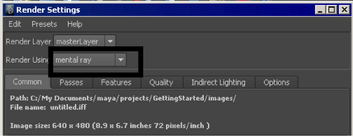
To turn on the mental ray for Maya renderer

  1. In the main menu, select Window > Rendering Editors > Render Settings (or click the Render Settings icon in the Render View window).

  2. In the Render Settings window, set Render Using setting to mental ray.

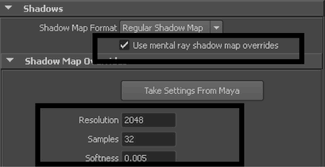
To add fur shadowing attributes to spotlights

  1. Select Window > Outliner to display the Outliner.

    For complex scenes, the Outliner is useful for selecting specific objects in the scene, especially when you want to select objects that are hidden by other objects, or are outside the camera’s field of view. Selecting items in the Outliner is much easier when you have named the objects and lights in your scene.

  2. In the Outliner, click spotLight1 to select it in the scene.
  3. Open the Attribute Editor by clicking the Show/Hide Attribute Editor icon on the Status Line.
  4. Select the spotLightShape tab, and under the mental ray section, expand the Shadows section.
  5. Enable Use mental ray shadow map overrides to customize the shadow maps for the spotlight.
  6. Under the Shadow Map Overrides section, set the following attributes:
    • Resolution: 2048
    • Samples: 32
    • Softness: 0.005

  7. Enable Use mental ray shadow map overrides for spotLight2 and spotLIght3 and set the Shadow Map Overrides as follows:
    • Resolution: 1024
    • Samples: 16
    • Softness: 0.05