In 3D animation, rendering
typically refers to the act of creating a sequence of high-quality
image snapshots for each frame of an animation sequence. After rendering
the images, you play them in sequence to create a film or video
clip. If the concept of 3D animation rendering is new to you, consider doing
the lesson
Lesson 1: Rendering a scene before
completing this section.
Before you can render
the particles using mental ray, you must add the particleSamplerInfo node
to your shading network so that mental ray can access the attributes
of your particle object such as color informationand Lifespan.
To add the particleSamplerInfo node to
your shading network
- Select Window > Rendering
Editors > Hypershade to open the Hypershade window.
- With the particle object selected, click
the
 button
to graph its shading network.
button
to graph its shading network.
- In the shading network, select the Lambert shader.
- Click the Map
 button
beside the Color attribute in the Lambert shader Attribute
Editor. The Create Render Node window
appears.
button
beside the Color attribute in the Lambert shader Attribute
Editor. The Create Render Node window
appears.
- In the Create Render Node window,
under Maya, click Utilities.
- In the right panel, click
 .
.
A particleSamplerInfo
node now appears in the shading network and connected to the Lambert shader
node.
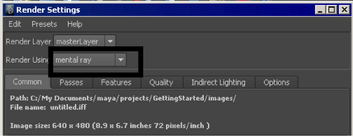
To turn on the mental ray for Maya renderer
- In the main menu, select
Window > Rendering Editors > Render Settings (or
click the Render Settings icon in the Render
View window).
- In the Render Settings window,
set Render Using setting to mental
ray.
To batch render the sequence
- In the Render Settings window,
select the Common tab.
- In the File Output section,
set the following options:
- File Name Prefix:
Type the name Emit. This name will be the base of the filenames
created by batch rendering.
- Image Format:
Select Maya IFF (.iff), Maya’s standard
image file format. You can use the .iff format
for any further work you need to do, including previewing and compositing
the animation. If you require a different format, you can specify
it instead of .iff in the Render
Settings.
- Frame/Animation ext:
Select name.#.ext. This specifies
that the filenames will have the format prefix.frameNumber.fileFormat.
For example, batch rendering the entire 120-frame animation will
create Emit.0001.iff, Emit.0002.iff, and so on through Emit.0120.iff.
- Frame padding:
Enter 4. This causes the frameNumber part of the filenames to be
four digits prefixed with 0s. For example, the filenames will be Emit.0001.iff and Emit.0002.iff and so forth.
- In the Frame Range section,
set the following options:
- Start frame:
Enter 1, the first frame of the animation sequence to be batch rendered.
- End frame:
Enter 75, the last frame to be batch rendered. (Rendering all 120
frames may be time-consuming.)
- Close the Render Settings window.
- Select
Render > Batch Render to
render the sequence.
Rendering is complete
when the following message appears:
//
Result: Rendering Completed. See mayaRenderLog.txt for information.
//
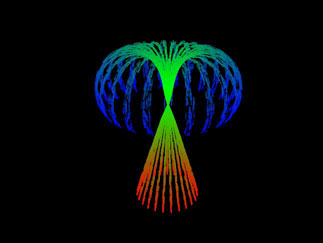
To use FCheck to view the sequence of
rendered frames
- Select
File > View Sequence.
The File Browser window
appears.
- Using the File Browser, navigate to the
images directory for your current project (or wherever you saved
the rendered sequence of images for the Apple).
- Click the image file Emit.0001.iff to
select the first image in the sequence and then click Open.
The FCheck image viewing
utility appears and the rendered sequence of 75 frames plays back
as an animated loop.