Drawing a polygon


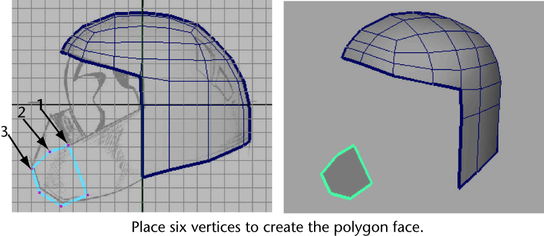
To create the lower front region of the helmet (that is, the region that would protect the mouth and jaw of the wearer) you’ll create a polygon for the cross section of the lower front region by manually placing vertices using the Create Polygon Tool ( Mesh > Create Polygon Tool).

To place vertices for a polygon

  1. In the side view, select Mesh > Create Polygon Tool > .

    The Create Polygon Tool settings editor appears.

  2. In the tool settings editor, set the following options:
    • Limit the number of points: On
    • Limit points to: 6

    These settings specify that a closed polygon face will be created once you have placed six vertices in the scene.

  3. In the side view, place six points for the profile as it appears in cross section of the lower front region of the helmet (see image below). Ensure that you place the vertices in a counter-clockwise direction for this step.

    The new polygon face is created along the YZ plane (the axis of symmetry for the model).

  4. Press the q key to quit the Create Polygon Tool when the polygon face is complete.

    The new polygon component remains selected in Object Mode.

    NoteIf the polygon face doesn’t appear shaded in the side view but does appear shaded in the perspective view, it means that the polygon face and the image plane lie on exactly the same plane. You can correct this by moving the image plane backwards in the side view so it doesn’t lie directly on the YZ plane, but this step is not critical to the success of the steps that follow.

You’ll extrude this polygon face to create the remainder of the lower front region of the helmet. Before you can extrude the new face it needs to be selected in Face mode. You can do this quickly by converting the existing selection to Faces.

To convert the object selection to face selection

  1. With the face still active in Object Mode, choose Select > Convert Selection > To Faces.

    The selection is converted to a face selection.

    TipYou can also press Ctrl + F11 or Ctrl + right-click on the selected object and choose To Faces > To Faces from the marking menu that appears.