


Learning Resources > Tutorials > Getting Started with Maya > Polygonal Modeling > Lesson 1: Modeling a polygonal
mesh from a reference image >
Adding polygons to a mesh
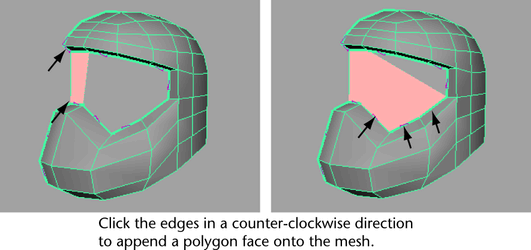
For the protective face shield on the helmet, you'll create one large multi-sided polygon using the Append to Polygon Tool and then split it into multiple four-sided polygons (quads) so that the new polygons match the existing four-sided topology of the helmet mesh.
To create the face shield using the Append to Polygon Tool
 .
.
If the planar option is on, the Append to Polygon Tool will not create a multi-sided polygon as the edges you’ll select do not form a planar region.
A polygon appears that spans the two edges.
The multi-sided polygon is completed and added to the existing mesh. Multi-sided polygons are also referred to as n-gons.
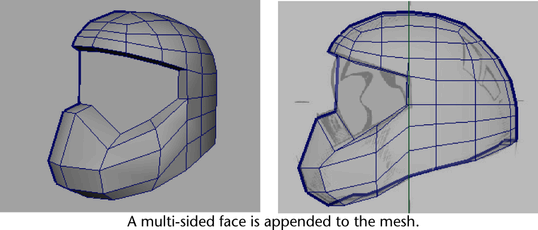
Ideally, all faces should be four-sided to match the other faces on the helmet mesh. In the next section, you'll split the n-gon vertically and horizontally into several smaller four-sided polygons using the Split Polygon Tool.