Rendered
images can be saved as IFF files. These IFF files have RGBA data
with no depth map, by default. For example:
Rendered images
- Load a scene, such as cone.ma
- Switch to rendering mode, and select Render into
new window from the Render menu.
- When the render has finished, use
 to click
the image and select Save image from the Images menu.
to click
the image and select Save image from the Images menu.
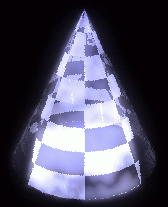
- Enter a file name in the file browser.
The output image should look like cone.iff:
Shadow maps
Light
sources in Maya can read and write shadow maps. These shadow maps are
stored as a depth map in an IFF file. The depth map may be either
a traditional Z buffer or a midmap. The stored value for a midmap
is half of the distance between the first and second surfaces. Midmaps
reduce the number of incorrect self shadowing occurrences.
Different light sources
produce different shadow maps. A spot light subtending an angle
below 90 degrees will produce one shadow map. If the subtended angle
is greater than 90 degrees, it will produce five shadow maps - one
central and five peripheral. A point light will produce one shadow
map in a simple scene, and up to six shadow maps in more complicated
scenes.
Try the following example:
- Load a scene with a light in it, such
as torusShadow.ma
- Select the light and open the Attribute
Editor.
- Expand the Shadows section.
- Check the Use depth map check
box in the Depth Map Shadow Attributes section.
- If you want a midmap, check the Use
Mid Dist Depth Map check box in the same section.
- Check the Write shadow map check
box in the same section. Enter a file prefix in the Depth
map name text field.
- Render a scene.
- You should now have one file*, each beginning
with the prefix selected in step 6. The suffix will be the name
of the light source and then the type of shadow map generated. For
the torusShadow example, you should have one of two images, shadowmap_pointLightShape1_int.SM.iff
or shadowmap_pointLightShape1_int.MIDMAP.SM.iff, depending upon your
choice in step 5.