


Learning Resources > Tutorials > Getting Started with Maya > Animation > Lesson 5: Inverse
kinematics >
Creating a control object
for an IK system
Using the IK Handle to pose an IK chain is generally not a good practice. The IK Handle can be challenging to select in the scene view, especially when it’s grouped into a hierarchy that includes a skeleton and other surface components. A better practice is to create a control object.
You create a control object to select and manipulate an IK system instead of directly using the IK Handle. You can create a control object with a curve or a locator, which are often used because they don’t appear in the rendered image.
The control object controls the movement of the IK Handle using a constraint. You can constrain the position, orientation, or scale of an object to other objects using constraints.
To create a control object using a locator
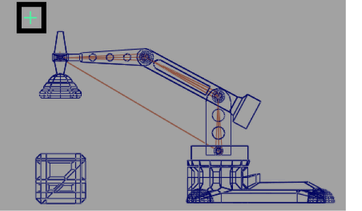
A three-dimensional cross is created at the origin in the scene view.
To easily identify the locator as a control object in the Hypergraph, rename the locator.
To rename the control object using the Hypergraph

Before you constrain the IK handle to the control object, you need to freeze the transformations for the control object. Freeze Transformations zeros the transformations for an object without changing the position of the object. This is another good practice; If it becomes necessary to reset the arm to its default position, you can set the transformation on the control object to zero, and the arm will return to this default pose.
To freeze the transformations for the control object
 .
.
The transformations for ArmControl are set to zero. From this point onwards, you can reset its position to this location by zeroing its translations in the Channel Box.
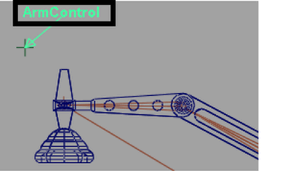
To easily identify the locator as the control object in the scene view, label the control object using an annotation. An annotation is a text label that can be set to point at the labeled item. Annotations are useful because they always face the viewer, regardless of the orientation of the model in the scene view.
To label the control object in the scene view
In the scene view, the word ArmControl appears near the locator/control object. In the Hypergraph, two new nodes appear in a hierarchy beneath ArmControl.
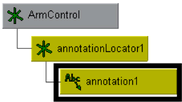
The annotation displays in any scene view so you can easily identify the control object for selection.
To simplify the display of the Arm Control node
The ArmControl node appears as a single node instead of the previous three node hierarchy. The small arrowhead on the lower left-hand corner of the node indicates that the node is collapsed.

The control object must be linked to the IK Handle to control the IK Handle.