Learning Resources > Tutorials > Getting Started with Maya > Hair > Lesson 1: Creating a basic
hairstyle >
Setting up shadowing on
hair
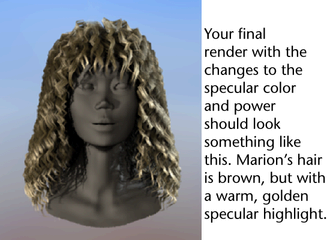
Hair, by default, is translucent so you need to set up self shadowing, otherwise hair appears glowing, like nylon. The darker the hair color is, the more important the specular color and highlights become.
There are three directional lights in this scene. In the render you did in the previous steps, Marion’s hair appears blond and glowing, even though the default hair color is dark brown, as in the scene view. This apparent hair color discrepancy occurs because:
In these next steps you set up shadows on all three lights.
To set up shadows and self shadows on hair
Normally you would increase the Filter Size to blur the light in the hair for realism, and increase the Bias, which sets how far the light filters through the hair. These attributes were set for you in the scene.
The shadows on the hair are hard and there is very little specularity. You fix this in the next steps.
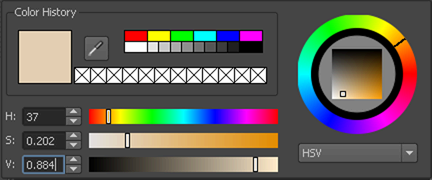
To create specular highlights on hair