


User Guide > Modeling > NURBS Modeling > Creating NURBS surfaces > Create NURBS transition
surfaces >
Create a surface between
two sets of boundary curves
You can build a blend between two boundaries defined by sets of surface curves. For example, you can use this tool to create a surface that forms a smooth juncture between a creature’s arm and torso.
 . You
can use isoparms, edges, or curves-on-surface.
.
. You
can use isoparms, edges, or curves-on-surface.
.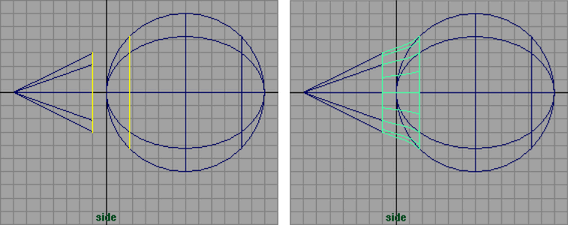
If you edit the surfaces that provided the input curves for the blend, the blend updates automatically.
Troubleshooting a fillet blend surface
If the resulting fillet blend surface is twisted, you can try the following: