


Learning Resources > Tutorials > Getting Started with Maya > Character Setup > Lesson 3: Cluster and blend
shape deformers >
Creating a target object
for a blend shape
In the next steps, you duplicate the face of the head to create a target object for the blend shape. Later in the lesson, you apply a cluster to the duplicated face (target object) so you can create a smile. The facial expression on the target object is what the original base object will match.
In the Outliner, the face is named baseFace and is indented under head.
 . In
the options window, select Edit > Reset Settings,
turn on World for the Group
Under option, then click the Duplicate Special button.
By grouping the duplicate under the world, you create an object
independent of the original.
. In
the options window, select Edit > Reset Settings,
turn on World for the Group
Under option, then click the Duplicate Special button.
By grouping the duplicate under the world, you create an object
independent of the original.
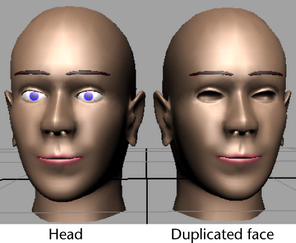
This duplicate face will be modified so it can be used to influence the original.