Lesson 5: Simulating medium resolution meshes
using custom nCloth attribute presets
Now that you used the workflow described in Lessons 3 and 4 to realistically solve the low resolution nCloth meshes, you can use them to quickly prepare a medium resolution version of the nCloth pants and shirt for simulation.
Open the scene file named Character_MedRes.mb. The medium resolution shirt and pant meshes that you use in the lesson have already been converted to nCloth objects, and named nCloth_Shirt_MedResShape and nCloth_Pants_MedResShape. A Point to Surface constraint has already been applied to the pants to constrain them to the character's waist. The medium resolution shirt and pants have already been wrapped, using a wrap deformer, with a new, duplicated high resolution shirt and pants mesh. The low resolution shirt and pants nCloth shirt and nCloth pants objects have been cached and are positioned next to the medium resolution meshes for reference.
Save the nCloth attributes as custom presets
By the end of the Lesson 3 and 4, you generated optimized simulations of your character’s shirt and pants. A number of steps were involved in obtaining the attribute values that drive your the behavior of these nCloth objects, and so you may want to save these optimized attribute values. Using Maya attribute presets, you can save the attribute values of the low resolution nCloth shirt (nCloth_ShirtShape) and nCloth pants (nCloth_PantsShape) objects as custom nCloth presets. Your new nCloth presets can then be applied to other versions of the meshes, including the medium resolution shirt and pants. This workflow allows you to quickly prepare other simulations with geometry that has similar topology to your original objects.
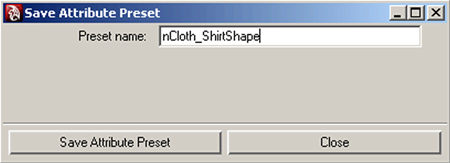
To save the nCloth shirt object’s attributes as a custom nCloth preset
The Save Attribute Preset window appears.
Since you no longer need to simulate the low resolution nCloth shirt and pants, you can disable them from the Nucleus solver. Doing this will increase the simulation speed of your medium resolution nCloth shirt and pants.
Applying the custom nCloth attribute preset to the medium resolution shirt and pants
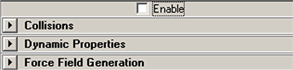
In this section of the lesson, you apply your custom nCloth attribute presets to the medium resolution versions of the nCloth shirt and pants (nCloth_Shirt_MedResShape and nCloth_Pants_MedResShape). After the attribute presets are applied, you can fine tune the simulation by adjusting your objects’ Collisions, Dynamic Properties, and Quality Setting attributes.
To apply your custom nCloth attribute preset to the medium resolution nCloth
 -select the
nCloth_Shirt_MedResShape and nCloth_Pants_MedResShape objects,
cache your simulation, and then play it back.
-select the
nCloth_Shirt_MedResShape and nCloth_Pants_MedResShape objects,
cache your simulation, and then play it back.
In the final section of this lesson, you compare the behavior of the medium resolution nCloth shirt and pant objects with the low resolution nCloth simulation from lessons 3 and 4.
Comparing the final simulations
In final sections of the lesson, you compare your final nCloth simulations. First, you compare the behavior of your medium resolution nCloth shirt and pant objects with your final low resolution shirt and pants simulations. In the last section, you compare all three simulation versions of nCloth (the original high resolution, medium resolution, and low resolution meshes).
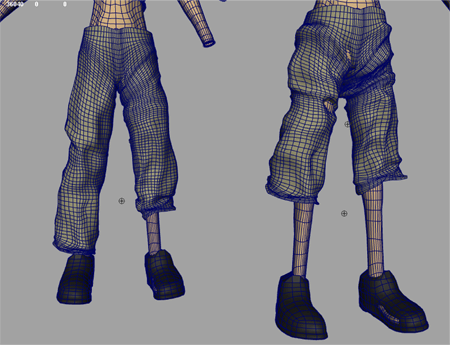
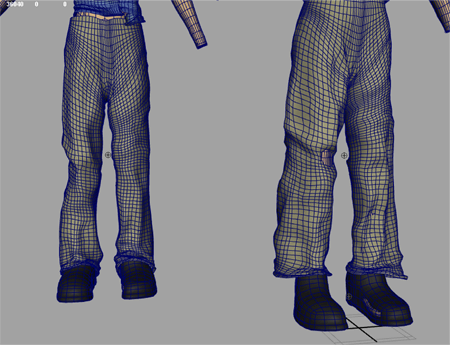
To compare your medium and low resolution simulations
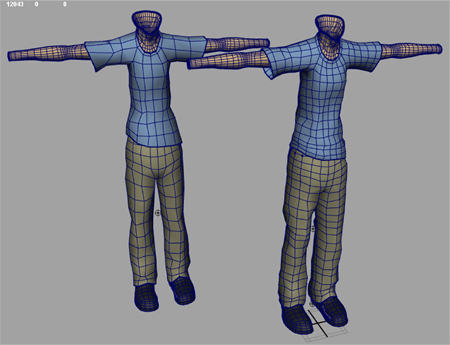
The medium resolution and low resolution nCloth meshes, each wrapped by the same high resolution shirt and pants, now appear in the scene view.
Dolly and tumble the scene while scrubbing the Timeline so that you can closely observe any differences in the behavior of each nCloth object.
When you play back the simulations, you notice the following:
If you are not satisfied with the behavior your medium resolution nCloth shirt and pants, use the same attribute optimizing workflow described in lessons 3 and 4 to adjust the objects’ Collisions, Dynamic Properties, and Quality Settings attributes.
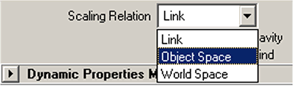
You can remove some of the bounce from the medium resolution nCloth pants by editing the Scaling Relation attribute. When Scaling Relation is set to Link, the nCloth’s dynamic attributes, such as Bend Resistance and Stretch Resistance are calculated relative to the mesh’s scale. When Scaling Relation is set to Object, the dynamic attribute calculations are automatically scaled based the meshes resolution. Low resolution meshes tend to stretch more when Scaling Relation is set to Object, than if Scaling Relation is set Link. High resolution meshes tend to stretch less when Scaling Relation is set to Object, than if Scaling Relation is set Link. For more information, see
Compare all three versions of nCloth
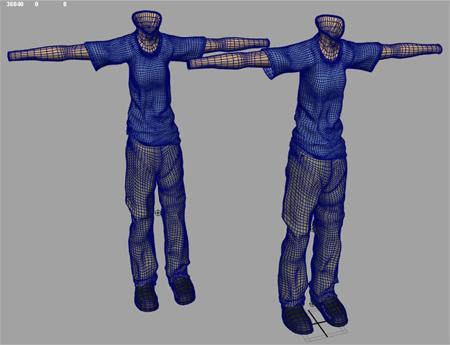
To compare all three versions of nCloth
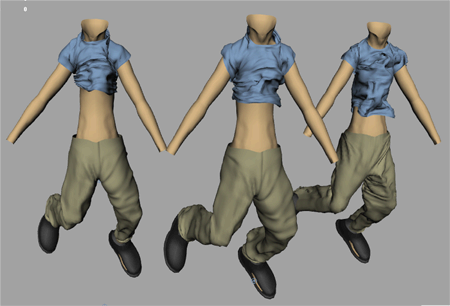
When you compare the three versions of nCloth in the scene, you have to look closely to notice the subtle differences in behavior of each set of objects. Considering the amount of time saved optimizing a low resolution mesh resolution, this workflow provides a viable alternative to simulating highly detailed character clothing. By wrapping your highly detailed mesh on to a lower resolution nCloth instead of simulating it, you can still model details into mesh without worrying about how it simulates.
By saving the low resolution nCloth attributes as a custom preset, you add value to the time invested in optimizing the nCloth simulation. After applying the preset to the medium resolution nCloth, only minimal adjustment was required to obtain a simulation with good results.