Lesson 3: Wrapping the high resolution mesh and
simulating the pants during animation
To ensure the lesson works as described, do these steps before beginning:
For this lesson, you need to access Maya geometry cache files in addition to the lesson scene file.
This file can be found in the AdvancedTechniques directory that you set as your Maya project.
Wrapping the high resolution mesh
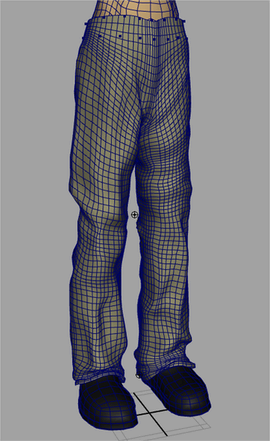
In this section of the lesson, you use a wrap deformer to create an influence object that causes the high resolution to behave like the simulated low resolution mesh. For more information, see What are deformers?.
To wrap the high resolution mesh
 -select the
nCloth pants.
-select the
nCloth pants.
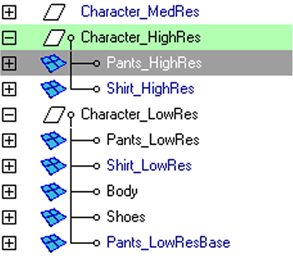
A wrap node appears in the Attribute Editor, and a Pants_LowResBase object appears in the Outliner.
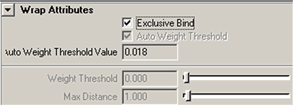
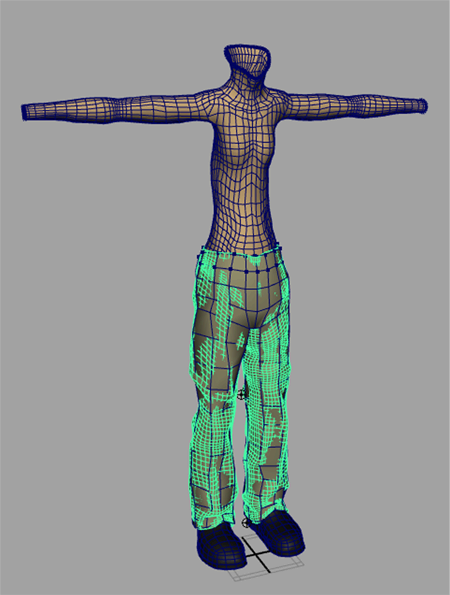
With this turned on, each surface point (vertex) on the Pants_HighRes object is constrained or affected by the Pants_LowRes object vertices. This ensures that the Pants_HighRes object inherits the properties of the simulated nCloth pants.
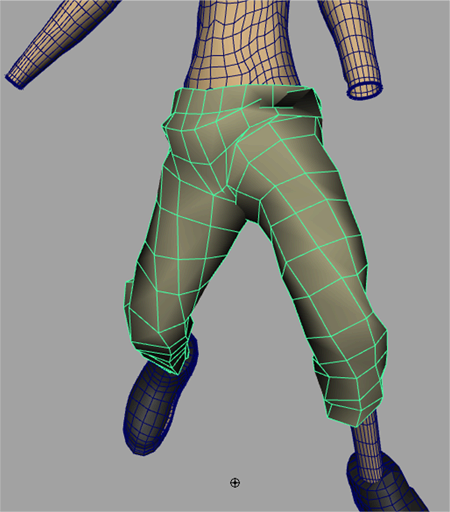
When you play back the simulation, you notice the following:
With the high polygon count of the Pants_HighRes object, one would expect to see the simulation slow down. However, this is not the case, since the Nucleus solver is not simulating any data associated with the Pants_HighRes object. All Nucleus calculations involved in the simulation are still performed on the low resolution nCloth pants. The behavior of the Pants_HighRes object is being influenced by a new instance of the simulated nCloth pants, the Pants_LowResBase object. In the Outliner, you can see that the Pants_LowResBase object has been added to the Character_LowRes group.
The Pants_LowResBase object is the base shape for the deformation of the Pants_HighRes object, which is the wrap influence object. Like all wrap deformers, any difference in position, orientation, or shape between the base shape and the wrap influence object results in a deformation of the surface being influenced by the wrap deformer.
Simulating the nCloth pants on an animated character
In this section of the lesson, you import geometry caches for the nRigid body and nRigid shoe objects, and begin simulating the nCloth pants object while the body and shoes are animated.
To ensure that this section of the lesson works as described, do these steps before beginning:
To import the geometry caches to animate the body and shoe meshes
You can play back the simulation to see how your nCloth pants behave when they are simulated with the animated character. However, it is difficult to closely inspect the simulation without being able to scrub the Timeline. To make it easier to identify problems in the simulation, create a cache for the nCloth pants object. For information about nCaches, see nCaching overview.
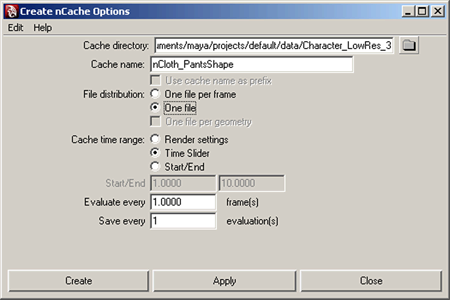
To cache the nCloth pants simulation
 .
.
The Create nCache Options window appears.
Identifying problem areas in the simulated nCloth
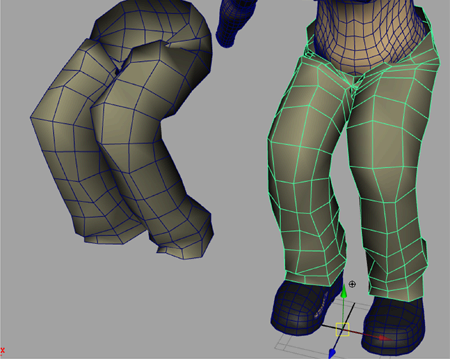
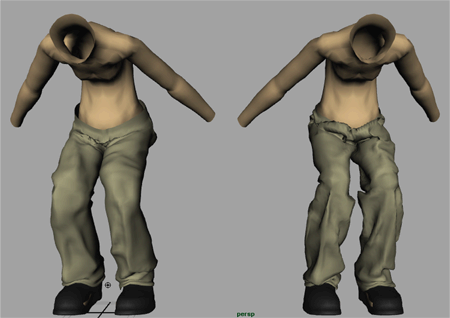
When you play back the simulation, you notice the following problems with the nCloth pants object:

Dolly and tumble the scene while scrubbing the Timeline so that you can closely observe each problem area.
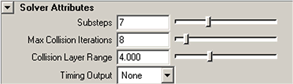
A useful first step to fixing simulation issues is to increase the number of Nucleus solver Substeps and Max Collision Iterations. Substeps specify the number of times per frame that the Maya Nucleus solver calculates everything involved in the simulation, from the collision detection between nCloth and passive collision objects, to the effects of Dynamic Properties attributes and the dynamic constraints. Adjusting Substeps allows you to control how the simulation time is broken up into calculation segments. Simulation quality and collision accuracy generally improve with increasing substeps values. Max Collision Iterations specify the maximum number of collision iterations per frame for this Maya Nucleus solver. A high number of Substeps or Max Collision Iterations may result in a slower solve.
Depending on the complexity of your scene, the default values of 3 Substeps and 4 Max Collision Iterations may work well when simulating a static scene in which only gravity and wind are affecting the nCloth objects. When the nCloth begins to move and self collide, higher Substeps values are required to ensure accurate collision detection, especially on fast-moving objects. Increasing Max Collision Iterations becomes important when the number of nCloth collisions increases, and when dynamic constraints are added to your object. For more information, see Substeps and Max Collision Iterations.
To edit Substeps and Max Collision Iterations
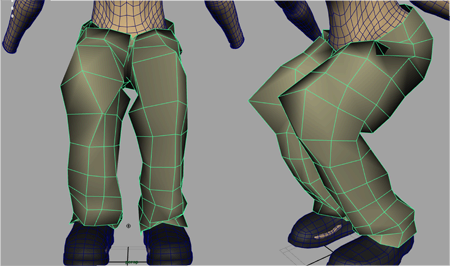
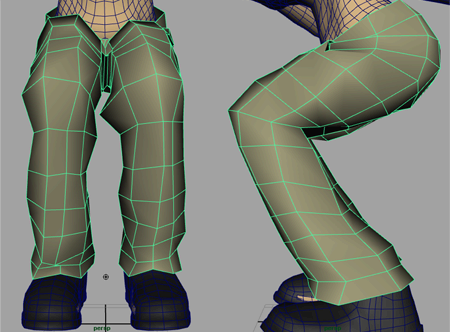
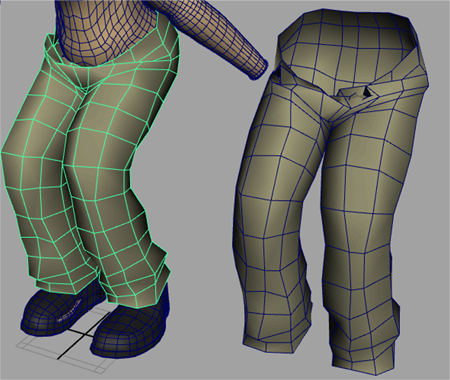
When you play back the simulation, you notice that, starting at frame 1030, the polygon faces in the area of the knees look more realistic. The cloth deformation is now spread over more faces, making it look more realistic. However not all of the simulation problems were resolved. Higher Substeps and Max Collision Iterations may be required.
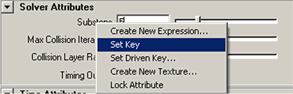
Because increasing Substeps and Max Collision Iterations cause the Nucleus solver to perform more calculations each simulated step, it slows down the simulation. To develop a balance between simulation quality and performance, it is useful to identify the specific areas or frames in the simulation that require higher Substeps and Max Collision Iterations. You can then animate the Substeps and Max Collision Iteration values over the duration of the simulation by setting keyframes.
To set keyframes for Substeps and Max Collision Iterations
| Frame | Substeps | Max Collision Iterations |
|---|---|---|
| 1019 | 5 | 6 |
| 1020 | 7 | 8 |
| 1022 | 9 | 12 |
| 1025 | 15 | 20 |
| 1060 | 9 | 12 |
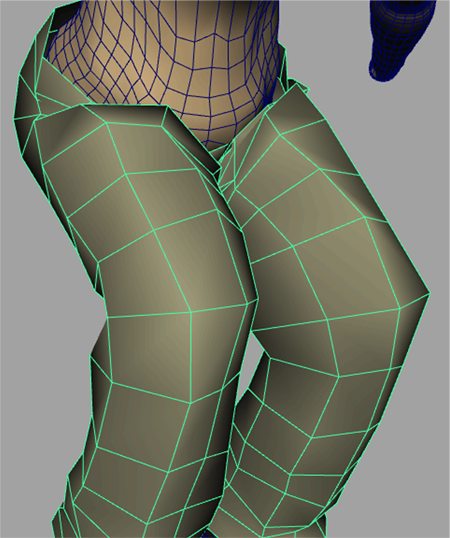
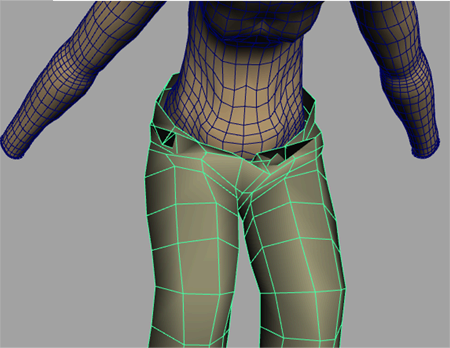
When you play back the cache, you notice that the overall quality of the simulation has improved. However, problem areas, most notably in the waist and in the crotch, can still be observed. For example, at frame 1030, poor self collisions in the area of the crotch are resulting in undesirable polygon deformations. To improve the quality your simulation, you can to start fine tune the Dynamic Properties attributes.
When fine adjusting nCloth attributes, such as Dynamic Properties attributes, it is useful to create a duplicate of the nCloth mesh at different frames of your simulation. When you play back the simulation, you can then compare your currently simulated nCloth against the duplicate mesh and evaluate:
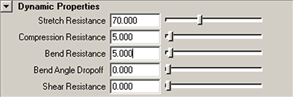
To help solve the problems in the crotch area, you can increase Bend Resistance so that the edges of the polygons better retain their shape. For more information, see Bend Resistance.
To create a duplicate mesh and edit Bend Resistance
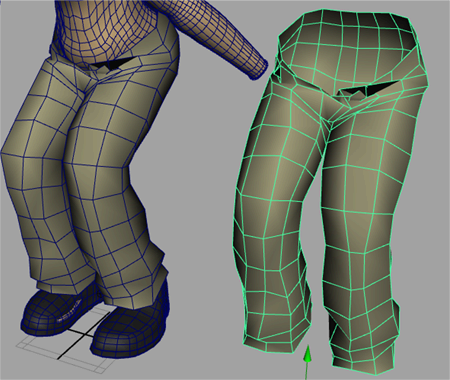
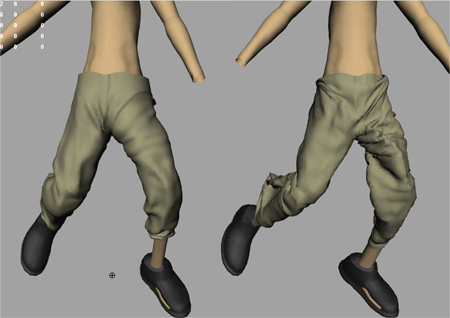
When you play back the simulation, you notice that the cloth is bending more realistically in the crotch area. In the Timeline go to frame 1030, and compare your simulated nCloth to the duplicate mesh. Dolly and tumble the scene so that you can closely observe the problem area.
Editing Quality Settings and resolving interpenetrations
When you play back the simulation and compare the problem areas with duplicate meshes, you notice that the problem areas between frame 1030 and 1035 still persist.
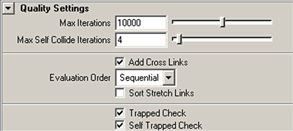
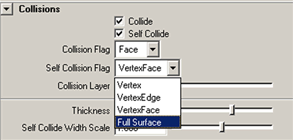
Another way to improve simulation quality is to edit the Self Collision Flag and Quality Settings attributes, which affect the nCloth components' collisions and self collisions. By default, Self Collision Flag is set to VertexFace, which means that the nCloth object's vertices and faces collide with each other. Setting Self Collision Flag to Full Surface sets all of the object components (vertices, edges, and faces) to participate in self collisions. When simulating a low resolution mesh, increasing the number of potential self collision areas of the nCloth object is important because of the mesh’s low vertex, edge, and face count. Setting Self Collision Flag to Full Surface on high resolution nCloth meshes increases simulation time. This is less of an issue with low resolution meshes, which makes this alternative much more appealing for iterative simulation tests. For more information, see Collisions.
To edit the Self Collision Flag attribute
After initial fine adjustments to Self Collision attribute, you edit the Quality Settings to improve collisions and self collisions in the simulation. This will resolve any remaining interpenetrations between the nCloth pants object and the nRigid shoes. You can also increase Thickness or create a Thickness Map to improve collision detection.
In the Timeline, go to frame 1033, and compare your simulated nCloth to the duplicate mesh. Dolly and tumble the scene so that you can closely observe the problem area.
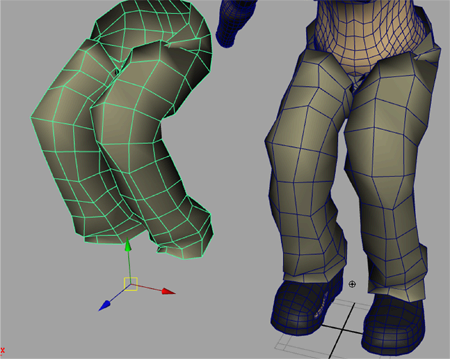
Comparing the wrapped nCloth simulation with the simulated high resolution mesh
To complete the attribute adjustments of the nCloth pants object, you compare the wrapped nCloth simulation to the reference character object (the original simulated high resolution mesh).
To compare the low and high resolution nCloth meshes
When you play back or scrub the simulation, you notice the following:
To force the pant legs of the nCloth pants to simulate in the same way as the pants legs on the reference character object, adjust the Friction attribute.
 -click
the
-click
the