Windows installation


The Maya FBX Plug-in is compatible with the following versions of Microsoft Windows:

To install the Maya FBX Plug-in:

  1. Exit Maya or deactivate fbxmaya.mll in Maya's Plug-in manager before installing.
    NoteIf you install the Maya FBX Plug-in while the fbxmaya.mll driver is in use, the installation cannot occur and an “Error opening file for writing” message displays.
  2. Download the install file from www.autodesk.com/fbx. See Downloading the Maya FBX Plug-in for information on downloading the latest Maya FBX Plug-in.
  3. Double-click the install file to launch the Autodesk Maya FBX Plug-in installer.
  4. Click I accept to accept the terms of the license agreement, and then click Next.

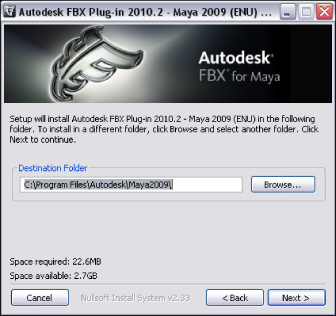
  5. The next window shows the recommended installation location for the plug-in. To specify another location, click Browse to launch the file browser.

  6. Click Next.
  7. The next window shows the recommended installation location for the plug-in documentation. To specify another location, click Browse to launch the file browser.

  8. Click Install.
  9. A series of dialog boxes appear asking if you would like to keep older versions of the plug-in (if applicable), open the plug-in documentation or view the read me file. Select Yes or No for each of these options.
  10. The Installation completed window appears. Click Close to exit the installer.

The Maya FBX Plug-in is now installed.

Removing the Maya FBX Plug-in from Windows

To remove the Maya FBX Plug-in manually:

  1. In Maya, disable the fbxmaya.mll Loaded and Autoload options in the Plug-in Manager.
  2. Exit Maya.
  3. Delete fbxmaya.mll from the Maya<ver>\bin\plugins directory, where <ver> is the version of Maya you have installed.