Opening the tutorial file (optional)
If you successfully completed Part 2, proceed to the next step: An overview of lights used in Alias below.
If you were not successful in part 2, open the file called Render_Basics_part3.wire, located in the wire directory of the CourseWare project. This file contains the completed model from Part 2.

Watch Part 3 of the tutorial.
An overview of lights used in Alias
Lights illuminate objects. If your scene contains no lights, it will render entirely black.
There are different types of lights you can use:
For most of your scenes, you will use one Ambient light and either a Directional light or Spotlight for the main lighting effects. Additional lights may be used occasionally, to create special lighting effects or to fill in dark areas.
When you choose WindowDisplay > Hardware Shade  , a set of default lights
are automatically created to light your scene.
, a set of default lights
are automatically created to light your scene.
The default lights are one Ambient and one Directional light.
When you create lights, they are listed in the Multi-lister.

If you double-click a light icon in the Multi-lister, you open the Light editor. This is where you can set and edit the light parameters such as Intensity and Color.

Lights in the Modeling Windows
Lights are also shown in the modeling windows. This allows them to be positioned and rotated, so that lighting and shadows can be accurately controlled.

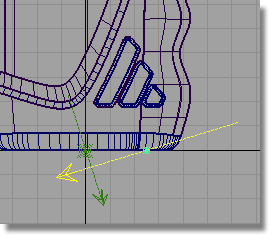
The lights are shown as green symbols (yellow when selected), a different one for each type of light.

The light symbols can be toggled on and off using the Show panel on each window pane.
The shadows a light casts can be used to help compose the scene.
In hardware shade, a virtual Ground plane can be enabled, which allows shadows to be cast. You can choose to cast these shadows from one of your lights, or from some preset lighting options.
In Software rendering
(Render > Render  ), shadows will be accurately
calculated as the light falls on the geometry. So, for example,
you will need to create a floor surface for shadows to be cast onto
a floor.
), shadows will be accurately
calculated as the light falls on the geometry. So, for example,
you will need to create a floor surface for shadows to be cast onto
a floor.
Now, you will apply these concepts to the lighting in your scene.
The initial Hardware Shade settings use a preset lighting option, which only gives you limited control over lighting in the scene.
Instead, you will use the default lights listed in the Multi-lister to light the scene. This will give you complete freedom to adjust the lights and shadows.
First, you will modify the Hardware Shade options to display the effects of the default lights in the scene.
❒ to open the option window.
In the Light source option of the Settings, choose ALL LIGHTS.

The lighting on your model changes, showing the effect of the Default lights in the Multi-lister.
In Enable Environment Effects, turn on Ground Plane.
Click Shade on.

Next, you will display the shadows cast by the lights, so you can design the lighting for your scene.
First, you will enable the ‘virtual ground plane’ in the Environment shader. This is an invisible floor plane that catches the shadows, but does not appear rendered in the scene.


Now, you will rotate the Directional light to modify the shadow direction.
 or F9 to
show all four windows.
or F9 to
show all four windows.
In the Top window, the two lights are shown, but are partly hidden by the model.

The two default lights are shown as green symbols.
 and select the Directional
Light.
and select the Directional
Light.
 to rotate the light in the
z-axis.
to rotate the light in the
z-axis.
Observe the effect on the shadow in the perspective view, and position the shadow so that it falls to the right side of the bottles. This shadow position helps to emphasize the design of the finger grip.

Now that you have changed the light to create an interesting shadow, the lighting on the bottles has changed.
You will now create another light to fill in the dark areas.
 .
.

 to rotate the light in the
y-axis.
to rotate the light in the
y-axis.

The bottles may be over-lit, as the new light has an Intensity of 1. Now, you will modify the second light using the Multi-lister.

The new light is shown in the Multi-lister.
Open the Common Parameters section, and reduce the intensity to around 0.5.


