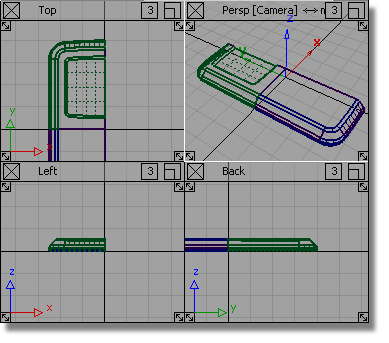
For most symmetrical designs, it is helpful to build the geometry centrally, around the origin. This will let you use the mirroring tools to duplicate geometry.
So, you will build the Navigation Key (and the control buttons in the next section) at the origin, and later move them into the correct location on the front casing.
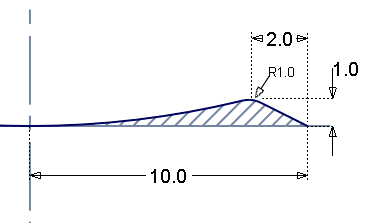
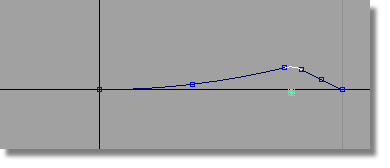
A cross-section of the Navigation Key is shown below. Only the part of the key that will be seen above the casing will be built.

The dimensions for the Navigation Key profile are shown below. This will be revolved to create the button surfaces.
Opening the tutorial file (optional)
If you successfully completed Part 4, proceed to the next step: Navigation Key Curves below.
If you were not successful in part 4, open the file called MP3Player_part5.wire, located in the wire directory of the CourseWare project. This file contains the completed model from Part 4.

Watch Part 5 of the tutorial.
You will create the cross-section profile of the Navigation key using Keypoint curves, and then Revolve them to create the surfaces.
 to create a layer for the
central navigation key. Change the layer name to NaviKey.
to create a layer for the
central navigation key. Change the layer name to NaviKey.
Maximize the Left window.
First you will create a construction line to specify the tangency for the center of the button.
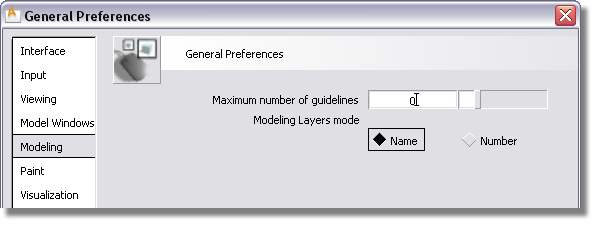
 ❒ to open the option window. In the Modeling section,
choose zero for the Maximum Number of Guidelines. This
prevents any guidelines from being created.
❒ to open the option window. In the Modeling section,
choose zero for the Maximum Number of Guidelines. This
prevents any guidelines from being created.
 and use
  (the
(the  (Windows) or
  (Mac) key) to place the
start point at the origin.
(Mac) key) to place the
start point at the origin.
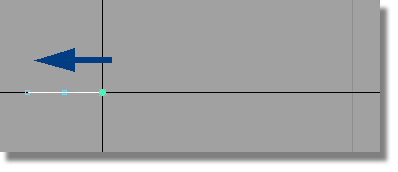
Use the  to place the second point
of the line horizontally to the left of the origin. The length of
the line isn’t important, as it will only be used to help create
a tangent arc.
to place the second point
of the line horizontally to the left of the origin. The length of
the line isn’t important, as it will only be used to help create
a tangent arc.
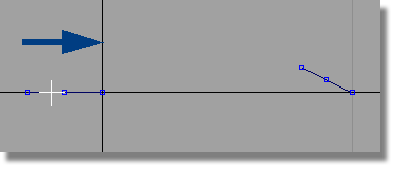
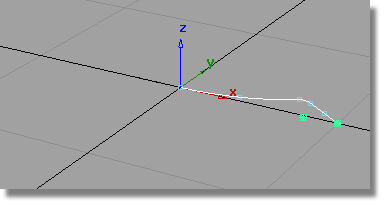
Now you will draw the line for the outer chamfered edge.
 , then Keypoint Curve Tools > Lines > Line again. When prompted to
enter the start point of the line, use ( (Windows) or (Mac) key) to place the
start of the line at the grid point at 10 mm in the X direction.
, then Keypoint Curve Tools > Lines > Line again. When prompted to
enter the start point of the line, use ( (Windows) or (Mac) key) to place the
start of the line at the grid point at 10 mm in the X direction.
When prompted to place the end point of the line, type in R-2,0,1.

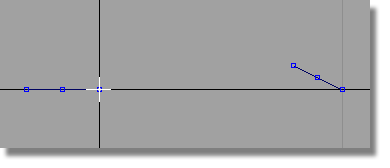
Now you will create an arc for the center of the button.
 . You are prompted to
Select curve at location to make arc tangent to.
Click the first line, and without releasing the mouse button drag the start of the arc to the end of the line at the origin.
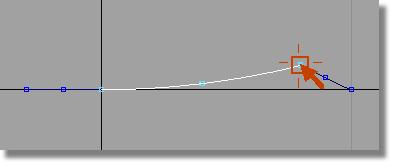
You are prompted to enter the end point of the
arc. Use the  (
(  (Windows) or
  (Mac) key) to place the
end point of the arc on the top keypoint of the angled line.
(Mac) key) to place the
end point of the arc on the top keypoint of the angled line.
 to select it and press the
  key to remove it.
 and double-click to open
the option window.
and double-click to open
the option window.
Change the Radius to 1.87.
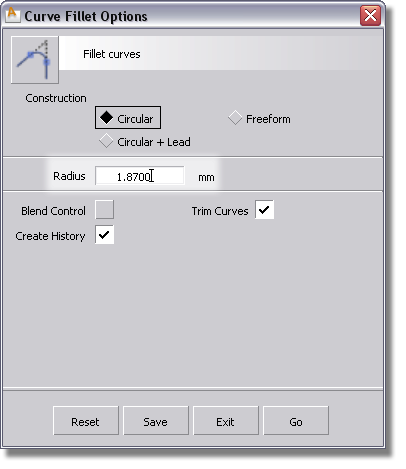
Follow the prompts to create a 1.87-mm radius fillet between the curves.
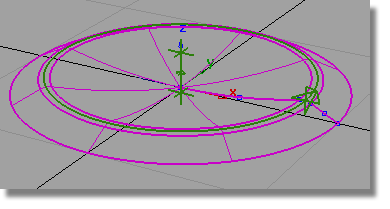
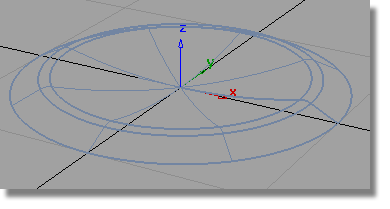
Now you will revolve the profile curves to create the button surfaces.

and select the profile curves.
 and double-click to open
the option window.
and double-click to open
the option window.
Choose the Global option for the Axes. This will allow you to revolve many curves at once, around the origin, not around each curve’s pivot point.

Click the Go button and the surfaces will be revolved.
and the surfaces will automatically
be selected.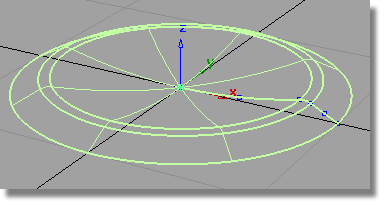
 to group the surfaces together
to create the navigation button.
to group the surfaces together
to create the navigation button.
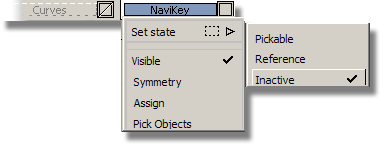
Assign the grouped surfaces to the NaviKey layer, and make it inactive.
Assign the curves to the Curves layer.


