Creates curves-on-surface corresponding to highlight lines produced by light sources.
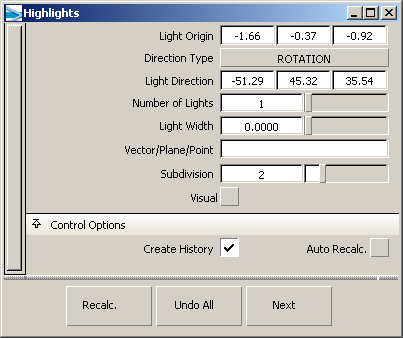
The 3D coordinates of the origin of the first light (center point).
You can set the origin with the highlight manipulator when you use the tool.
Select either Rotation or Vector.
The direction in which the light sources point.
You can set this vector with the highlight manipulator when you use the tool.
The number of lights from which to create curves-on-surface highlights.
If you use more than one light, the multiple lights are always parallel to each other.
The width of the single light source. This option is only available if Number of Lights is 1.
Set the width to 0 to create a single curve-on-surface. Set the width greater than 0 to create two curves-on-surface corresponding to the edges of a wide highlight.
This option has no effect if Visual is turned on.
The spacing between multiple light sources. This option appears when Number of Lights is greater than 1.
The quality of the curve-on-surface projection, from 1 to 6. The higher the value, the more precise the result. Use low values for draft quality, use higher values for final results.
Draw fast polylines instead of curves-on-surface.
These lines are mainly for display purposes. Although you can pick them (to delete them, for example), you cannot use them to create geometry.
Enter the name of a point/vector/plane to position/align the Surface Evaluate manipulator with it. (You can also click a point/vector/plane to align the Surface Evaluate manipulator with it. Or you can select the point/vector/plane and the surface before selecting the tool.)
When Auto Recalc. is off, use this button to update the curves on surface to correspond to the current options.
Undo all the changes made by the tool and return to the original surface.
Finish creating curves-on-surface on the current surface and prompt for a new surface to evaluate.


