You will start by adding a number of audio files to your scene. Next, you’ll display the files as clips on the Dope Sheet track editor and adjust their sequencing to fine-tune the audio playback.
 (Open File), navigate to the animation\prosound folder, and open prosound_start.max.
Add sound files to your scene:
 (Curve Editor (Open)).
 Input Files group, click Add.
The Open dialog automatically opens to the \sounds folder in your active project folder. If the sound files flyby.wav, inflight.wav, start_engine.wav, and takeoff.wav are not there, navigate to the folder where you saved your ProSound tutorial scene files.
The files display as a list in the Input Files group. While it is not mandatory, it can be helpful to place the files in the order in which their sounds are heard in the sound track.


The File Details group also contains options that let you control how the file plays back in the scene. You can, for example, loop the file so it repeats a specified number of times, or enter the first and last frame on which the sound is played. The Active option lets you include or exclude the sound file in the playback.
In this tutorial, however, you will set these and other file playback parameters in a more visual way by using the Dope Sheet.
View the sound tracks in the Curve Editor and Dope Sheet:
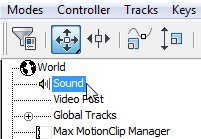
 expand the Sound track to display the master track as well as four additional tracks, each of which represent the sound files
you loaded into the scene.
expand the Sound track to display the master track as well as four additional tracks, each of which represent the sound files
you loaded into the scene. Expand each track. Each time you do so, highlight the track’s Waveform component to display it.
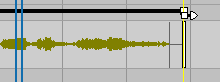
A waveform is an image that represents an audio signal, showing a change in amplitude over time. Soft sounds, like footsteps, produce a narrow pattern, whereas sharp sounds, like the scrape of a chair leg, show a wider pattern. Waveforms help you visualize the events in an audio recording.
Notice how only one track waveform is visible at a time in the Curve Editor. (The master track waveform provides a visual compilation of all tracks.)
In this tutorial, it would be helpful to view all the waveforms together, so you can better adjust the timing of their audio segments. You can view multiple waveforms from the Dope Sheet.
Dope Sheet.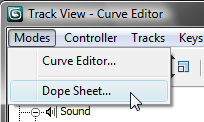

The first, second, and fourth sound tracks were recorded in mono and show a single waveform. The third sound track, flyby.wav, was recorded in stereo and displays two waveforms, one for its left and another for its right channel.
 Play the animation to hear the sound files.
The segments overlap and produce a jumbled sound. You need to adjust the timing so each plays back at a more logical place in the animation.
Synchronize the audio with the animation:
 (Edit Ranges).

You need to reposition the start_engine segment to coincide with the part in the scene animation where the biplane propeller starts to turn.


The plane starts to move down the runway at frame 160. This is where you want to place the start of the takeoff.wav audio segment.

As the plane begins to taxi down the runway it would be a good idea to prolong the start_engine audio segment, to simulate a sputtering takeoff.
You could prolong the segment by going back to the ProSound dialog and in the File Details group, set Loops to repeat the segment as many times as needed. The next step shows you a different method.
As you drag, the audio segment is repeated. You can drag for as many repetitions, or loops, as you like.
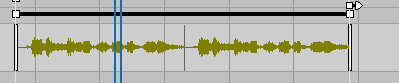
The end of each repetition is indicated by a vertical bar, as shown in the next illustration.


The waveform should peak at or around frame 435, when the biplane passes directly overhead.
 Replay the animation to hear how all the audio segments fit together.
Try scrubbing sounds in reverse:
By default, the audio plays forward as you play the animation forward: There is no audio when you scrub animation in reverse.
Playback group, turn on Permit Backwards Scrubbing.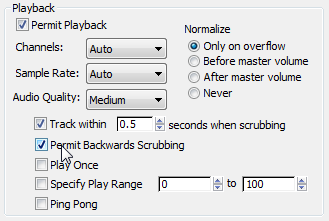
You can compare your work with a finished version of the scene by opening prosound_completed.max.
In this tutorial, you learned how to add multiple audio files to your scene and mix them in the Dope Sheet editor for playback during an animation.


 Stop the playback.