3ds Max uses some special user interface controls, which are described in this topic.
3ds Max uses several different types of right-click menus.
For object editing and ActiveShade control, you use the quad menu. Commands on the quad menu vary depending on the kind of object you are editing and the mode you are in.
Each viewport has three labels that are menus you can access by either clicking or right-clicking. These let you change viewport display cettings, choose the point-of-view to display, how to shade the viewport, and so on. See Viewport Label Menus.
Also, the command panel and the Material Editor have right-click menus that let you manage rollouts and navigate the panel quickly. And most other windows, including Schematic View and Track View, have right-click menus that provide fast access to commonly used functions.
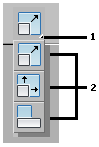
1. Flyout arrow
2. Flyout buttons
A flyout is similar to a menu, except that its items are buttons. A flyout button is indicated by a small arrow in the lower-right corner. To display the flyout, click and hold the button for a moment, then choose a button by dragging the cursor to it and then releasing the mouse button.
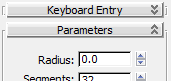
A rollout is an area on command panels and dialogs that you can expand (roll out) or collapse (roll in) to manage screen space. In the preceding illustration, the Keyboard Entry rollout is collapsed, as indicated by the downward-pointing arrows (or + sign), and the Parameters rollout is expanded, as indicated by the upward-pointing arrows (or − sign).
Sometimes a command panel or dialog is not large enough to display all of its rollouts. In this case, a pan ("hand") cursor appears over the inactive parts of the panel. You can scroll command panels and dialogs vertically, and you can scroll a toolbar along its major axis.
You can scroll a toolbar only when some tool buttons are not visible. This typically occurs when 3ds Max window is smaller than full screen.
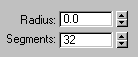
A spinner is a mouse-based control for numeric fields. You can click or drag the spinner arrows to change the value in the field.
To change a value using a spinner, do any of the following:
Numerical Expression Evaluator
While a numeric field is active, you can display a calculator called the Numerical Expression Evaluator. To display the calculator, press Ctrl+N.
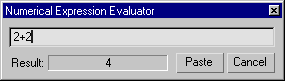
The expression you enter is evaluated, and its result is displayed in the Result field. Click Paste to replace the field value with the result of the calculation. Click Cancel to exit the Expression Evaluator.
The expressions you can enter are described in Expression Techniques. You can't use variables in the Expression Evaluator, but you can enter the constants pi (circular ratio), e (natural logarithm base), and TPS (ticks per second). These constants are case-sensitive: the Expression Evaluator does not recognize PI, E, or tps.
You can also enter a vector expression or an Expression Controller function call, but the result of the expression or function must be a scalar value. Otherwise, the Expression Evaluator won't evaluate it.
You can change a numeric value by a relative offset by highlighting the contents of a numeric field (not in the Numerical Expression Evaluator) and typing R or r followed by the offset amount.
For example, a Radius field shows 70 and you highlight it:
The user interface uses color cues to remind you what state 3ds Max is in.
You can exit a functional mode by clicking another modal button. Other exit methods supported by some buttons include right-clicking in a viewport, or clicking the modal button a second time.
You can easily undo changes you make to your scene and your viewports. There are separate Undo buffers for both the scene objects and each viewport.
Use the Quick Access toolbar Undo and Redo buttons or the Edit menu  Undo and Redo commands to reverse the effects of most scene operations. You can also use Ctrl+Z for Undo and
Ctrl+Y
for Redo. Most things you do in 3ds Max can be undone.
Undo and Redo commands to reverse the effects of most scene operations. You can also use Ctrl+Z for Undo and
Ctrl+Y
for Redo. Most things you do in 3ds Max can be undone.
Use the Views menu Undo and Redo commands to reverse the effects of most viewport operations, such as zooming and panning. You can also use Shift+Z for Undo View Change and
Shift+Y
for Redo View Change.
You can also undo actions by using the Hold and Fetch commands on the Edit menu. Choose Edit menu Hold to save a copy of your scene in a temporary file. Then choose Edit menu Fetch to discard your current scene and revert to the held scene at any time.


