Because of the variety of geometry and different situations that can arise, normal bump maps sometimes give unexpected results. Usually there is a workaround for the problem, or more than one. This topic describes some situations that can arise, and ways to correct them.
Parallel Projection Loses Detail
If the projection cage is set up so projected rays run parallel to part of the high-resolution geometry, that portion of geometry can be lost in the normal bump map.
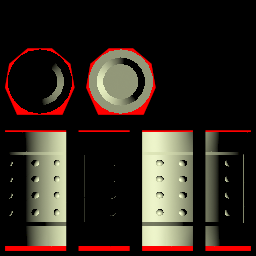
For example, in this scene, the normal bump map is based on a high-resolution cylinder that has indentations at the top and bottom.
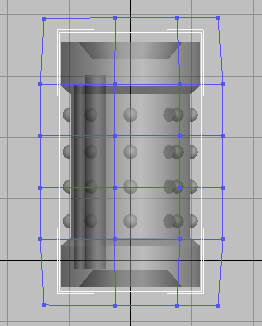
Default cage around high-res cylinder
However, the normal bump map does not show the end indentations.

Indentation is missing from top and bottom of the cylinder's normal bump map.
The reason is that with the default projection cage, the rays parallel the sides of the indentation, and so details are lost.
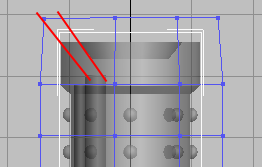
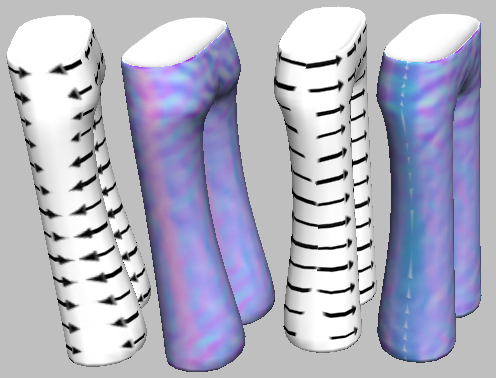
Projection rays (shown in red) parallel the sides of the indentation.
To correct the problem, you can move the end of the cage upward, and scale it inward a little, so the rays don't run so nearly parallel to the side of the indentation.
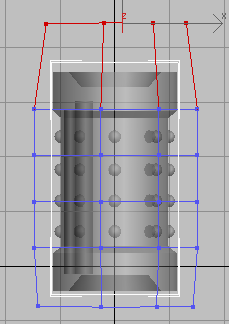
Raising and scaling the upper end of the projection cage.
When the cage is adjusted this way, the indentation appears in the normal bump map.
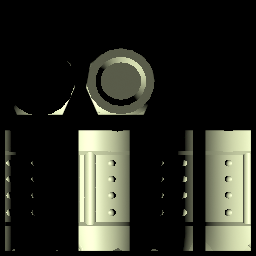
With the corrected cage, the upper indentation appears correctly in the normal bump map.
Breaking low-res vertices causes the indentations to render in the normal bump map. However, projection now misses some areas of the geometry, so the cage needs to be adjusted further.
Flipped Seams in Tangent Space
When you use tangent space for your normal bump map, usually the values used for the tangents are consistent between the hardware shader, renderers, and third-party applications. However, sometimes portions of the geometry are flipped, relative to each other, causing discontinuities when you render or use a hardware shader. Tangent space is the default option for normal bump mapping, and it is the method you should use for objects that both move and deform, such as animated characters. This problem does not arise when you use the other coordinate spaces: world, screen, or local.
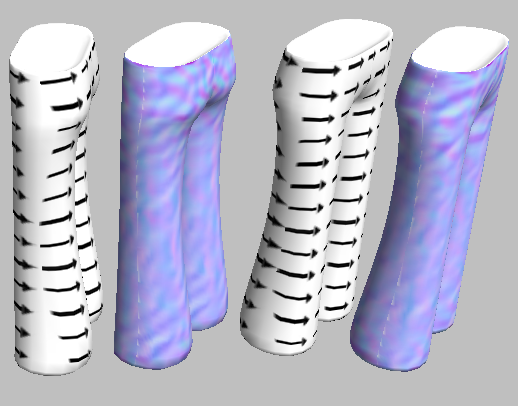
For example, in the following scene, the pants show discontinuities. They are flipped relative to each other, as the arrows show.
Flipped seams in rendering of pants
Left: Left side shows a discontinuous red stripe
Right: Right side shows a discontinuous blue stripe
The arrows show how the maps are misaligned.
When you render a normal bump map, you can generally see flipped areas as showing a “flare” of reddish color to the right, and of bluish color to the left.
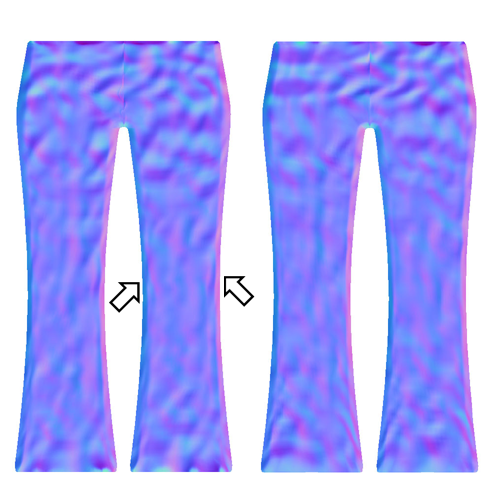
Uncorrected normal bump map shows blue and red “flares.”
The solution is to use the UVW Unwrap modifier's Flip Horizontal command for those sub-object selections that show flaring, or an excess of red areas.
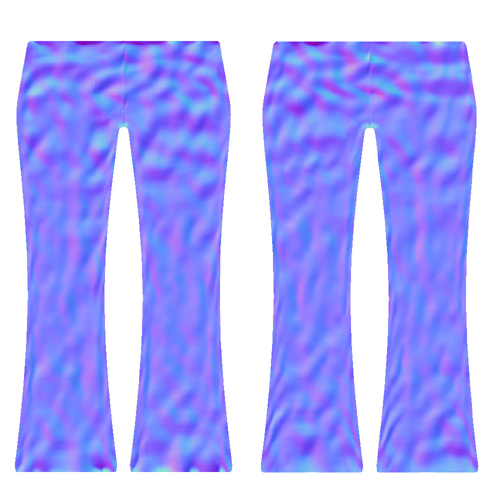
Normal bump maps corrected using Flip Horizontal
Red and blue are more evenly distributed, with blue predominating.
With the maps corrected, the full rendering, whether with 3ds Max or a hardware renderer, looks better.
Corrected normal maps render more smoothly, without discontinuity.
The arrows show how the maps are correctly aligned to wrap around the pant legs.
Noise when Rendering a Normal Bump Map with the mental ray Renderer
If you use the mental ray renderer to render a normal bump map, and the model has overlapping faces (for example, where the low-resolution and high-resolution objects overlap in space), then the normal bump map can show noise where the faces overlap.

Red areas show noise from overlapping faces
The workaround is to adjust either the high-res or the low-res object so that faces are not coincident. One way to do so is to use a Push modifier. After you have generated the normal map, you can turn off the Push modifier.
Overlapping UV coordinates can cause rendering errors in Render To Texture. The problem is especially noticeable on objects that have mirrored UVs, or symmetrical mapping. If you are working with a character or other model that has mirrored UVs, we recommend that you follow this procedure:
Edit Normals Modifier Makes Normal Bump Mapping Incorrect
Don't apply an Edit Normals modifier to the low-res object. Normal bump projection relies on the low-res object having standard normals, and altering them causes normal bump maps to have unpredictable results.


