The Camera Tracker utility's Motion Trackers rollout sets up and controls the image feature trackers. All the trackers created are listed here: showing enable check mark, tracker number, associated scene point object name, and active frame range. To select a tracker, click in the list. Provides controls for subpixel tracking as well.
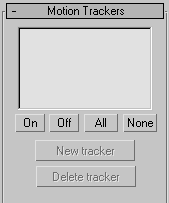
Creates a new movie feature tracker. This places a feature tracker gizmo in the center of the Movie window and a new entry in the tracker list. The new tracker takes on the parameters currently displayed under Tracker Setup. You can change these parameters after you create the tracker, but it’s often useful to set the Max Move Per Frame parameter prior to creating the new tracker as this automatically establishes an initial search bound for the tracker gizmo.
Sets up the parameters for the currently selected tracker. Any tracker you create will take its initial parameters from the current values in this group.

Associates a tracker with a scene point object that corresponds to the image feature in the Movie window. Pressing this button puts 3ds Maxinto standard object picking mode. When you’ve selected the object, the entry in the tracker list and the text in the button change to the name of the selected object. You can change the connected object at any time by pressing this button.
It’s recommended that you use point or CamPoint helper objects, although you can use any 3ds Max object. The tracker uses the pivot point of the selected object as the correlation reference point during the match computation.
When you set up a tracking project, you can make the tracker save the setup in a .mot settings file. The association between tracker and scene point object that you set up here is saved as a scene object name. If you reload the movie in the tracker, the object association is reestablished using the object's name. This means you must be careful to name the point objects uniquely, otherwise you might establish incorrect associations. Further, you must load the working scene in 3ds Max before opening the movie in the camera tracker utility, so the named objects can be found. If you happen to open the movie first, the object names in the Tracker list will all read "<none>". Simply reopen the movie in the tracker and it will establish the connections correctly.
Sets the camera matching priority separately for each tracker. Use this to improve the match accuracy for features close to where a computer graphics generated element will be inserted. It helps to minimize sliding and jitter in that part of the scene.
The match-move algorithm works by adjusting the camera to minimize the error between the feature objects seen through the camera and their associated feature points in the movie plate. With all weights set to 1, the algorithm randomly distributes the error between all the object projections and their tracking features. If you bump the Match Weight of a tracker, it redistributes the error in favor of that tracker, reducing the distance between that tracker's feature and object projection, while possibly increasing the error in other trackers. If you bump weights on two or more features, the locking may progressively lessen, since the algorithm distributes the improvements between the high-weight trackers. Use weights of two to six to get a good lock.
Sets the maximum number of pixels that the tracked feature moves from frame-to-frame over the entire tracking range and establishes an initial motion search bounds box for newly created trackers. You can also set this dynamically by adjusting the motion search bounds box directly in the Movie window.
You can make the tracker identify possible tracking errors and you can use this during a manual tracking review and during actual tracking to correct errors. Typical sources of error include frame-to-frame jumps greater than the search bounds, image contrast changes, or a feature changing shape over a sequence of frames, such as a corner might if the camera moves by it. The error detector is controlled by measurement thresholds set in the Error Thresholds rollout.
When you place a gizmo on some frame, a keyframe is created and a new target feature image is sampled at that frame for searching in subsequent frames. Turning on Resample On Error causes the tracker to detect errors during tracking. If one is found, it backs up to the last good frame and places a new keyframe there causing a new target feature image to be sampled at that frame and continues tracking from that frame.
Usually, an image feature won’t move an integral number of pixels from frame-to-frame. With pixel-level tracking, however, the nearest estimate for a feature center is always at a pixel boundary. This can lead to camera match errors. With subpixel tracking you can zoom in on a feature and position its gizmo within a pixel. This makes the tracker attempt to track at that resolution by up-sampling the target image and search bounds, thereby improving match accuracy.
You can turn on subpixel tracking selectively for each tracker by choosing a level in the Subpixel Tracking drop-down menu on the Motion Trackers rollout. This defines the resolution at which feature tracking is performed in the tracker up to 1/32 of a pixel.
Two things happen when you select a subpixel level:
When manually positioning gizmos at keyframes, it’s crucial that you zoom in enough so you can place the gizmo in the center of the feature to the degree of accuracy allowed by the selected subpixel level. If you don’t do this, the tracker won’t be able to track the correct center at the selected resolution.
You can also reduce feature tracking times by making the inner feature bounds box in the gizmo as tight as you can while still retaining a couple of pixels worth of surrounding contrast. Search times are proportional to the feature bounds box size.
Tracker Keyframes and Position Data
Any time you manually position a tracker gizmo, such as at the first frame or at some tracking error, you create a special keyframe position. The tracker never attempts to reposition these keyframes, but uses them as start points for the frames that follow them up to the next keyframe. At keyframes, you can adjust the position and the feature or search bounds.
During tracking, the selected feature at a keyframe is sampled and that feature becomes the search target for subsequent frames. Using any adjusted search bounds up until the next keyframe, provides the start point, target feature, and search bounds box for the frames that follow.
The position data for each frame in each gizmo can be one of three possibilities:
All frame positions except the first are initially unknown and will be named as tracking proceeds or gizmos are positioned. When you manually set a keyframe, any previously tracked positions following that keyframe up until the next keyframe are deleted and so become unknown. The Complete Tracking button in the Batch Track rollout searches for unknown positions in the currently enabled trackers and tracks those frames. The Check Status button in the same rollout checks for any currently unknown positions as well as tracking errors. See Batch Track Rollout.


 Utilities panel