Point surfaces are NURBS surfaces whose points are constrained to lie on the surface.
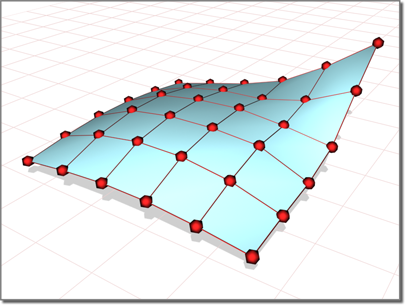
Points shape the surface they lie on.
Because an initial NURBS surface is meant to be edited, the surface creation parameters do not appear on the Modify panel. In this respect, NURBS surface objects are different from other objects. The Modify panel provides other ways to change the values you set in the Create panel.
 Create panel.
 (Geometry) active, choose NURBS Surfaces from the drop-down list.
The creation parameters are the same for both point surfaces and CV surfaces, except that the labels indicate which kind of basic NURBS surface you are creating.
The Keyboard Entry rollout lets you create a point surface by typing. Use the Tab key to move between the controls on this rollout. To click the Create button from the keyboard, press Enter while the button is active.
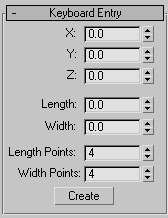
The width of the surface in current 3ds Max units.
On the Modify panel, the Length and Width spinners are no longer available. You can change the length or width of the surface by scaling the surface at the Surface sub-object level. Moving point sub-objects also alters the length and width of the surface.
The number of points along the width of the surface. In other words, the initial number of point rows in the surface. Range=2 to 50. Default=4.
On the Modify panel, the point Length and Width spinners are no longer available. You can change the number of rows and columns by deleting existing rows and columns, or by adding new rows and columns using the Refine controls at the Point sub-object level.
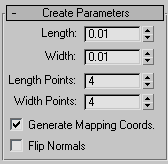
Turn on to reverse the direction of the surface normals.
The Flip Normals control is present on the Modify panel. It is at the Surface sub-object level.
When you modify a point surface, a rollout lets you change its surface approximation settings.


