The Layer Controller dialog provides commands and options related to the Layer controllers in your scene, which the system automatically assigns for you when you enable animation layers on an object.
Unlike other controllers, you cannot assign a Layer controller explicitly to a track; you first need to enable layers via the Animation Layers toolbar or the Controller menu of the Curve Editor.
The Layer controller dialog has similarities to the List controller dialog. You can refer to it for complementary information on some of the options.
Animation Layers and Autodesk VIZ
Although the Animation Layers feature is not available in Autodesk VIZ, VIZ can load and save objects that use this feature without any data loss. The Layer controllers continue to exist in VIZ, and can even be viewed and edited in Track View, although editing of the animation-layer data is not recommended if the objects are to be returned to 3ds Max.
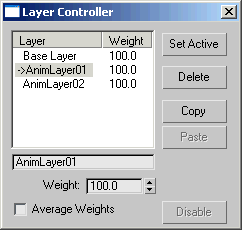
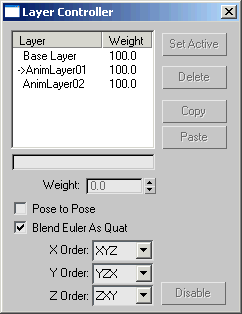
The dialog for a Layer controller depends on whether you’re using it with a position or scale track (left, following), or with a rotation track (right, following).
Determines on which layer your animation keys are set. The active controller is marked with an arrow in the list.
Enables blending among controllers in the list. Available only when you assign a Layer controller to a rotation track. Default=off.
Refer to the List controller for more information on this option.
When on, exposes the rotation axis order for blending the Euler controllers, which can prove useful for controlling gimbal. Available only when you assign a Layer controller to a rotation track. Default=off.
Removes the Layer controller from the select object and reverts the animation keys on the Base Layer to the original controller.
Animation layers let you combine multiple animation tracks on the same object. You can use layers to store your animation experiments as you try them out, turning them on or off to your liking. To enable, add, and control layers, use commands from the Animation Layers toolbar.
This dialog provides global options in regards to collapsing animation layers and isolating the active layer from the rest.
This dialog lets you choose both the name and controller type of the new layer.


 (Curve Editor (Open))
  Motion Panel