This topic contains basic procedures to follow when network rendering with 3ds Max.
The following conditions are assumed:
Special Consideration for Procedures 2 and 3
To use a render farm, you must output a frame sequence in a still-image file format; for example, a series of BMP files. You cannot render animated file formats such as AVI or MOV to multiple systems. You must render animated files to a single system. When rendering to an animated file format, the Use All Servers check box in the Network Job Assignment dialog is unavailable.
Basic Procedure 1: Single-System Network Rendering
This procedure describes usage of network rendering on a single computer. The main advantage to this method over standard rendering is that you can submit multiple rendering jobs for the computer to render. In effect, this lets you perform batch rendering.
 Programs Autodesk Backburner and choose the
  Manager menu item.
This starts Manager and creates the backburner.xml file in the Backburner\Network folder.
When you run Manager for the first time, you will see the Backburner Manager General Properties dialog, shown below.
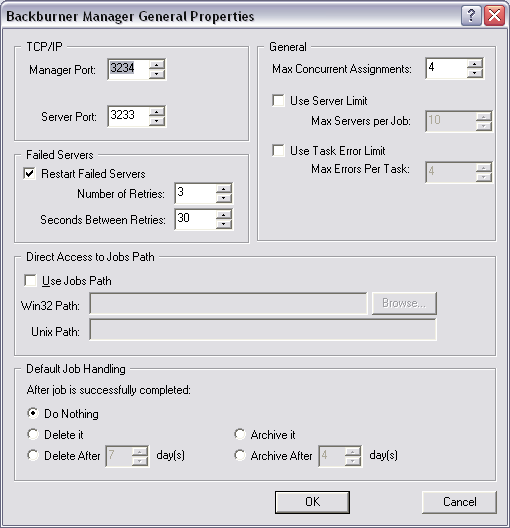
Backburner Manager General Properties dialog.
Programs Autodesk Backburner and choose the  Server menu item.
This starts Server and creates the server data that is stored in the backburner.xml file.
You will see the Backburner Server General Properties dialog, shown below, when you run Server for the first time.
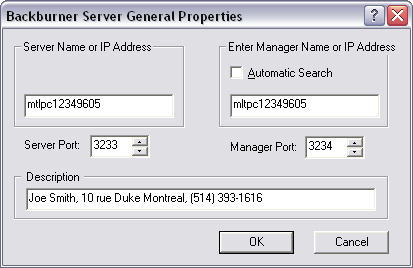
Backburner Server General Properties dialog.
The Backburner Server dialog displays. After a few moments, messages appear in both the Server and Manager windows indicating that the Server has successfully registered with the Manager.
 (Render Setup).
3ds Max opens the Network Job Assignment dialog.
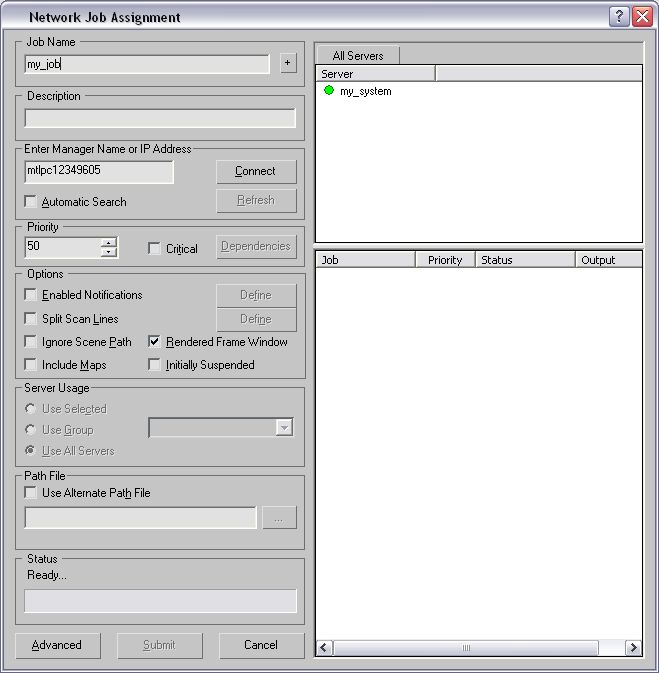
Network Job Assignment dialog showing the server station that is also running Manager.
The name of your computer (that is, the Server) appears in the Server window to the right. It has a green dot next to it meaning that it is a Server system that is ready to start rendering.
The Manager submits the job to the Server, both running only on this system, and the Server begins rendering each still frame or the animation.
You can submit as many jobs as you like. The Manager will queue the jobs up and render them in the order that you submitted them.
Basic Procedure 2: Network Rendering from Server (not Manager)
When rendering across a network, you first assign one machine to be Manager, and then any number of others as Servers. In this procedure, you won't use the Manager as a rendering Server.
Programs Autodesk Backburner and choose the Manager menu item.
This starts Manager and creates the backburner.xml file in the Backburner\Network folder.
When you run Manager for the first time, you will see the Backburner Manager General Properties dialog, shown below; this is normal.
Backburner Manager General Properties dialog.
Programs Autodesk Backburner and choose the Server menu item.
This starts Server and creates the server data that is stored in the backburner.xml file.
You will see the Backburner Server General Properties dialog box, shown below, when you run Server for the first time.
Backburner Server General Properties dialog.
The Backburner Server dialog displays. After a few moments, messages appear in both the Server and Manager windows indicating that the Server has successfully registered with the Manager.
(Render Setup).
The Network Job Assignment dialog appears.
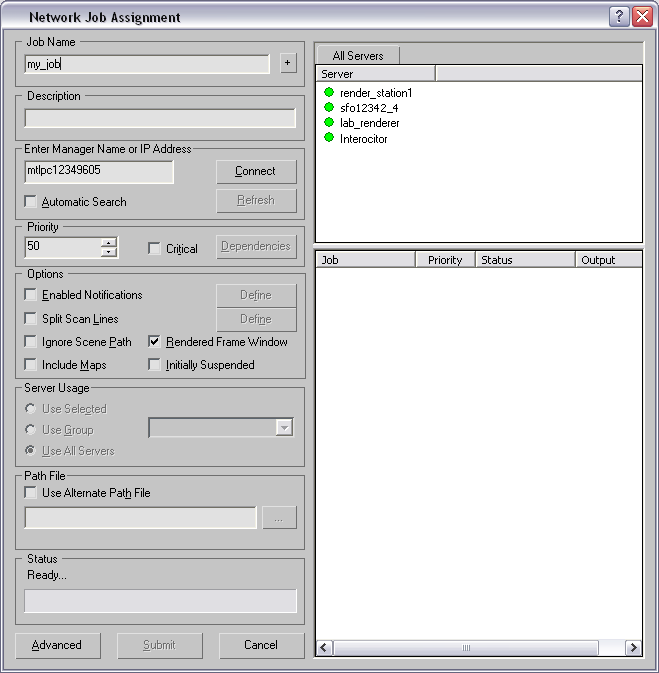
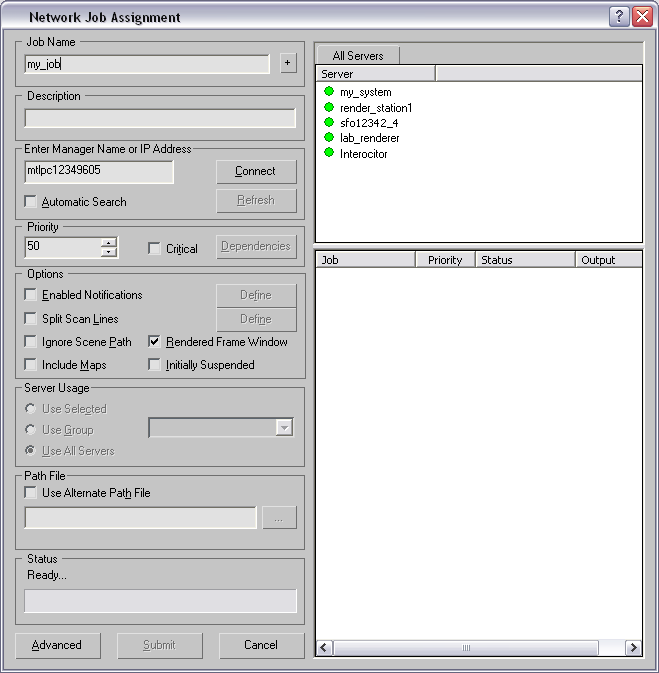
Network Job Assignment dialog showing all the server stations. The manager station is excluded.
The names of all Servers appear in the Server window to the right. Those with green dots next to their names are ready to start rendering.
By default, all the Servers that are listed will take part in the rendering job. To assign a specific Server to render a job, first turn off Use All Servers in the Options group, and then highlight the server(s) that you want to render the job.
The Manager submits the job to the Servers, which begin rendering .
At this point, you can load and submit additional scenes. When the first job is complete, the next job will automatically begin rendering on the Servers.
Basic Procedure 3: Network Rendering from Manager and Servers
When rendering across a network, you first assign one machine to be Manager, and then any number of others as Servers. In this procedure, you'll use the Manager computer as a rendering Server as well.
Programs Autodesk Backburner and choose the Manager menu item.
This starts Manager and creates the backburner.xml file in the Backburner\Network folder.
When you run Manager for the first time, you will see the Backburner Manager General Properties dialog, shown below; this is normal.
Backburner Manager General Properties dialog.
Programs Autodesk Backburner and choose the Server menu item.
This starts Server and creates the server data that is stored in the backburner.xml file.
You will see the Backburner Server General Properties dialog box, shown below, when you run Server for the first time.
Backburner Server General Properties dialog.
The Backburner Server dialog displays. After a few moments, messages appear in both the Server and Manager windows indicating that the Server has successfully registered with the Manager.
(Render Setup).
The Network Job Assignment dialog appears.
Network Job Assignment dialog showing all the server station plus the manager station that is running Server.
The names of all Servers appear in the Server window to the right. Those with green dots next to their names are ready to start rendering.
By default, all the Servers that are listed will take part in the rendering job. To assign a specific Server to render a job, first turn off Use All Servers in the Options group, and then highlight the server that you want to render the job.
The Manager submits the job to the Servers, which begin rendering .
At this point, you can load and submit additional scenes. When the first job is complete, the next job will automatically begin rendering on the Servers.


