Normal Align uses the Normal Align dialog to align two objects based on the direction of the normal of a face or selection on each object. To open the Normal Align dialog, select the object to be aligned, click a face on the object, and then click a face on a second object. Upon releasing the mouse, the Normal Align dialog appears.
If you use Normal Align while a sub-object selection is active, only that selection is aligned. This is useful when aligning sub-object selections of faces, since otherwise there's no valid face normal for the source object.
Normal Align respects smoothing groups and uses the interpolated normal, based on face smoothing. As a result, you can orient the source object face to any part of the target surface, rather than having it snap to face normals.
For an object with no faces (such as helper objects, space warps, particle systems, and atmospheric gizmos), Normal Align uses the Z axis and origin of the object as a normal. Thus, you can use a Point object with Normal Align.
Other alignment tools on the Align flyout are Align, Quick Align ,Place Highlight, Align to Camera, and Align to View.
 (Normal Align), which is on the Align flyout.
 Normal Align.
The Normal Align cursor appears, attached to a pair of cross hairs. A blue arrow at the cursor indicates the current normal.
The source object moves into alignment with the target normal, and the Normal Align dialog appears.
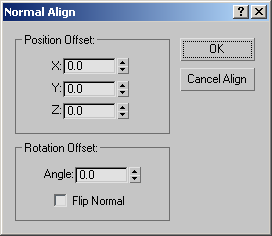
The Normal Align dialog lets you adjust or cancel the current alignment, and contains the following controls:
Lets you rotate the source object about the normal's axis. You see the rotation in real time.
The Cancel button is labeled Cancel Align to make it clear that you're not only canceling the settings in the dialog, but canceling the original transform of the source object.


