A ruled surface is generated from two curve sub-objects. It lets you use curves to design the two opposite borders of a surface.

Using two curves to create a ruled surface
You can animate the parent curves or their CVs to change the ruled surface.
When you create a ruled surface, you can select curves that are not already sub-objects of the active NURBS model. You can select another curve or spline Splines object in the scene. When you select that curve, it attaches to the current object as if you had used the Attach button.
As you move the mouse over a curve that is not part of the active NURBS object, the cursor changes shape to indicate that you can pick the curve, but the curve is not highlighted in blue.
The NURBS object must contain at least two curves.
 (Create Ruled Surface).
You can also click first one curve, then the other.
A dependent surface is generated, using the two curves as the surface's opposite edges. The perpendicular edges are generated automatically.
The Flip Normals control lets you flip the surface normals at creation time. (After creation, you can flip normals using controls on the Surface Common rollout.)
When you turn on the Ruled button, and while a ruled surface sub-object is selected, a rollout with the ruled surface parameters is displayed at the bottom of the Modify panel.
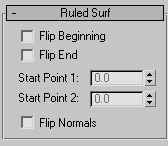
Ruled Surf rollout (creation time)
Flip one of the curve directions used to construct the ruled surface. A ruled surface is created using the directions of the parent curves. If the two parents have opposing directions, the ruled surface can be shaped like a bow tie. To correct the situation, use Flip Beginning or Flip End to construct the ruled surface using a direction opposite the corresponding parent curve's direction. These controls eliminate the need to reverse the curve.
Adjust the position of the start point at the two curves that specify the ruled surface. Adjusting the start points can help eliminate unwanted twists or "buckles" in the surface.
These spinners are disabled if the edges or curves are not closed.
While you're adjusting start points, a dotted blue line is displayed between them, to show the alignment. The surface is not displayed, so it doesn't slow down adjustment. When you release the mouse button, the surface reappears.
Ruled Surf rollout (modification time)

Flip one of the curve directions used to construct the ruled surface. A ruled surface is created using the directions of the parent curves. If the two parents have opposing directions, the ruled surface can be shaped like a bow tie. To correct the situation, use Flip Beginning or Flip End to construct the ruled surface using a direction opposite the corresponding parent curve's direction. These controls eliminate the need to reverse the curve.
Adjust the position of the start point at the two curves that specify the ruled surface. Adjusting the start points can help eliminate unwanted twists or "buckles" in the surface.
These spinners are disabled if the edges or curves are not closed.
While you're adjusting start points, a dotted blue line is displayed between them, to show the alignment. The surface is not displayed, so it doesn't slow down adjustment. When you release the mouse button, the surface reappears.


 Modify panel