


The Layer manager is the interface to the CATLayer system. As you animate with CAT, you this rollout serves as the center of your layering workflow. Here you can add, remove, move layers up and down , adjust and animate global or local layer weightings, and more.
To access the Layer Manager rollout:
 Select any part of the rig.
 Motion panel.


 Setup/Animation Mode Toggle
Switches between CATModes: Animation and Setup.

 Rig Coloring Mode
Sets the coloring mode for the rig: Choose the mode from the flyout. Available only in Animation mode (see preceding).
By default, the rig displays with the colors assigned to the individual bones. In Layer Color mode, however, the overall rig color is determined by the active layer and modified by underlying, blended layers.
 Dope Sheet: Layer Ranges
Opens Track View in Dope Sheet mode to display the ranges for all layers. See Ranges View .
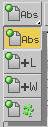 Add Layer
Adds a new layer to the layer stack. Click and hold on the Abs button to open the flyout, drag down to the layer type to add, and release to create the layer. See Layer Types.
 Remove Layer
 Copy Layer
 Paste Layer
Paste the copied layer into the layer stack.
This tool is useful for quickly duplicating layers on one CATRig, or for copying animation from one rig to another in the same scene. It is better than using the animation saving and loading tools because some types of controllers, such as Reaction, cannot be saved using the Clip file saver.
 Collapse Layers
Collapses a time range of your animation to an existing or new layer. See Collapsing Animation Layers .
The layer color. This determines the color of the layer’s transform gizmo (see following), as well as the rig color in Layer Color mode. Click to change the color using the Color Selector dialog.
 Display Layer Transform Gizmo
Creates a transform gizmo for the current layer in the layer stack. Transform gizmos are available for absolute layers only. See Layer Transform Gizmo .
 CATMotion Editor
Opens the CATMotion Editor. Available only when a CATMotion layer is active.
 Key Pose To Layer
Keys the current pose of the character into the selected layer when Auto Key is on or offsets the current pose of the character into the selected layer when Auto Key is off.
 Move Layer Up/Down
These controls determine how the highlighted layer interacts with those before it in the layer stack; that is, those preceding it in the list. Except for Solo and Time Warp, the controls are unavailable for the first layer in the stack.

The extent to which the highlighted layer affects the overall animation. For details, see Blending Between Layers.
To edit the animation curve for a layer’s Global Weight value, click  Curve Editor: Global Weights.
The extent to which animation in the highlighted layer for selected bones affects the overall animation. For details, see Feathered Weighting.
To edit the animation curve for a layer’s Global Weight value, click Curve Editor: Local Weights.
Enables control of the velocity of an animation layer. This value is typically animated. For details, see Layer Time Warps.
To edit the animation curve for a layer’s Time Warp value, click Curve Editor: Time Warps.

