You create and modify synoptic files using the synoptic editor.
To display the synoptic editor
When you display the synoptic editor, it opens with a blank, untitled synoptic view. You can open other synoptic files for editing as described in Managing Synoptic Files.
Overview of Creating and Editing Synoptic Files
This section is a quick overview of creating and editing a synoptic file. Each step is described in more detail in the sections that follow.
To create and edit a synoptic file
Set the synoptic editor options as described in Setting Options. These options control how data is saved and should be set before you do any work.
Import an image file as described in Importing Images.
Define a hotspot as described in Drawing and Modifying Hotspots.
Link the hotspot to a script procedure or another synoptic view as described in Linking Hotspots.
Save the synoptic view as described in Managing Synoptic Files.
The synoptic editor has two options that control how data is stored. You should set these options before you do any other work in the synoptic editor because changing them later may not have any effect.
You can use either VBScript, JScript, or Python to write script procedures that are called by hotspots. You should set the script language before you link any hotspots to procedures. Each synoptic view can use only one script language; you cannot mix scripting languages in the same synoptic view. After you have linked a hotspot to a procedure, you cannot change the script language of that synoptic view.
This sets the language attribute of the <script> element in the resulting synoptic file. For example, for VBScript the following gets set:
	<script language="VBScript">
		...
	</script>
For JavaScript, the following get sets:
	<script language="JScript">
		...
	</script>
For Python, the following get sets:
	<script language="Python">
		...
	</script>
Using Absolute or Relative Paths
The synoptic editor can store the addresses of external files using either absolute or relative paths. Relative paths are useful if you are sharing scenes or moving projects around, while absolute paths might be useful if you always want to refer to a given file in a specific location.
The option you choose controls all paths stored in the synoptic file, including the image used for the image map as well as the locations of secondary synoptic views linked to hotspots. Changing this option affects new paths that are added to the synoptic file afterwards, but does not affect paths added previously.
Before you can define hotspots in the synoptic editor, you must import an image file for the base of the image map. Images are stored as external files that are referenced by an <img> element in the synoptic file.
You can use any image format that can be read by Softimage. You are not limited to the formats that are typically supported by Web browsers (JPEG, PNG, and GIF).
You can import an image in two ways: by capturing a new file directly from the render region or by choosing an existing image file. If you change the image on disk for any reason, you can refresh the synoptic editor to see the updated image.
You can also provide a "highlight" image. When the synoptic view is displayed and the mouse pointer is over a hotspot, Softimage replaces the hotspot area of the base image with the corresponding area of the highlight image. For example, you can use this to light up images of different buttons as the pointer moves over them.
To highlight hotspots when the mouse is over them
Create a second image with the same size as the base image file. For example, it could be a brighter, more saturated version of the original.
Save the highlight image in the same directory as the base image file, using the same name with _h appended. For example, if the base image file is rigSynoptic.pic, the highlight image file should be rigSynoptic_h.pic.
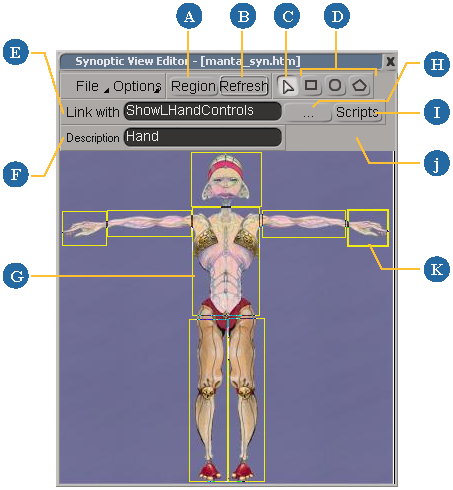
Drawing and Modifying Hotspots
Hotspots are clickable areas in synoptic views. This section describes how to draw hotspots, as well as how to change their shape and position. To specify the action to take when a hotspot is clicked, see Linking Hotspots.
In the synoptic editor, hotspots are displayed with visible borders so that you can see their shape and location. When you use a synoptic view on a scene element, hotspot borders are not displayed; instead, the mouse pointer changes to a hand when it is over a hotspot.
Hotspots are stored as HTML <area> elements in a <map> element in the synoptic file.
You can draw three types of hotspot: rectangles, circles, and arbitrarily shaped polygons.
When defining hotspots, make sure that they do not overlap.
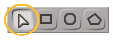
Click the Draw Rectangular Area tool or press the R key.
Click to define one corner of the rectangle, then drag the pointer to define the diagonally opposite corner before releasing the mouse button.
The Draw Rectangular Area tool stays active and you can continue to draw more rectangles.
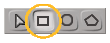
Click the Draw Circular Area tool or press the C key.
Click to define the center of the circle, then drag the pointer to define the radius before releasing the mouse button.
The Draw Circular Area tool stays active and you can continue to draw more circles.
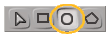
Click the Draw Polygonal Area tool or press the P key.

Continue clicking to define the remaining vertices in order (clockwise or counterclockwise). You must define at least three vertices.
The Draw Polygonal Area tool stays active, and further clicks continue to add vertices to the current hotspot. To start a new polygonal hotspot, click the right mouse button.
The Select Area tool can be used to simply select hotspots as well as to move them. Selected hotspots are displayed with a double-width border.
You do not actually need to activate the Select Area tool. The tool is automatically activated over a hotspot, as indicated by the change in the mouse pointer.
The exception is after drawing at least one vertex with the Draw Polygonal Area tool. In this case, clicking defines a new vertex. To select a different hotspot, you must either right-click to finish drawing the current polygon first or activate the Select Area tool explicitly.
After you have drawn a hotspot, you can still modify its shape simply by dragging.
As with selecting and moving hotspots, you do not need to activate any particular tool. Once again, the exception is after drawing at least one vertex with the Draw Polygonal Area tool : right-click to finish drawing the current polygon first.
After you have drawn a hotspot, you need to define what will happen when someone clicks on it. This can be one of two things:
Linking Hotspots to Secondary Synoptic Views
Linking a hotspot to a secondary synoptic view allows you to use the main synoptic view as an overview, which would open more detailed controls that run script procedures. For example, you could have a synoptic view for an entire character with hotspots that open separate synoptic views with specific controls for the hands, arms, legs, torso, and face.
Linking Hotspots to Script Procedures
Linking a hotspot to a script procedure allows your synoptic view to do something useful.
All the script procedures for a synoptic view are contained in the same <script> element. This means that they are in the same namespace and can share global variables and subprocedures.
You can access the scene element on which the synoptic property is applied, as well as the mouse button and modifiers used, as described in Special Variables in Synoptic Script Procedures.
To link a hotspot to a script procedure
Type a name for a script procedure in the Link with box. For example:
myProc
Click Scripts. The script view is displayed. If you entered a new script name, Softimage automatically creates a template for the procedure. For example, in VBScript:
sub myProc(in_obj,in_mousebutton,in_keymodifier)
end sub
function myProc(in_obj,in_mousebutton,in_keymodifier){
}
Write your script procedure using the template as a starting point.
When you have finished, click Page to return to the image view.


 General