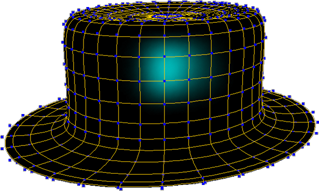
Weight maps let you paint parameter values across the surface of an object. For example, you can use weight maps to vary deformations or filter ICE particle emissions.
Weight maps are properties of point clusters on geometric objects. They associate each point in a cluster with a weight value. Each cluster can have multiple weight maps, so you can modulate different parameters on different operators in different ways.
Each weight map has its own operator stack. When you create a weight map, a WeightMapOp operator sets the base map, which can be constant or one of a variety of gradients. Then when you paint on the weight map, the strokes are added to a WeightPainter operator on top of the WeightMapOp in the stack. Like other elements with operator stacks, you can freeze a weight map to discard its history and simplify your scene data.
Weight maps have certain limitations:
You can apply a weight map on a curve, but you cannot display it or paint on it. You can use the constant or gradient base map generated by the WeightMapOp operator, or set values using an ICE tree (see Weight Maps in ICE).
This section presents a quick overview of the workflow for using weight maps. The sections that follow later in this chapter will fill in the details.
Optionally, select some points or a cluster.
Apply a weight map using Get  Property Weight Map
Press W to activate the Paint tool, then use the mouse to paint on the weight map.
Connect the weight map to drive the value of a parameter — for example the Amplitude of a Push deformation.
You can reselect the weight map and continue to paint on it to modify the effect further.
When you create a weight map, a WeightMapOp operator is applied. This operator creates the base weight map, which can be a constant value or a gradient.
Select the element to which you want to apply a weight map:
If you select a cluster, the weight map will be applied to it.
If you select an object, a cluster will be created for all the points on the object and the weight map will be applied to the cluster.
If you tag (select) points, a cluster will be created and the weight map will be applied to the cluster.
Choose Get Property Weight Map from any toolbar. A weight map is applied and its property editor opens.
To see your weight map while you are setting options, you can either change your view settings as described in the next section or press W to activate the Paint tool and move the mouse pointer over a 3D view.
Set the options you want for your base map on the Weight Map Generator page. For example, if you set the Weight Map Type to Constant and the Base Weight to 0, you start with a blank map for painting weights. You can also choose from a selection of linear and radial gradients, and set other options.
When you create a weight map, it is automatically selected so you can immediately paint on it as described in Painting Weights or apply a deformation as described in Deforming with Parameter Maps.
You can connect a weight map to drive a parameter as described in Connecting Maps.
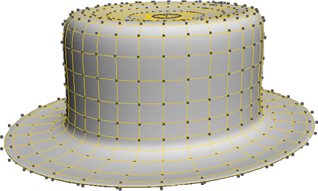
Weight maps are visible in the 3D views when certain display options are on. You can set these options manually using the procedure below.
Note that these display options are also temporarily toggled on when the Paint tool is active and you move the mouse pointer over a 3D view. When this happens, the previous display settings are automatically restored when you exit the Paint tool. You can also turn off Show Property Map in the Brush Properties Property Editor to hide the map except while you are painting a stroke.
To display weight maps in a geometry view
Click on the Display Mode menu, and set it to Constant or Shaded. Constant mode shows the weight maps more clearly than Shaded.
Click the eye icon on the menu bar to make sure that Weight Maps is on.

For other ways of setting this and other display options, see Displaying Types of Elements and Other Data [Viewing and Playback].
To paint weights, you first activate the Paint tool. You can then add weight, remove weight, smooth weights, or change the brush radius, opacity, and other brush properties.
This section provides a quick overview of painting weights on weight maps. Each step is described in more detail in the sections that follow.
Select the weight map. If you omit this step, painting is performed on the last active weight map by default.
Activate the Paint tool by pressing W. For additional ways to activate the Paint tool, see Activating the Paint Tool.
If desired, adjust the brush properties:
Press R and drag the mouse to change the brush radius interactively. You can also set the radius on the weight paint panel. For additional ways to set the radius, see Changing the Brush Radius.
Press E and drag the mouse to change the opacity interactively. The opacity controls how much weight is added with each stamp of the brush.
Set other options in the Brush Properties Property Editor (Ctrl+W).
Click and drag to paint. In normal (additive) paint mode:
To remove weight, either use the right mouse button or press Shift while using the left mouse button.
To smooth weights, press Alt while using the left mouse button.
For more information about painting, see Using Brush-based Tools.
Here are some quick tips to consider when painting weights:
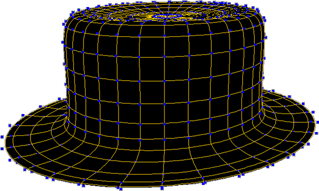
To paint weights on a subdivision surface created with the geometry approximation method, click the eye icon (Show menu) on a 3D view's menu bar and make sure that Polymesh Hulls is on.
To see the weight maps on the hull, make sure that Subdivision Surfaces is off.
When painting, you can increase performance by reducing the object's geometry approximation settings. The Paint tool uses the triangulation of the object to follow its surface. See Applying and Editing Geometry Approximation.
You can set the paint mode and certain other brush properties on the weight paint panel. However, the weight paint panel is designed for use with envelope weights and most of its tools are not useful for weight maps.
You can modify weight-map properties. For example, you can change the name or display color — this is useful if you need to easily distinguish between several weight maps on the same cluster.
Weight maps can be frozen to simplify your scene's data. Freezing collapses the weight map generator (the base constant or gradient map you chose when you created the weight map) together with any strokes you have applied.
After you have frozen a weight map, you can still add new strokes but you cannot change the base map or delete any strokes you performed before freezing.
You can paint weights symmetrically using symmetry maps, an object's local center, or both.
You can apply different symmetry maps on different clusters on your object, allowing you to have different planes of symmetry in different areas.
Choose Get Property Symmetry Map from any toolbar. A property editor opens.
On the Symmetry Map Generator property page, set the Symmetry Plane to the desired value: YZ (X = 0), XZ (Y = 0), or XY (Z = 0).
The symmetry map uses the object's local center and the chosen plane to establish a correspondence between points.
To set the brush's symmetry options
Set the options on the Symmetry Options tab:
Use Local Object Symmetry Plane uses the object's local center and whichever symmetry plane is currently active to determine symmetry. To set the active symmetry plane, right-click on Sym in the Transform panel and choose an option.
Use Symmetry Maps uses any symmetry map applied on the object to determine symmetry.
If both options are on, symmetry maps take precedence. This allows you to symmetry maps wherever they exist and the object's local symmetry plane wherever there are no clusters with symmetry maps.
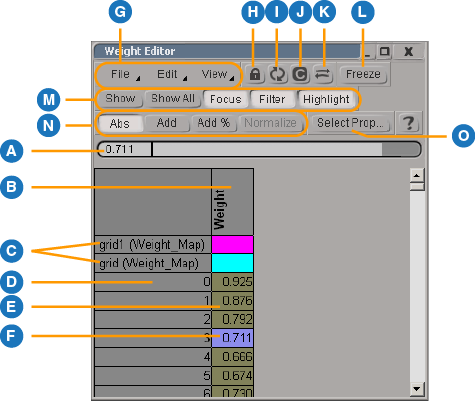
Editing Weight Maps Numerically
You can edit weight maps numerically using the weight editor. The weight editor can be used for both weight maps and vertex colors as well as envelope weights.
Animation Weight Editor or press Ctrl+E.
Editing Weight Maps with the Weight Editor