Load another scene
Note
When you load more than one scene, you cannot save any changes you make. Autodesk recommends you set up all scenes before
continuing.
- Save your scene files.
- Select (or press C).
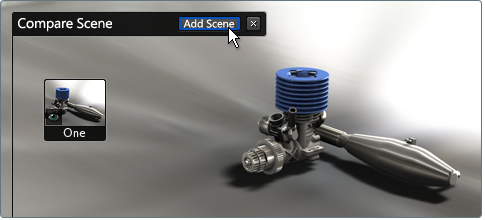
The Compare Scenes interface appears. An icon is shown for the current scene.
- Click .
Note
Alternatively you can drag and drop the new scene file onto the Showcase window. You will be prompted whether you want to
import or compare the scene file (click ).
- Browse to and select the new scene file.
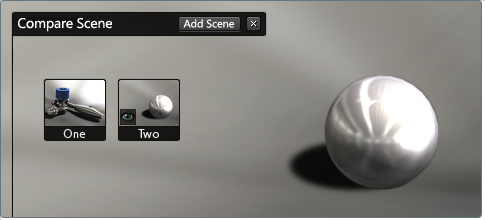
The new scene appears in the Showcase window. Its icon appears in the Compare Scenes interface.
This concept car design is provided by Estech: http://www.estech-design.com.
- To switch between scenes, click the icons in the Compare Scenes interface.
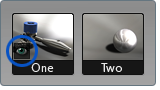
An eye icon indicates which scene is active:
- Use the above instructions to add as many scenes as you need.
Switch between scenes
Either:
- Click on the icons in the Compare Scenes interface.
- Select and select the appropriate navigation option.
Use shots
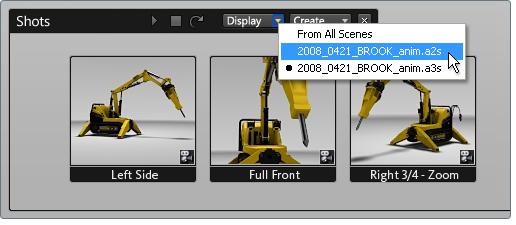
When you load more than one scene, you can switch to the camera angles and motions you have already set up as shots in the
scenes.
- Press T to view the Shots interface.
- From the Display menu in the Shots interface, select the scene for the shots you want to use (or select to see all shots from all loaded scenes).
- Click over a shot to view its camera movement in the current scene.
Exit from the Compare Scenes interface
Select to start a new scene (or to exit the application).
Note
You cannot save any changes you made to any scenes loaded into the Compare Scenes interface.
See Compare scenes side-by-side.