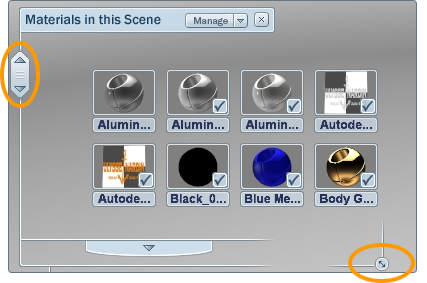
The materials interface
provides a flexible, visual way to see all of the materials in the current
scene and the materials in your libraries. The top section shows
the Materials In This Scene, while
the lower section shows the available Material Libraries.
When library materials are applied to objects in the scene, they
are copied to the Materials In This Scene section. For more information
on working with materials in the scene, see
Work with materials used in the scene.
NoteLibrary materials
cannot be edited after being saved to a library. Any edits to a material
in the scene are only stored with the scene, and will not affect
the library material they may be based on.
Resize
the Materials interface
The Materials interface
can be resized to maximize the view of the materials or maximize the
view of the scene behind it. The relative size of the two main categories
of materials can also be adjusted
- Scroll with the scroll bar on the left
of the interface.
- Click and drag on the “arrows in a circle”
icon at the bottom, right corner of each section of the interface
to dynamically resize the interface proportions and icon arrangement.
NoteThe resize corner
icon will only extend the interface to 60% of the width of your
screen, and will move the split between libraries and in scene materials
to show at least one row of icons in each, or the title areas at
the least.
- Collapse or expand individual material
categories.
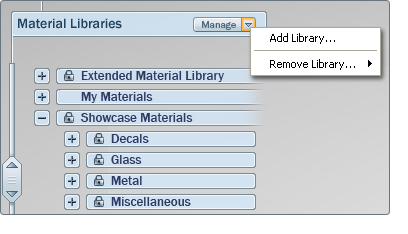
Manage Material Libraries
Custom materials and
frequently used materials can be saved to custom libraries displayed
in the Material Interface.
Add a material library
- Press M to view
the material interface.
- Click the Manage button
at the top of the Material Libraries section of the interface.
- Select Add
LibraryA file browser will appear
asking for a folder location to be the new material library location.
If the target folder is empty, a new library
will be created within it. If the target folder has a material library
description in it, the contents will be added to the new library.
NoteMaterial libraries
can either be local (on the current computer’s hard drive) or networked
(on a shared location in an accessible network).
By default, a user library for materials is
created during installation and named “My Materials.”
Remove a material library
- Press M to view
the material interface.
- Click the Manage button
at the top of the Material Libraries section of the interface.
- Select Remove
library and choose which library to remove.
NoteRemoving a material
library will not delete the material files or folders. It will only
remove the reference to the library in Showcase for this user.
Add a material to
a library
- Press M to view
the material interface.
- Scroll to the material icon you wish
to add, either in the In Scene Materials,
or within another library.
NoteUsing the filters under the Manage button
of the In Scene Materials interface can simplify finding a material
to save.
- Right-click on the material icon in the
interface and select Save to Library.
Choose the library and category where the material
should be saved. If a new library is needed, choose New
Library... then browse to a folder location.
If a new category is needed, choose New
Category...