Before you can begin PTEX painting, you must set the overall resolution required for each base-face of the mesh. You can specify different base-face resolutions for different areas of the model, which means you can allocate the texel budget to areas where higher resolution is most needed, for example around the eyes of a character's face. Mudbox uses the resolution information to create paint layers. For PTEX models, this paint information is stored in one or more PTEX files.
To prepare a model for PTEX painting
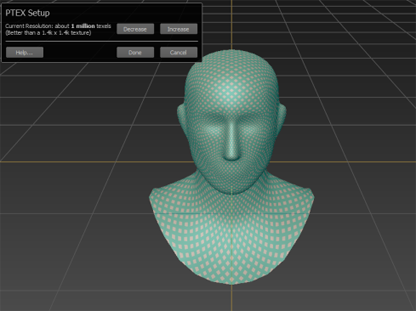
The PTEX Setup window displays, and a green preview texture displays on the mesh.
Depending on your setup, either of the following can also appear.
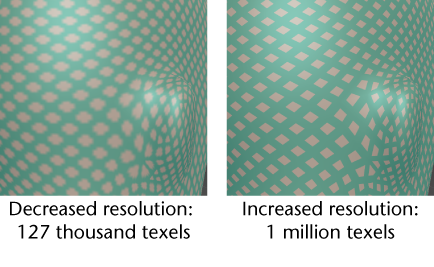
The sample texture displays to make jagged texture edges as visible as possible, and help you to set an appropriate level of resolution.
Increasing the resolution makes the display of the sample texture sharper, while decreasing resolution softens the texture but saves texture memory.
The mesh is now prepared for PTEX painting, and the sample texture is removed.
If you have existing paint layers after step 3, new PTEX paint is applied to the currently active layer. If you have no layers, the Create New Paint Layer window appears. Notice that all file types listed in the Save As drop-down list are now PTEX file types. See also Create a new paint layer.
If you decide to stop using PTEX painting on this model, you can exit PTEX painting by assigning another material to the mesh. PTEX and non-PTEX meshes cannot share the same material.
 Except where otherwise noted, this work is licensed under a Creative Commons Attribution-NonCommercial-ShareAlike 3.0 Unported License


