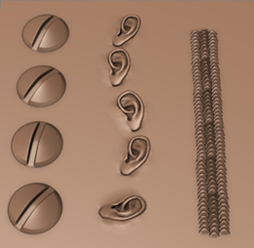
You can easily add detailed sculpt features to a mesh, including undercut or overhanging features, using a vector displacement
map as a stamp or stencil. Creating a library of vector displacement maps that recreate common or repeating features such
as ears, nostrils, or vertebrae lets you sculpt once and efficiently reuse the detail on any mesh. You can also use vector
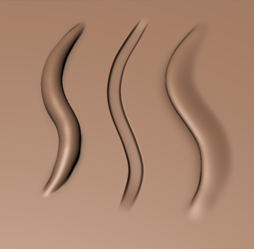
displacement maps to shape the brush to create new effects, like twisting or folding, as you stroke.
To sculpt using a vector displacement map
- Set up and extract a vector displacement map. See Extract a vector displacement map.
For example, you can sculpt a single, detailed vertebrae on a plane, then extract the vector displacement map of that feature
using another basic plane.
- Load the mesh where you want to apply the sculpted detail you have captured with the vector displacement map.
For example, a creature mesh where you want to apply the vertebrae detail to create an entire spine.
- Switch to the , navigate to select the vector displacement map, and click
 .
.
This loads the map image as a stamp on your brush in the .
- Switch back to the .
- (Optional) Create a sculpt layer to store this work.
- In the tool properties, set the tool to 100.
This sets the tool to reproduce the full effect of the vector displacement map.
- Start to drag on the mesh to apply the stamp and assess the effect your stamp creates.
Mudbox reproduces the detail from your vector displacement map on the mesh as you drag. This is the start of an iterative
process in which you adjust the tool parameters to tweak the stamp effect, then reapply.
The settings you use depend on the effect you want to achieve. For example:
| To create distinct, individual reproductions of your original sculpted detail, without overlap...
|
or
|
To shape the brush tip to create new sculpting effects (such as folding, tucking, or twisting) based on your original sculpted
detail...
|
|
|
|
|
| Set the tool and properties to 100.
Set the property high enough to avoid stamp overlap (potentially greater than 100), and set a flat .
|
|
Ensure the tool is set to 100. With Strength at 100, you can keep the default values for most other settings. Keep the default (6.25), (50), and .
|
NoteIf you are using a stylus, you may also want to adjust the settings.
- (Optional) If you created a sculpt layer for your vector displacement map sculpting, you can adjust the of the layer to blend the detail into your existing mesh.
Note
This procedure uses the vector displacement map as a stamp, but you can also apply the map as a stencil.