You can view and edit the properties for a sculpt tool as follows:

The Properties window appears and displays all properties for the selected sculpt tool.
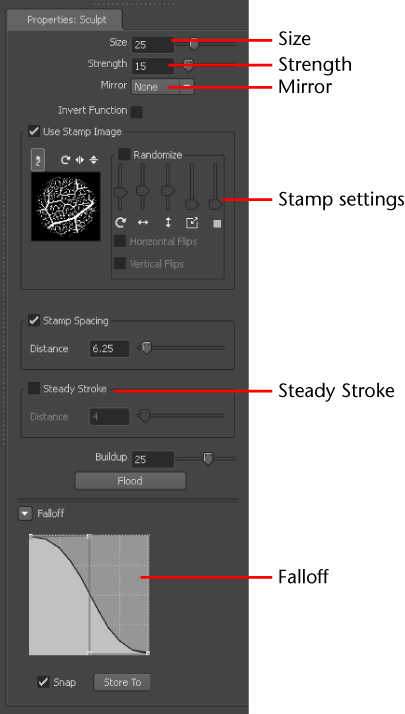
The Size and Strength properties control the radius of the tool cursor and how much influence it has when pushing or pulling vertices on the surface of a model.
The circular outline that appears when the pen/mouse cursor is above a model indicates the brush Size as well as the area that the Falloff occurs within.
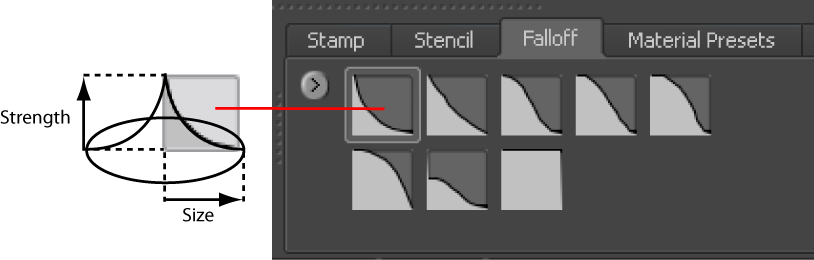
The Falloff property controls the profile (cross-section) of a sculpt tool. The falloff curve determines how the tool’s strength diminishes from the center towards its outer edge.
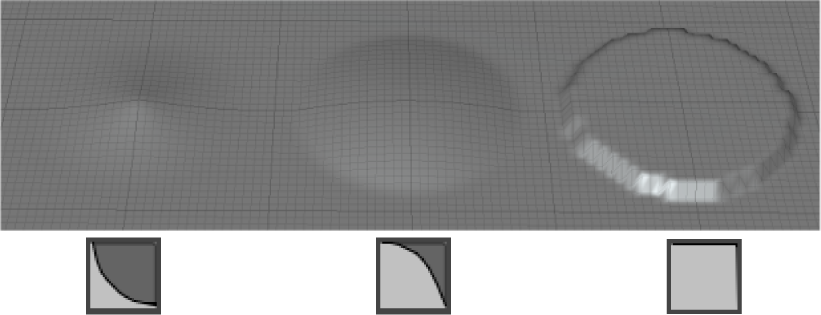
Depending on how you set the falloff, your sculpt strokes can feather off gently, blending smoothly with the surrounding surface, or appear with a sharp edge. These examples show different falloff curves and the resulting sculpt stamp on the surface. The falloff curve is always symmetrical.
You can quickly modify a sculpt tool’s falloff by selecting the Falloff presets from the Falloff tray. The curve you select is immediately assigned to the tool properties.
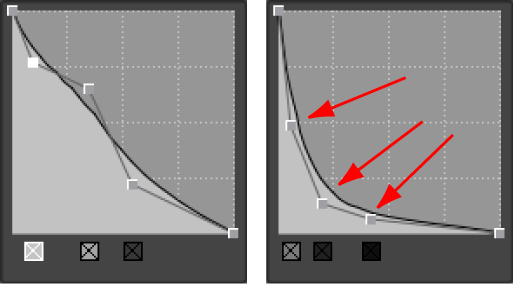
You can edit the shape of falloff curves in the Falloff section of the tool properties. Drag curve points to adjust the shape. Right-click to insert new curve points.
Adjusting pen pressure properties
You can adjust how Mudbox responds to pressure sensitivity from a Wacom tablet and stylus by adjusting the Min Size and Min Strength properties in the Advanced section of the tool properties.
Min Size specifies how small the tool size is when the lightest pressure is applied to the pen. Min Strength specifies how weak the tool strength is when the lightest pressure is applied to the pen.
Adjusting the Min Size and Min Strength properties to their maximum settings makes the pen function without pressure sensitivity, similar to a mouse. This can be useful if you need to repeatedly sculpt features at exactly the same height or width on your model.
Steady Stroke is a tool property that helps to produce smoother strokes when sculpting or painting. It works by creating a small distance gap between the tool cursor and the resulting stroke that appears on the model. Any unsteady hand motion that occurs when creating long strokes is reduced, helping you draw predictable smooth strokes.
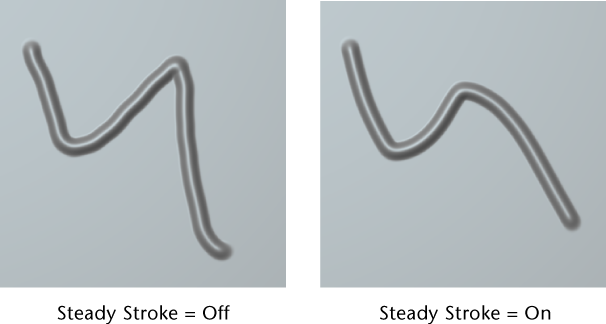
When Steady Stroke is on, you must move the cursor a small distance before the stroke (sculpt or paint) appears on the model. The thin vector line that appears indicates the distance the cursor must travel before the stroke is drawn. Once the arrowhead on the vector appears the stroke starts to draw. This trailing behavior between the cursor and the stroke filters out any shaky hand motion in the stroke.
Increasing or decreasing the Distance option for Steady Stroke changes the length of the arrow vector between the cursor and the drawing of the stroke, and the amount of filtering that occurs.


