


In the following procedure, you characterize the My_Pepe.FBX file you saved in the previous procedure (Export a 3ds Max character). The Pepe character is a 3ds Max biped, with only a mesh and materials.
To characterize your Character:
X-Ray mode lets you see through the character skin to the skeleton underneath.

3ds Max Biped Template asset applied to the Pepe Character skeleton
The 3ds Max Biped template is specially designed for bipeds created in 3ds Max as they have a different naming structure that the MotionBuilder Character does not recognize automatically.
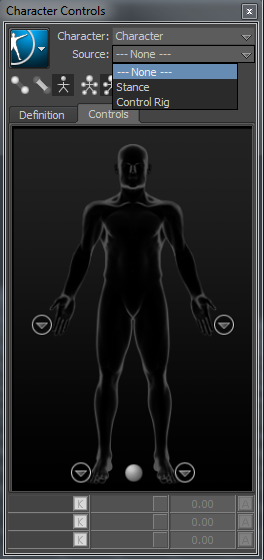
 From the Character Controls window > Source menu, select Control Rig.
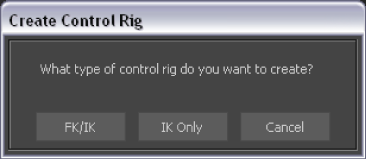
Click FK/IK
FK/IK is the method commonly used to animate characters.
This setting activates the Control rig and the Character representation. The Character representation is an image of a human form, meant to represent the character’s skeleton. It contains all the effectors you need to animate its Control rig. The biped is now rigged and ready to receive animation.
The Control Rig effectors appear on the biped as shown in the following figure.

 ) is selected in the Character Controls toolbar.
Activating Full Body mode lets you control the entire rig, not a body part.
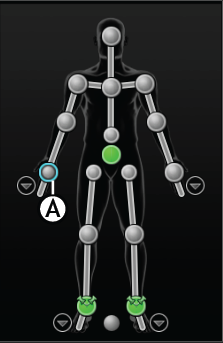
Right Wrist effector selected
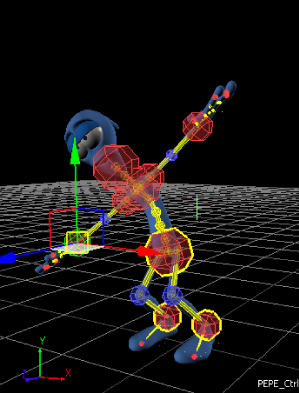
Notice as you move the hand, the arm extends and the rest of the body follows in a natural movement.
You can now animate your character with motion capture and key frame animation.
See Animating a 3ds Max Character in MotionBuilder.