


To retime key movements in an animation, you can create retime markers in the FCurves pane, then drag them to adjust the timing of key movements.
 .
.
This activates the Retime mode in the FCurves editor.
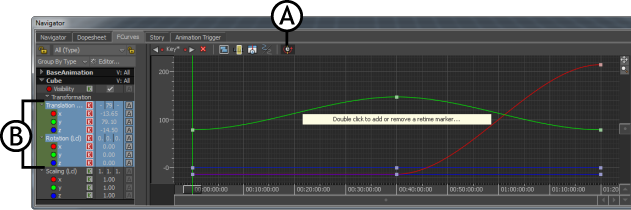
FCurves editor A. Retime Tool C. T and R channels selected
For example, in the following figure, two markers are added at frames 5 and 20 to retime animation between them.

Retime markers A. Solid line between markers B. Delete icon
When there are multiple retime markers, a solid line displays between each pair of markers. It indicates that dragging either marker affects any keys between the first marker and the next. Dragging two retime markers further apart slows the motion between them, and dragging them closer together speeds it up.
To delete a retime marker, click the Delete icon or double-click anywhere on the marker.
When you drag the marker, the timing of the animated object in the Timeline of Transport Controls window and in the scene loaded in the Viewer window is changed.
