レイアウトは、他の UI 要素を入れたり配置したりするための UI 要素で、ELF ウィンドウでのフォーマットの制御に使用される主要な手段です。特定の方法でコンテンツを配置するために、さまざまな専用レイアウトが用意されています。たとえば、列のレイアウトでは、一覧表のようにコンテンツが 1 列に縦方向へ配置されますが、行のレイアウトでは 1 列に横方向へ配置されます。他の配置スキームには、別のレイアウトがあります。レイアウトに別のレイアウトを入れて、さまざまなレイアウトを構築することができます。レイアウトを作成するコマンドはすべて、「Layout」で終わります(例:「gridLayout」)。
使用可能なレイアウトのリストについては、機能別コマンド リストの「UI: Layouts」セクションを参照してください。
「frameLayout」コマンド、「tabLayout」コマンド、および「menuBarLayout」コマンドにはその他の機能もありますが、これらは必ずしも、子の配置には関係しません。
フレーム レイアウトには展開(expand) /折り畳み(collapse)のオプションがあります。このレイアウトでは、タイトルの横に状態を切り換えるためのボタンがあります。折り畳んだ状態では、フレーム レイアウトのコンテンツは非表示になり、ほとんど画面スペースを使用しなくなります。レイアウトの展開と折り畳みを行う frameLayout コールバックは、可視インタフェース(クリックできる小さな矢印アイコンなど)を使用してレイアウトを折り畳んだり展開するときにのみ、コールされます。次のようなコードを使用しても、このコールバックはコールされません。
frameLayout -e -collapse true $theFrame;
このようなコールバックの振る舞いは、ウィンドウが最初に作成されるときに、無限ループに陥ることなくすべてが正しくセットアップされるようにする唯一の方法です。コールバックが必要で安全であるとわかっている場合は、折り畳みまたは展開を行うと同時に、直接コールバックをコールします。
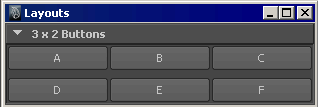
タブ レイアウトには、さまざまなレイアウトが含まれていますが、一度に 1 つしか表示できません。子レイアウトそれぞれには、タブのようなファイル フォルダがあり、これを選択するとレイアウトが可視になります。
さらに強力なレイアウトの 1 つが「formLayout」です。このレイアウトでは、子コントロールの絶対的および相対的な位置決めが可能です。たとえば、コントロールの位置を固定したままにしておいて、寸法がウィンドウのサイズによって相対的に変わるように指定できます。このコンセプトを最もわかりやすく表した例は次のとおりです。
window -widthHeight 300 200 TestWindow2;
 string $form = `formLayout -numberOfDivisions 100`;
 string $b1 = `button -label "A"`;
 string $b2 = `button -label "B"`;
 string $b3 = `button -label "C"`;
 string $b4 = `button -label "D"`;
 string $b5 = `button -label "E"`;
 formLayout -edit
 -attachForm $b1 "top" 5
 -attachForm $b1 "left" 5
 -attachControl $b1 "bottom" 5 $b2
 -attachPosition $b1 "right" 0 75
 -attachNone $b2 "top"
 -attachForm $b2 "left" 5
 -attachForm $b2 "bottom" 5
 -attachForm $b2 "right" 5
 -attachOppositeControl $b3 "top" 0 $b1
 -attachPosition $b3 "left" 5 75
 -attachNone $b3 "bottom"
 -attachForm $b3 "right" 5
 -attachControl $b4 "top" 0 $b3
 -attachOppositeControl $b4 "left" 0 $b3
 -attachNone $b4 "bottom"
 -attachOppositeControl $b4 "right" 0 $b3
 -attachControl $b5 "top" 0 $b4
 -attachOppositeControl $b5 "left" 0 $b4
 -attachNone $b5 "bottom"
 -attachOppositeControl $b5 "right" 0 $b4
 $form;
showWindow TestWindow2;
結果として表示されるウィンドウのボタン A は左上隅でウィンドウに固定され、下辺はボタン B にアタッチされ、右辺はボタンの幅がウィンドウの幅の 75% になるようにアタッチされています。このようにアタッチすることにより、ウィンドウのサイズが変更されると、それに合わせてボタン A が大きくなったり小さくなったりします。また、ボタン D とボタン E をアタッチすることにより、これらのボタンの左端と右端が、上にあるボタンにそろえられます。
多くの formLayout アタッチ フラグは、予期したとおりに動作します。ただし、AttachOppositeForm と attachOppositeControl については、さらに詳しく説明する必要があります。フォームに追加された子コントロールは位置は持ちませんが、順序はあるので、親に対する相対的な配置を持ちます。attachControl フラグでは、接続される 2 番目の子の、上端の「自然な」位置は、1 番目の子の下端になります。接続される 2 番目の子の、左端の「自然な」位置は 1 番目の子の右端になります。
したがって、2 番目の子は 1 番目の子の右下に、3 番目の子は 2 番目の子の右下に配置されます。
ここで、2 番目の子を 1 番目の子の隣にアタッチし、フォームのサイズが変更されても子 2 が子 1 の隣にいるように、相対参照にする必要があるとします。通常の attachControl は、子 2 の左側と子 1 の右端を接続し、attachControl child2 "left" 0 child1; では、子 2 の左端が、間隔のオフセット 0 ピクセルで、子 1 の左右方向で「ニアレスト」端にアタッチされます。従属的な順序では、子 2 は子 1 のすぐ右側にあるため、「ニアレスト」端は子 1 の右端になります。
しかし、attachControl の従属的な順序に従えば、子 2 の最上部を子 1 の最上部にそろえることはできません。このような場合に、attachOppositeControl を使用します。
attachOppositeControl child2 "top" 0 child1;
上記の例では、子 2 の最上部が、間隔のオフセット 0 ピクセルで、子 2 から最も遠い子 1 の端にアタッチされます。フォームでは、これらのオブジェクトは同じ上端の位置で隣り合わせに配置されます。
window TestWindow3;
string $form = `formLayout`;
string $b1 = `button -label "AAAAAAAAA"`;
string $b2 = `button -label "BBBBB"`;
string $b3 = `button -label "CCCC"`;
formLayout -edit
 -attachForm $b1 "top" 5
 -attachForm $b1 "left" 5
 -attachControl $b2 "top" 0 $b1
 -attachControl $b2 "left" 5 $b1
 -attachNone $b2 "right"
 -attachNone $b2 "bottom"
 -attachControl $b3 "top" 0 $b2
 -attachControl $b3 "left" 0 $b2
 -attachNone $b3 "right"
 -attachNone $b3 "bottom"
 $form;
showWindow TestWindow3;
次に、2 番目のボタンの位置に対する attachOppositeControl フラグのアクションを見てみましょう。1 番目のボタンをフォームの最上部にアタッチする場合、attachOppositeControl を次のように使用するのは、attachForm $b2 "top" を使用するのと同じです。ボタン 1 が移動の可能なコントロールに関連してアタッチされると、ここで attachOppositeControl を使用することが不可欠になります。
window TestWindow4;
string $form = `formLayout`;
string $b1 = `button -label "AAAAAAAAA"`;
string $b2 = `button -label "BBBBB"`;
string $b3 = `button -label "CCCC"`;
formLayout -edit
 -attachForm $b1 "top" 5
 -attachForm $b1 "left" 5
 -attachOppositeControl $b2 "top" 0 $b1
 -attachControl $b2 "left" 5 $b1
 -attachNone $b2 "right"
 -attachNone $b2 "bottom"
 -attachControl $b3 "top" 0 $b2
 -attachControl $b3 "left" 5 $b2
 -attachNone $b3 "right"
 -attachNone $b3 "bottom"
 $form;
showWindow TestWindow4;
ここで、逆の方向に attachOppositeControl を使用して、3 番目のボタンが 2 番目のボタンの真下にくるようにしてみましょう。
window TestWindow5;
string $form = `formLayout`;
string $b1 = `button -label "AAAAAAAAA"`;
string $b2 = `button -label "BBBBB"`;
string $b3 = `button -label "CCCC"`;
formLayout -edit
 -attachForm $b1 "top" 5
 -attachForm $b1 "left" 5
 -attachOppositeControl $b2 "top" 0 $b1
 -attachControl $b2 "left" 5 $b1
 -attachNone $b2 "right"
 -attachNone $b2 "bottom"
 -attachControl $b3 "top" 0 $b2
 -attachOppositeControl $b3 "left" 0 $b2
 -attachNone $b3 "right"
 -attachNone $b3 "bottom"
 $form;
showWindow TestWindow5;
さらに、3 番目のボタンを 1 番目のボタンの下に揃えて、2 番目の左端まで届くようにするには、次のようにします。
window TestWindow6;
string $form = `formLayout`;
string $b1 = `button -label "AAAAAAAAA"`;
string $b2 = `button -label "BBBBB"`;
string $b3 = `button -label "CCCC"`;
formLayout -edit
 -attachForm $b1 "top" 5
 -attachForm $b1 "left" 5
 -attachOppositeControl $b2 "top" 0 $b1
 -attachControl $b2 "left" 5 $b1
 -attachNone $b2 "right"
 -attachNone $b2 "bottom"
 -attachControl $b3 "top" 0 $b2
 -attachForm $b3 "left" 5
 -attachControl $b3 "right" 0 $b2
 -attachNone $b3 "bottom"
 $form;
showWindow TestWindow6;
"attachForm $b3 "left" 5" により、ボタン 3 がボタン 2 の左端に配置されたため、"-attachControl $b3 "right" 0 $b2" にニアレストな端がボタン 2 の左端になっています。最後に、ボタン 1 の左端からボタン 2 の右端まで届く 3 番目のボタンを作成します。
window TestWindow7;
string $form = `formLayout`;
string $b1 = `button -label "AAAAAAAAA"`;
string $b2 = `button -label "BBBBB"`;
string $b3 = `button -label "CCCC"`;
formLayout -edit
 -attachForm $b1 "top" 5
 -attachForm $b1 "left" 5
 -attachOppositeControl $b2 "top" 0 $b1
 -attachControl $b2 "left" 5 $b1
 -attachNone $b2 "right"
 -attachNone $b2 "bottom"
 -attachControl $b3 "top" 0 $b2
 -attachOppositeControl $b3 "left" 0 $b1
 -attachOppositeControl $b3 "right" 0 $b2
 -attachNone $b3 "bottom"
 $form;
showWindow TestWindow7;


