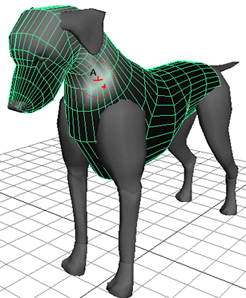
You can paint skin point weights with the Paint Skin Weights Tool. The Paint Skin Weights Tool provides an intuitive way to change the deformation effects of smooth skinning. If you want to set individual skin point weights to specific values, you can use the Component Editor (see Editing skin point weights).
 -click a joint, then press the up and down arrow keys on the keyboard to navigate your character's joint hierarchy.
While you are painting skin point weights, you can reset the weights to their initial values at any time (see Reset skin point weights to default weights).
To explore an example that includes painting skin point weights, see Skinning a cylinder by smooth skinning.
Note that painting smooth skin point weights uses a different painting tool than the tool for painting rigid skin point weights.
You can create a mask on the skin that is unaffected by any weight painting you do. When you apply brush strokes over the mask, the vertices on the masked area retain their weight, regardless of the paint weights operation.
Before creating the mask you must first create the skin. For details on masking surfaces, see Restrict an area for painting.
You can also use Paint Select mode in the Paint Skin Weights Tool to effectively mask parts of a mesh when you paint weights. See Create a mask for painting weights.
You can copy smooth skin weights from one smooth skin object to another, or from one group of smooth skin objects to another. You can also copy skin weights on selected components of the skin, or from a single vertex.
Copying smooth skin weights can save a lot of time if your project involves setting up several similar characters, for example a team of players for a football game. Rather than skinning all of your characters and painting weights for their deformation effects individually, you can focus your painting efforts on one character, then copy those weights to the other players. Using this technique to set up initial weights for several characters gives you more time to fine-tune the weights and deformations that make each character unique.
For best results, the skeleton on the character you are copying from and the skeleton you are copying to should have the same structure. If the skeletons are similar, Maya will still try to copy the weights. However, if the skeletons are radically different in scale or proportion, consider doing the following before you copy:
In addition, the skeletons on each character should be in the same pose during copying. If the orientation of the joints are not similar, the copying can lack some precision, which means you may have to do some touch up painting to the results.
If the skin objects have different numbers of CVs, or if the ordering of the CVs is different, the copying will intelligently take into account the differences and provide the same type of weighting. This is very useful if you want to apply the smooth skin weighting from a high-res character to a low-res version of the character.
While you can copy skin weights between skin objects of different types, the options work best when the source object is a polygon mesh: for example, copy skin weights from a polygon mesh to a NURBS surface or a subdivision surface.
You can mirror smooth skin weights, either from one smooth skin object to another, or within the same smooth skin object. You can also mirror skin weights on selected components of the skin.
Mirroring smooth skin weights greatly speeds up the process of editing and fine-tuning skin deformation effects. For example, you can perfect the smooth skin weighting for a character’s right shoulder area, then simply mirror the weighting to the character’s left shoulder.
Maya mirrors weights across planes defined by Maya’s global workspace axis. For mirroring to work properly, the skinned object (or character) should be centered on the global axis, or at least aligned along the axes you want to mirror about. Also, the skinned object (including its skeleton) should be in a pose that is symmetrical across the mirror-plane.
Reflection is disabled for the Paint Skin Weights Tool. You can use Skin > Edit Smooth Skin > Mirror Skin Weights as an alternative method to reflect skin weights.
 Except where otherwise noted, this work is licensed under a Creative Commons Attribution-NonCommercial-ShareAlike 3.0 Unported License