Once you have applied a non-linear deformer to an object, you can paint weights to adjust the effect of the deformer.
To paint a nonlinear weights map
 .
.
For example, for a squash deformer, select squash1.weights > nonLinear > squash1-weights.
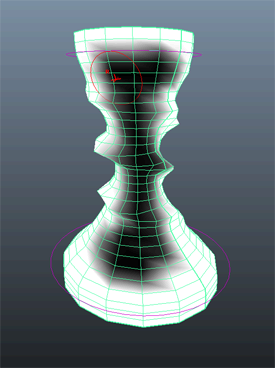
By default, the object surface is flooded with weight values of 1 (white), so the nonlinear deformer applies fully to the entire object. You can lessen or remove the deformer effect on specific areas of the object by painting lower or 0 (black) weight values.
 Except where otherwise noted, this work is licensed under a Creative Commons Attribution-NonCommercial-ShareAlike 3.0 Unported License


