If you make a particle object collide with an object, you can write an expression to trigger expression statements after the collision. For example, you can change the color or opacity of the colliding particles.
To prepare for writing the expression:
This adds an event attribute to the selected particle shape node. The Expression Editor displays the added event attribute in the Attributes list.
The eventCount and eventTest are static attributes. A particle shape node has them as soon as you create the particle object. Though they don’t appear in the Expression Editor, you can use their values in an expression. You must first create the event attribute as described previously.
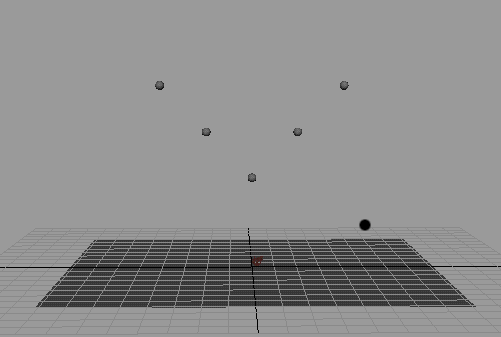
Suppose you’ve created a five-particle object named Peas that falls with gravity and collides with a plane.
You can make the particles turn red when the first particle hits the plane.
This step is necessary to make the correct particle color appear when you later use an expression to color particles.
This adds a per particle attribute named rgbPP. This attribute controls the red, green, and blue color scheme of each particle.
The particles turn black after you add the rgbPP attribute. Adding the rgbPP attribute turns off the default coloring of the particles and gives them a value of <<0,0,0>>.
if (event == 1)
	rgbPP = <<1,0,0>>;
else if (event == 2)
	rgbPP = <<0,1,0>>;
else if (event >= 3)
	rgbPP = <<0,0,1>>;
else rgbPP = <<1,1,1>>;
Upon rewind, the particles are black. The particles have the default black rgbPP color because no creation expression exists for the object.
The particles fall toward the plane. The runtime expression executes as each frame plays. The event attribute is a per particle attribute. This isn’t obvious because its name doesn’t have PP as the last two characters.
Because event holds a running count of collisions for each particle, event contains 0 for each particle until the first collision with the plane. Until the first collision occurs, the final else statement executes:
else rgbPP = <<1,1,1>>;
This statement executes because event doesn’t equal 1, 2, 3, or a number greater than 3. The vector <<1,1,1>> in the RGB color scheme represents the color white.
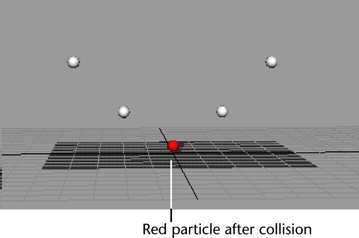
When the first particle of PeasShape hits the plane, Maya sets the event attribute for that particle to 1. This triggers execution of the first assignment, which sets the colliding particle’s rgbPP value to <<1,0,0>>. In the RGB color scheme, this vector value represents red. (When red equals 1, green equals 0, and blue equals 0, the resulting color is red.)
The value of the event attribute reflects the collision count in the frame after each collision. For example, if a particle collides with the plane in frame 10, event is updated in frame 11.
When the other particles hit the plane for the first time, they also turn red after they collide.
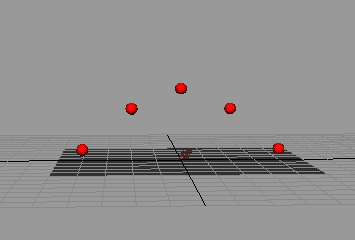
A particle stays red until it collides with the plane for the second time, when event equals 2. After a second collision, the particle turns green.
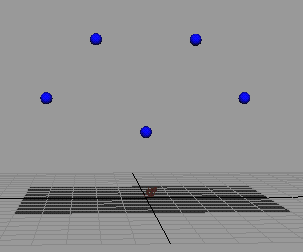
After a third collision, when event is equal to or greater than 3, a particle turns blue. Each particle stays blue for all subsequent collisions as the animation plays.
The particles turn black again because they receive the default rgbPP value <<0,0,0>>. When you play the animation again, the particles turn white, red, green, and blue in the same sequence as before.
You can refine the animation by giving the particles a color other than black for the frame that appears upon rewinding. For example, you can give the particles a white color upon rewinding with two techniques:
rgbPP = <<1,1,1>>;
This statement executes for each particle in the object, so they all receive the same white color when you rewind the scene.
This saves all PeasShape attribute values from the current frame for the initial state of the attributes. The current value for rgbPP will be used when you rewind the animation. Because you played the second frame of the animation, this saves the white color of the particles at that frame for use upon rewinding the animation.
Set for Selected saves all attribute values, including position, velocity, acceleration, and so on. In cases where you have several changing attribute values during playback, Set for Selected might save undesired attribute values in addition to the desired ones. In such cases, use a creation expression.


