


You can use the Substance node to quickly create photorealistic procedural textures using a library of organic, fabric, and material presets.
In addition, you can use substances as noise or smart filters. Each one can be customized to generate infinite variations.
Two 2D noise textures are available: Clouds_2_Animated and Plasma_Animated. These textures can be used in a wide range of applications such as blending masks between textures or materials, or as dynamic property maps for dynamics like fluid effects or nCloth.
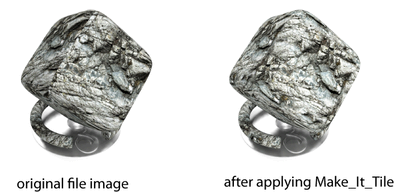
Three filter substances are available: Windscreen_Glass_01, Water_Drips and Make_It_Tile. A filter lets you plug an input image (file node) in to the substance node; for example the Make_It_Tile substance lets users create a seamless tiling material from a simple image or photograph.
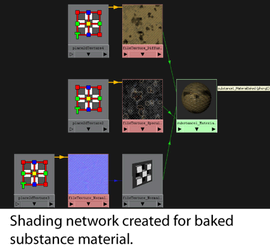
Creating a shading network using substance textures

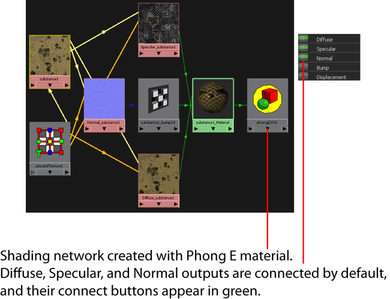
This creates a shading network with a Phong E material that, by default, connects the Diffuse, Specular, and Normal substance outputs.
You can now apply this Phong E material to the objects in your scene.
Procedural controls are built into each substance so you can easily create unique effects. Experiment with these sliders and view the changes in real time in the Maya scene view.
Tweak attributes such as Hue Shift to shift the global color range of the texture, Luminosity to control the brightness level, Saturation to control the level of color purity, or Depth to adjust the attenuation of depth of the texture.
 icon beside the list of available substance outputs.
If the input of the material attribute is already occupied by another substance output, for example Normal, a warning message appears, and the output is created but not connected. The substance output connect icon appears orange. You can then delete the connected output and re-attach a new output.
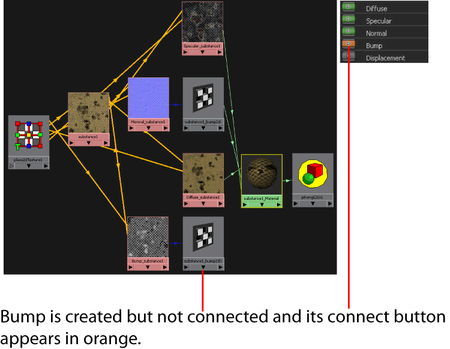
A grey connect icon (initial state) denotes that no Substance Output node has been created for this output map. An orange connect icon denotes that an output node is created but not connected to another node. A green connect icon denotes that the Substance Output node has been created and is connected to another node.
You can now use the shading network in the Maya default and high quality viewport or Viewport 2.0, and render it using the Maya hardware renderer or software renderer.
If you want to export the shading network to a game engine, you must export the images to disk. To render with mental ray for Maya, you can also export images to disk, or bake textures to disk using the workflow below.
To render using mental ray for Maya, IPR or other 3rd party renderers
You can automatically bake a texture to disk to render it with mental ray for Maya, IPR or other 3rd party renderers. Use the Automatic Baking options in the substance Attribute Editor as follows:
You can now render using mental ray for Maya.
Tiling your file texture using the Make_It_Tile substance
For example, increase the Absolute width to 2048 for better resolution. Tweak Random Seed and Mask Warping to warp the edges of the texture. Tweak Mask Size to change the blending of the edges and Mask Blurring to adjust the softness of the edges.
Using this feature, all Substance Output nodes connected to the Substance node (including both outputs denoted by green and orange icons) are baked onto disk.
mental ray for Maya does not support LZW compressed .tif files. To work around this, add IMF_TIFF_COMPRESSION=none to your Maya.env file. For more information on how to set environment variables using Maya.env, see Setting environment variables using Maya.env.
 to indicate that these output nodes exist and are connected to the material shader.
