The Retime Tool lets you directly adjust the timing of key movements in an animation sequence. To retime segments of animation, you create retime markers in the graph view area, then drag them to adjust the timing. You can lock the span between markers to move entire segments of animation in time, or leave markers unlocked to scale the region of animation within the span.
To retime curves for a whole character at once, for example, select the character hierarchy.
 in the toolbar or select Edit > Transformation Tools > Retime Tool.
For example, to adjust animation between frames 5 and 10, double-click at frame 5 to add one marker, then double-click at frame 10 to add another.

A retime marker is added each time you double-click.
The retime markers persist in the graph view as long as you keep the same object(s) selected. You can change tools in the Graph Editor, then switch back to the Retime Tool and continue to adjust the markers.
 at the bottom of the marker.
To clear all retime markers from the graph view
Manipulating markers and retiming animation
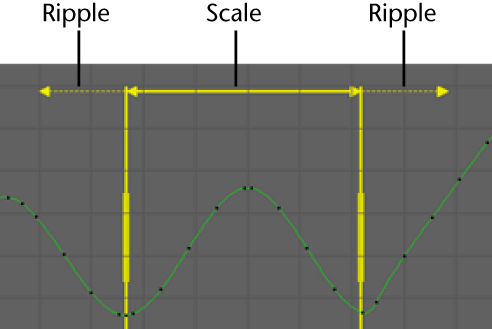
When you have multiple retime markers in the graph view, a solid line spans each pair. The solid span indicates that dragging either marker will scale keys between this marker and the next. A dotted line displays above any animation that will be rippled outward in time as you adjust the markers.
 ) and turn off Snap Markers on Frame.
 +
+  or
or  .
.
To move retime markers and adjust the timing of animation
As you drag a retime marker in the graph view, points on any curve under the marker are also dragged in time.
If the span between markers is unlocked, the curves in the graph view squash and stretch (scale) as you drag the markers to adjust the timing of keys.
If the span is locked, dragging the markers moves the segment in time (without scaling or adjusting the shape of the curves within).
Curves in the graph view area update as you drag markers. You can also view the adjusted timing of the animated object in the scene view.
To lock the animation in a time span
When you lock a time span, you can drag the retime markers to move curve segments in that span without scaling them, shifting the entire sequence to a new point in time. Locked segments also help you retime specific sections of your animation while preserving other segments that you don't want to change.
 -click the span between the markers, then turn on the Lock option that appears.
A lock icon displays on the span to indicate that curves within this segment will not be adjusted as you drag the retime markers. A dotted line displays outside the span to indicate animation that will be rippled outward in time as you move the locked span.

To insert keys in place of a retime marker
If you want to anchor the retiming changes, you can insert keys in place of a retime marker.
-click the marker and select Insert Key from the menu that appears.
Maya inserts a key on all selected channels currently displaying under the retime marker. If no curves are selected, a key is inserted at this frame for all curves currently displayed in the graph view.
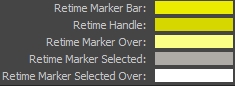
To change the color of Retime Tool markers