Show in Contents

Add to Favorites

Home: Autodesk 3ds Max CAT Help

Tips and Tricks

Tips and Tricks

Mapping Motion from Motion-Capture Point Clouds

Customizing IK Using Constraints
3ds Max CAT's
IK is customizable to the extent that you can use all regular 3ds Max constraints, and
even write scripts to control a limb. Following are descriptions
of two leg setups that you might find useful: Knee LookAt and Orientation Constrained.
LookAt Knee
An effective method when
applying IK to legs is to have the knee look at a target. With 3ds Max CAT you
can accomplish this by using an extra bone as the target object.
To set up a LookAt Knee:
- Make sure there are no animation layers
in the Layer Manager and return to Setup mode.
- Select the thigh bone (upper leg).
- Go to the Modify panel.
- On the Bone Setup rollout, click Add
Bone to create an extra bone.
The extra bone is created
at the end of the bone on which it is created.
ImportantCreate the extra
bone on the limb with which it will be associated, because even
after an extra bone is relinked to the pelvis, it is still part
of the limb group and thus will use the limb weight as its local
weight. This is useful when working with feathered weighting.
- Move the bone out in front of the knee.
TipSelect the bone in
a wireframe viewport.
- Link the extra bone as a child of the
pelvis.
The knee LookAt should
control the leg; if it remains linked to the leg it will follow
the leg, not the other way around.
- Select the thigh bone again.
- Go to the Motion panel, add an Absolute
layer, and then add a relative layer (Adjustment Local or Adjustment
World).
- Put the rig into Animation mode.
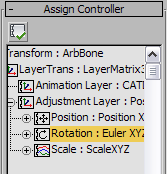
- Access the Assign Controller rollout
and highlight the Rotation track of the current animation layer.
-
 Click Assign Controller
and assign a LookAt contraint.
Click Assign Controller
and assign a LookAt contraint.
- Go to the LookAt Constraint rollout.
- On the LookAt Constraint rollout click
Add LookAt Target and choose the extra bone. Right-click to exit.
- Put the thigh into FK. (Limb Animation
rollout > IK/FK=1.0)
This is useful because
you can get a much better idea of what is going on.
- On the LookAt Constraint rollout, turn
off Select Upnode > World and assign the FootPlatform as the
Upnode.
- Set Upnode Control to LookAt and pick
the footplatform as the target.
- Set the Source Axis to Y and choose Flip.
- Put the limb back into IK.
Orientation Constrained
When you want a leg to
inherit motion from both its parent (the pelvis) and the FootPlatform,
use an orientation-constrained setup.
To set up an orientation-constrained
leg:
- Select the upper leg bone.
- Go to the Animation panel, add an Absolute
layer and activate Animation mode.
- Put the limb into FK.
- Go to the Assign Controller rollout and
highlight the Rotation track in the current animation layer.
- Click Assign Controller and assign an
Orientation constraint.
- On the Orientation Constraint rollout
click Add Orientation Constraint and select the FootPlatform.
- Turn on Keep Initial Offset.
- The Leg should now be standing on the
FootPlatform normally.
- Blend the leg back into IK.
Now when you rotate theFootPlatform
the whole leg will rotate with it.
To blend the leg rotation between the
FootPlatform and the pelvis:
- Apply an Orientation constraint and assign
the FootPlatform as orientation target, as described in the preceding
procedure.
- Add a second Orientation constraint,
this time assigning the pelvis as orientation target.
- Adjust the constraint Weight settings
between the two targets as required.
Saving Constraint Settings
To save your IK constraint
settings, set up the configuration in a layer and then save the
layer as a clip file with no keyframes on it. When you want to add
a new Absolute layer with the same configuration simply load in the
layer.
NoteNote: Using these
constraint systems makes it impossible to blend to FK on the same
layer. To blend to FK, blend to another animation layer in which
the limb doesn't have this system added.