Chapter 5, Getting Familiar with Your Workspace
| Pick List, Tools, and Views Tabs | Tool Presets | ||
Chapter 5, Getting Familiar with Your Workspace |
|||
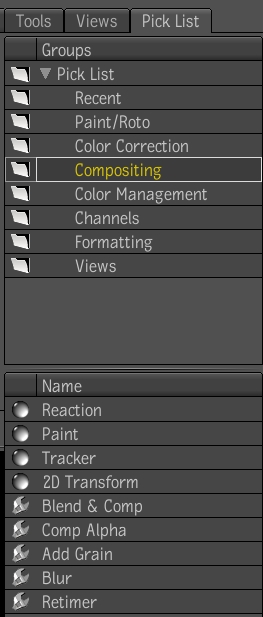
The Pick List is a convenient way to access frequently used tools and other elements. You can add tools, views, and compositions to the Pick List. For example, if you add a Schematic view to the Pick List, then drag and drop it into a view, a Schematic view opens in that view. This is the same behavior that occurs when you drag the Schematic view from the Views tab into a view.
Each user has a Pick List. Its contents are independent of any project and are persistent across sessions.
The Pick List exists as a tab in two locations: the tool UI and through the east gate of the Gate UI.

 "Show full-size image")
| Pick List tab in the tool UI |
 "Show full-size image")
| Pick List tab accessed through the east gate |

You can add and remove items in your Pick List, create a new Pick List group, delete Pick List groups you no longer use, and reorder Pick List groups. You can color code Pick List groups for easier recognition, as well as rename them. You can also set a Pick List as a default, reset a layout to that default, and restore the Pick List to the factory default group layout.
Do one of the following:
Drag the item to the Pick List tab and drop it into a group.
Right-click the item and select Add to Pick List. The Pick List group which is currently highlighted in the Pick List tab will be the destination Pick List group.
Use Ctrl + drag to copy and paste an item from one Pick List group to another.
Do one of the following:
Drag an item from the Pick List to the dependency graph or into a view. If you add an item from the Pick List into a Player view, the drop gate appears. Add the item as per the selections in the drop gate. If you drag an item from the Pick List to a Schematic view, then connect it to the dependency graph as if you were dragging the item from the Tools or Views tab.
Right-click in the view (Schematic, Player, Composition Browser, or Layer Editor) and select Add from Pick List.
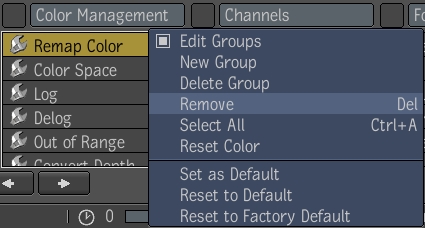
Right-click and select the Edit Groups checkbox.
In the Pick List, right-click the item you want to remove and select Remove or press the Delete key.
 "Show full-size image")
Note: You cannot undo the removal of an item from the Pick List. You can, of course, add that item to the Pick List again at any time.
Do one of the following:
Right-click anywhere in the Pick List tab and select New Group.
Drag an item to the Pick List tab and drop it into the tab's background.
A new Pick List group is added at the end when dropping on the background. Right-clicking and adding will add it after currently selected group. This will allow new groups to be placed in-between existing groups.
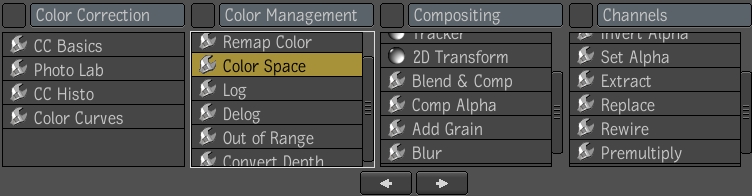
Right-click and select Edit Groups.
Click anywhere in a group's window.
Use the right and left arrow buttons.
 "Show full-size image")
Right-click inside a Pick List group and select Delete Group.
The Pick List group is deleted.
Right-click and select Edit Groups.
Select the name of the Pick List group in the Name field at the top of the Pick List.
Select the current group name, type in a new name and press Enter.
Right-click and select Edit Groups.
Click the color pot next to the Pick List group name field.
The color picker appears.
 "Show full-size image")
Select a color from the Color Picker and press OK--see Color Picker.
The Pick List group assumes the selected color.
Right-click inside the group and select Set as Default.
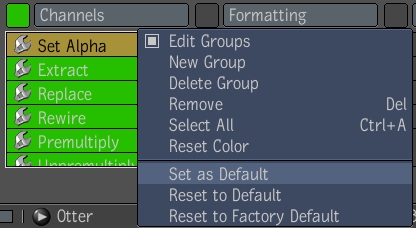
 "Show full-size image")
Right-click inside the group and select Reset to Default.
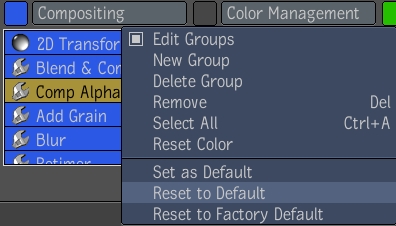
 "Show full-size image")
Right-click inside the group and select Reset to Factory Default.
All Pick List groups are reset to their factory default states.
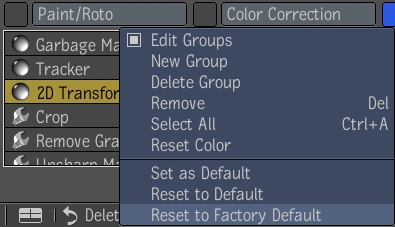
 "Show full-size image")