Chapter 6, Browsing for Footage
| Working with EDL, ALE, and Cutlist Files | |||
Chapter 6, Browsing for Footage |
|||
 Loading CDL Data in the EDL Panel
The American Society of Cinematographers Colour Decision List (ASC CDL) colour correction specification defines a common language format for primary colour correction. It is becoming a standard defined by the ASC and has been adopted by most major manufacturers.
CDL is expressed by nine numbers (three RGB triplets) representing predefined colour functions: offset, slope, and power. The format of CDL is standardized so results in one colour corrector can be duplicated in another corrector, so long as they both support the ASC CDL format. Currently, ASC CDL only supports primary colour correction, with the exception of chrominance (saturation change).

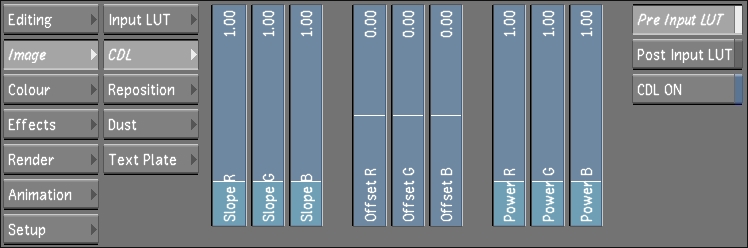
The CDL menu allows you to:
Change the three basic transfer functions (slope, offset, and power).
Select whether you would like the transfer functions to be applied before, or after, an Input LUT is applied.
Enable or disable the transfer functions you have set.
In the main menu, click Image.
Click CDL.
The CDL menu is displayed.
 "Show full-size image")
Note: The CDL panel is not accessible from the ACS or the CP-100.
When you change the slope transfer function, it allows you to change the lift and gain of the image without shifting the black level that is established by the offset. The following is a graph displaying how the slope value affects your image.
The following are the values to set the slope:
Default value is 1.00 (i.e., no value).
Minimum value is 0.00.
Maximum value is 5.00.
The offset transfer function either raises or lowers the overall brightness of the component, while keeping the slope constant.
The following are the values to set the offset:
Default value is 0.00 (i.e., no value).
Minimum value is -5.00.
Maximum value is 5.00.
The power transfer function changes the intermediate shape and is the only non-linear function.
The following are the values to set the power:
Default value is 1.00 (i.e., no value).
Minimum value is 0.00.
Maximum value is 5.00.
You can decide to apply the CDL data either before (Pre) or after (Post) applying an Input LUT.
Note: Applying CDL data after applying an Input LUT will work only if the Input LUT is enabled within the Input LUT module.
The CDL On/Off toggle allows you to either enable or disable CDL data. Since the Bypass All function does not bypass both the Input LUT and CDL, you would use the CDL On/Off button to 'mute' the effect of the CDL.
The Selector contains the following CDL parameters:
Slope (RGB sliders)
Offset (RGB sliders)
Power (RGB sliders)
Pre/Post Input LUT
CDL On/Off
 "Show full-size image")
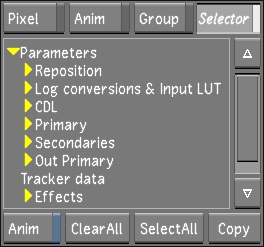
You can use the Selector to:
select the CDL section you want to copy/paste from shot to shot
selectively load CDL data saved in the individual grades that are saved in the Grade bin
Lustre allows you to copy CDL parameters with the Selector in the same way as they would copy grading parameters. The parameters the Selector can copy are as follows:
Colour grading parameters
Input LUT selections
CDL parameters
Repositioning values
Tracker data
Effects
Render flag settings
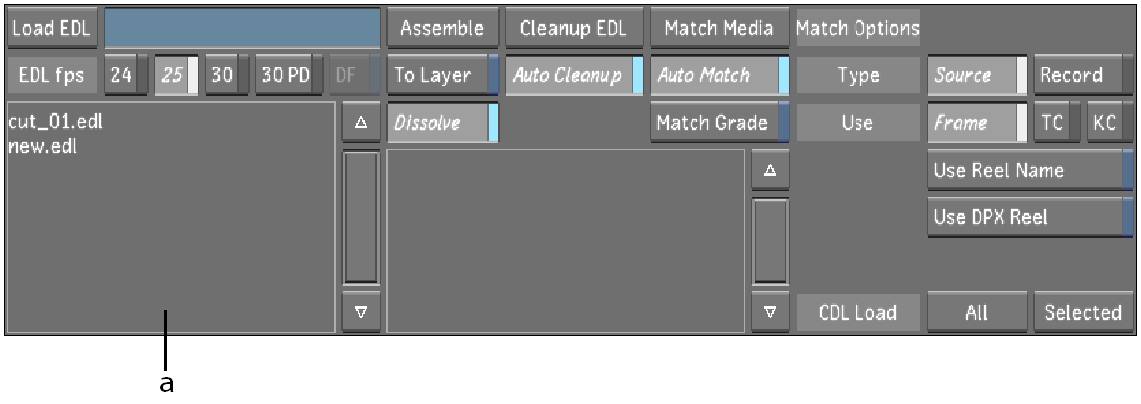
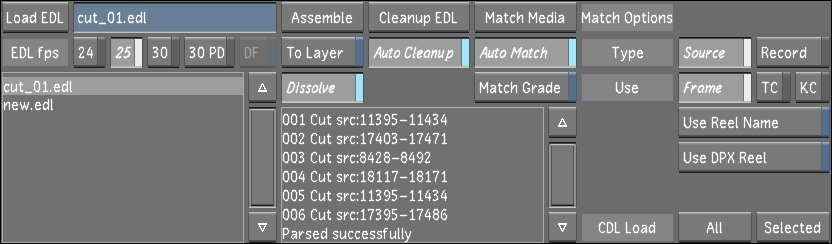
The EDL panel contains a new interface to support loading CDL data.
When you load an EDL into Lustre, the CDL data is not converted at that time. You can conform and assemble the EDL as you normally would do. However, if you want to use the CDL data part of the currently loaded EDL, you need to use the CDL Load options to apply the CDL data to the currently opened cut file.
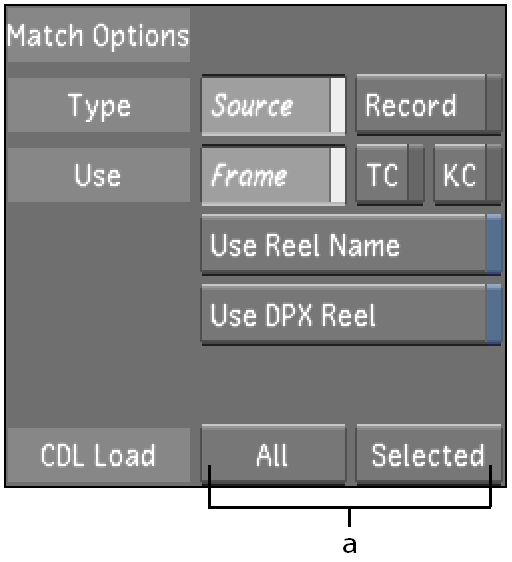
When you are ready to use CDL data, you can select one of two actions listed in the CDL Load list:
All: Clicking All reads all CDL data from all the EDL events in the EDL Editor and applies the converted data to the events on the timeline by matching the record timecode (REC TC) value.
Selected: Based on the selected events in the EDL Editor, the Selected action reads the CDL data of the selected events, then converts and applies each one of them to the events on the timeline by matching the REC TC value.
 "Show full-size image")
|
Note: Loading CDL data does not erase the current grade applied to the shots. Loading CDL data only loads the data into the CDL panel. If the CDL data is already loaded, it will be overwritten with the newly loaded CDL data.It is possible to use a different EDL to conform and a different EDL to import CDL data.
The following procedure assembles an EDL with CDL data.
Drag the shots that you want to assemble into the Shot bin.
Click Editing, and then click Assemble.
The Assemble menu appears.
 "Show full-size image")
|
Select the EDL that contains the CDL data that you want to load from the EDL list.
Click Load EDL.
The selected EDL loads.
 "Show full-size image")
Note: For more information on assembling an EDL, see Assembling an EDL.
Click Match Media to match the EDL event timecodes to the available shot timecodes in the Shot bin prior to assembling.
Click Assemble to conform the EDL and build the cut.
The EDL events in the Assembly window are cleared.
Select the same EDL and click Load EDL.
Click CDL Load All or CDL Load Selected. See CDL Load Options.
The CDL data is now part of the current cut.
CDL data for a given shot is represented as a comment in the EDL file.

 "Show full-size image")
There is one CDL comment line per event. See Adding CDL Data to an EDL File.
CDL data for a given shot is represented as a reference in the EDL file to an XML file.

 "Show full-size image")
Note: The ASC CDL specification allows more than one colour correction data set per XML file. Lustre only supports a single colour correction data set per CDL and XML file. See ACS CDL specifications for more detail.
See Adding CDL Data to an EDL File.
To be able to use XML files, place them in an import sub-folder located in the project's sacc_data folder:
<my project>/<scene 1>/<sacc_data>/<import>