A normal map is a type
of transfer map, meaning that it is a texture created from a polygon
object. Different transfer maps handle the conversion from polygons
to textures in different ways. A normal map captures the surface normal
information of the source mesh and uses it to light the target mesh.
To set a base material for the target
mesh
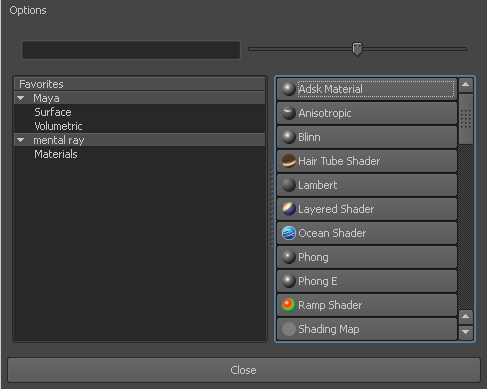
- Right-click the mesh and select Assign
New Material from the pop-up menu.
The Assign
New Material window appears.
- In the list of materials, select Blinn.
Maya applies a default
blinn shader to the low resolution mesh.
- Close the Attribute Editor.
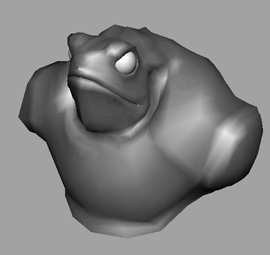
To show the high resolution mesh
- Open the Outliner (
Window
> Outliner).
- In the Outliner,
select hi_res_toad.
- Select Display > Show >
Show Selection.
Both meshes appear in
the scene overlapping each other.
- Deselect the high resolution mesh.
To create a normal map
- Select Lighting/Shading >
Transfer Maps.
The Transfer
Maps window appears.
The Transfer
Maps window lets you create various textures based on
mappings from polygon models. First you need to assign the source
and target meshes for the transfer.
- In the Outliner,
select lo_res_toad.
- In the Transfer Maps window,
in the Target Meshes section, click Add Selected.
- In the Outliner,
select hi_res_toad.
- In the Transfer Maps window,
in the Source Meshes section, click Add Selected.
Next you need to set
the Search Envelope.
The Search
Envelope represents the volume of the target geometry
to consider for the texture. Whatever part of the source mesh between
the Search Envelope and the target
mesh is mapped to a texture.
Generally you want the Search
Envelope to encompass your entire source mesh so you
don’t miss any detail.
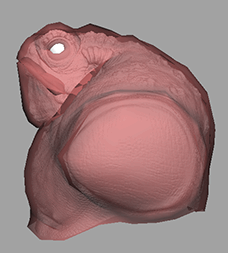
To set the Search Envelope
- In the Transfer Maps window,
in the Target Meshes section, set Display to Envelope.
The low resolution toad
is replaced by a translucent red mesh.
This red mesh represents
the Search Envelope.
- Drag the slider under Search
envelope (%) to the right.
The red mesh grows.
- Drag the slider so that the red mesh
barely encompasses all of the high resolution mesh without leaving
any white spots (excluding the eyes). You can also enter a value
in the box next to the slider. In this case, a value of 4.3 yields
just enough coverage around the two meshes.
- Set Display back
to Mesh.
Now you can set the normal
map options.
To set the normal map options
- In the Transfer Maps window,
under Output Maps, click Normal.
- In the Normal Map text
field, click the browse icon (
 ).
).
A file browser appears.
- Navigate to Getting
Started/UVMapping and enter the name toad_texture.
- Click Save.
- Set File Format to
DDS (dds).
- In the Transfer Maps window,
set the following:
- Under Connect Output Maps,
set Connect maps to to Assigned
shader.
- Under Maya Common Output,
set Map width and Map
height to 1024 and Sampling quality to Medium
(4x4).
- Click Bake and Close.
Maya generates a normal
map.
NoteIt may take a few
minutes for Maya to generate the normal map.